

Carbonite Post-Restore Checklist

Summary:
This checklist will assist you with performing post-restore functions to get your data where it needs to be and resume your backup.
- This article is for Windows - View the Mac article
Solution:
The sections below are collapsed. Please click a section title to open / close the appropriate section.
Step 1: Determine if Your Restore is Complete
The Restore Manager indicates the progress of the restore. When your restore finishes, you will receive a pop-up indicating the number of files restored. You will also be able to view a report of your restore progress.
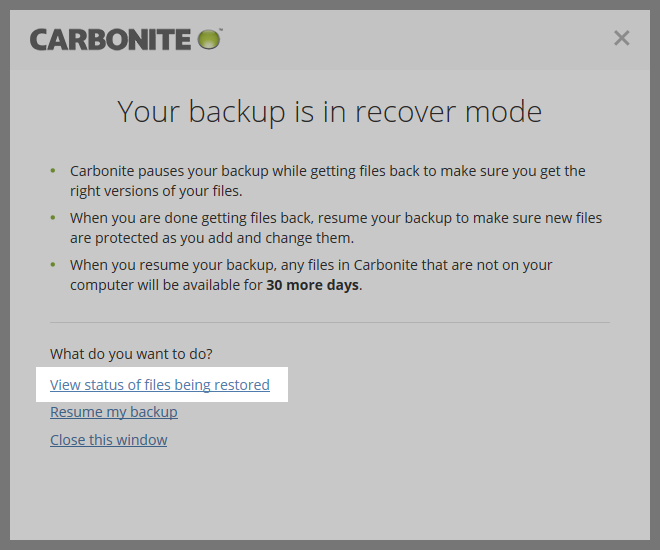
Double-click the Carbonite icon in your Windows notification area to open the Carbonite application.

You will see the Carbonite application displayed, indicating that your backup is in Recover mode. Click the View status of files being restored link to open the Restore Manager. You will see the status of your restore in progress. (Note: If this option is not available, it is possible that your restore is already complete. If this is the case, please proceed to Step 2).
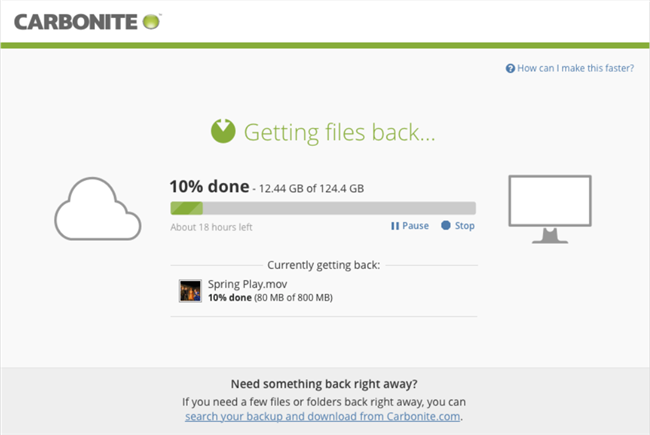
This window shows you the percentage of your selected files that have restored, which file is currently being restored, how many files have been restored, and the progress of the file it is currently restoring.
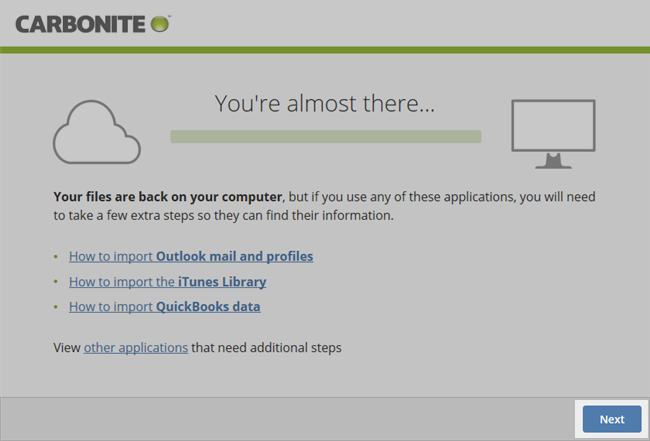
Once all your files are back on your computer, information will be displayed regarding any additional steps that might be needed in order to view restored data for certain applications. You can click on any of the provided links to view specific instructions for importing data into these applications. Click Next to proceed.
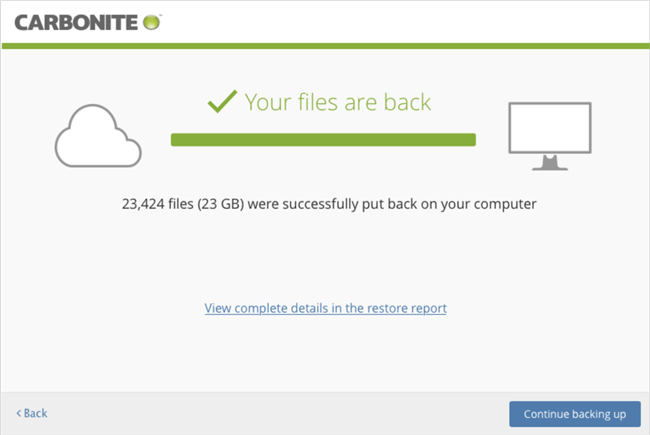
Details of the completed restore will be displayed within the Restore Manager window. A printable list of restored files and instructions for importing files for certain programs can be accessed in the Restore Report by clicking the View complete details in the restore report link.
Step 2: Locate Your Restored Files
You can use the Carbonite Restore Report to locate your restored files. The restore report lists the original location and the restore location of each restored file.
How To Use The Restore Report
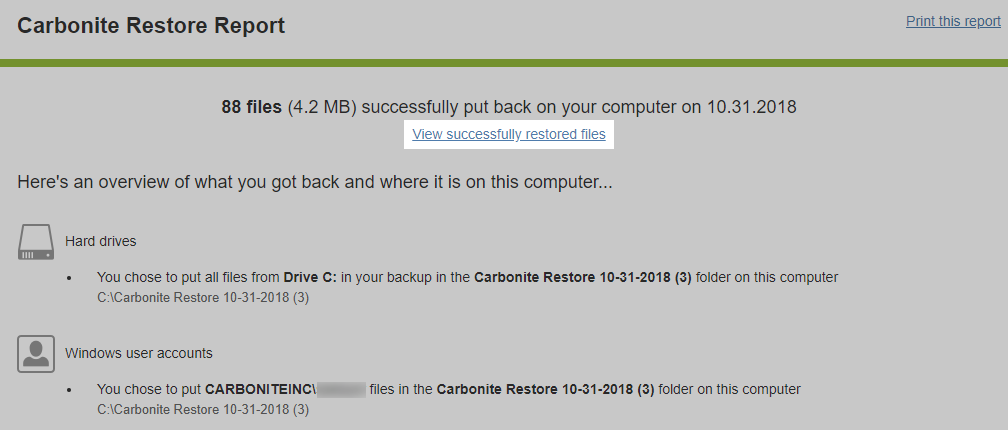
After a restore, Carbonite will create a Restore Report file. This file contains a list of all the files you chose to restore, each file's original backup location, and the location to which they were restored to on the new computer.
To access the Restore Report, double-click the Restore Report file (it will usually have the symbol of your default web browser for an icon).
The Restore Report is located in the following location on your computer:
Windows 7
- C:\Users\[User_Name]\My Documents\Carbonite Restore Reports\
Windows 8 and Windows 10
- C:\Users\[User_Name]\Documents\Carbonite Restore Reports\
Note: Your [User_Name] will vary. If you do not see your own name, your files are most likely in a generically-named folder, such as Owner or User.
The Restore Report will be displayed in your web browser.
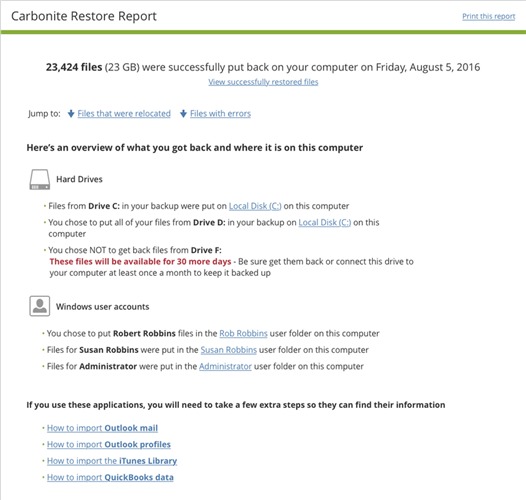
This report provides an overall status of the restore, including the number of files restored and the total size of all the files. It also provides a list of files that couldn't be restored to their original location, a list of files that couldn't be restored due to errors and information about importing certain applications' data that were restored.
- Hard Drives - Provides information about the hard drive(s) files were restored to and from. It also lists any hard drive(s) files were not restored from.
- Windows user accounts - Provides information about the Windows user accounts files were restored to and from.
- Applications - Provides information about certain applications whose files were restored and any extra steps required to view the contents of these files.
- Files that were relocated - Provides information about files that couldn't be restored to their original location, including the file name, original file location and new file location.
- Files with errors - Provides information about files that couldn't be restored due to invalid file names or file paths.
- If these files were not restored, you can restore the affected files by restoring through the Carbonite Backup Drive.
Click View successfully restored files to view a list of all the files that were successfully restored.
You can either scroll through this list or press CTRL + F on your keyboard to open a Find Window and search for specific files.
Once you locate the file in the list, look under the New Location column to determine where the file can be found on the new computer.
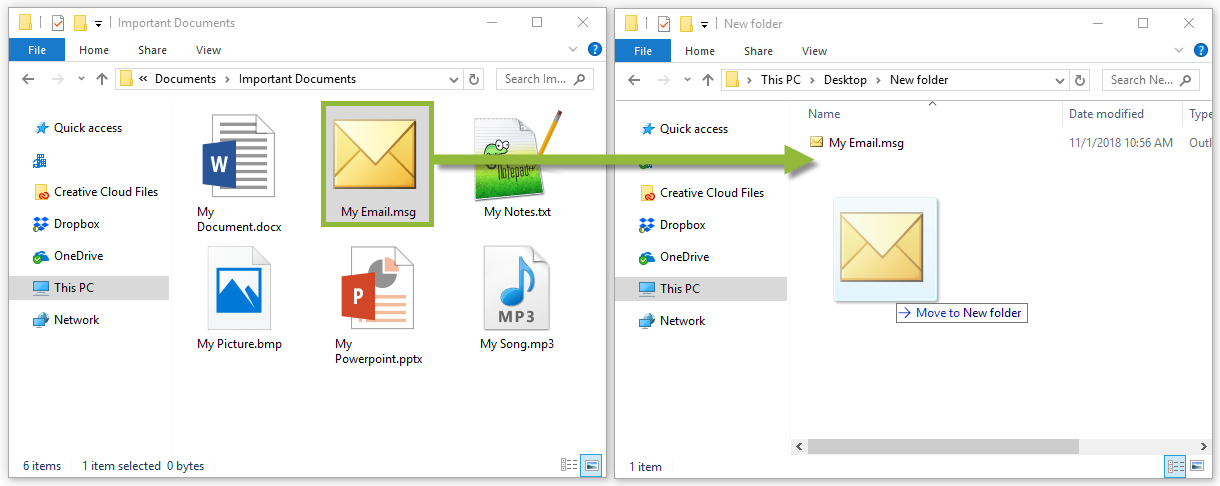
If you'd like to move restored files to a new location, you can do so by dragging and dropping them from one folder to another. Restored folders can also be moved in this manner.
Step 3: Importing Your Restored Files
If you prefer to complete these steps yourself, you can access self-service instructions for importing data into each of the programs listed below by clicking the appropriate link in the Carbonite Instructions column:
Commonly Used Programs
| Program | Carbonite Instructions |
|---|---|
| Google Chrome | Importing into Google Chrome |
| Family Tree Maker | Importing into Family Tree Maker |
| iTunes | Importing into iTunes (Windows) |
| Microsoft Edge | Importing into Microsoft Edge |
| Microsoft Internet Explorer | Importing into Internet Explorer |
| Microsoft Outlook | Importing into Outlook |
| Mozilla Firefox | Importing into Firefox |
| Mozilla Thunderbird | Importing into Thunderbird |
| NeatReceipts/Neatworks | Importing into NeatReceipts/NeatWorks |
| Peachtree | Importing into Peachtree |
| QuickBooks | Importing into QuickBooks |
| Quicken | Importing into Quicken |
| RoboForm | Importing into Roboform |
For any additional questions or concerns about a specific program, please check with the vendor of that program.
Step 4: Exiting Recover Mode
After you have confirmed that all of your files have been restored and imported into the programs you need, you can exit recover mode to resume your backup operations.
You may unpause your backup for safekeeping by selecting Exit Recover Mode through the Carbonite icon in your Windows notification area.
To unpause your backup for safekeeping, right-click the Carbonite icon and select Exit Recover Mode.

Exiting recover mode will display a confirmation window. The confirmation window asks if you have restored all your backed up files to your machine, and if you want to resume your backup.
If you click Resume my backup, Carbonite will start backing up your machine.
If you click Do not resume, your backup will remain paused for safekeeping.
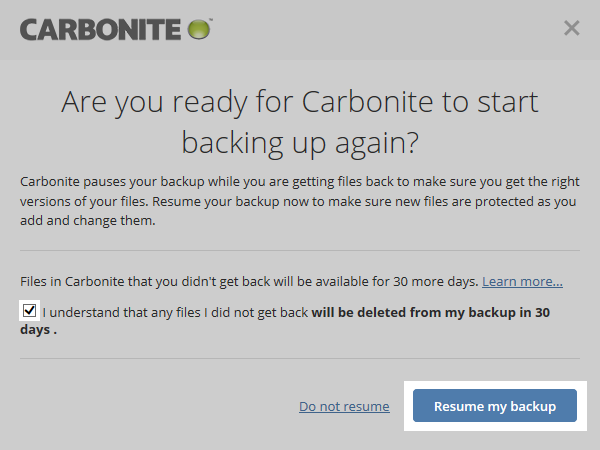
Any files that were not restored, not selected for back up, or are no longer on your computer before resuming the backup, will remain on the Carbonite servers for up to 30 days for Carbonite Safe (60 days for Carbonite Safe Pro) before they are removed (if you are on a Safe free trial, they will be deleted 15 days after your free trial has expired).
Now that you have started backing up again, we recommend that you adjust your power settings and Windows update settings back to their original settings.
 Feedback