

Moving Carbonite Safe to Another Windows Computer

Summary:
You can move your existing Carbonite Safe subscription to a new or repaired Windows computer to restore all your files or start a new backup.
This article applies to:
| Carbonite Plans | Products | Platforms |
| Basic, Plus and Prime (Not sure?) - View the Carbonite Safe Backup Pro article | Safe | Windows - View the Mac article |
Note: If a third party tool was used to bring your programs over to the new computer, Carbonite may appear to be installed already, but it isn't. You will need to uninstall before following the steps below.
Solution:
Step 1: Download Carbonite Safe
From the new or repaired computer, follow the instructions below to install Carbonite Safe on your computer.
- Sign in at https://account.carbonite.com or with the button below.
- From the Backup tab, click Options and select Move my Subscription from the dropdown menu.
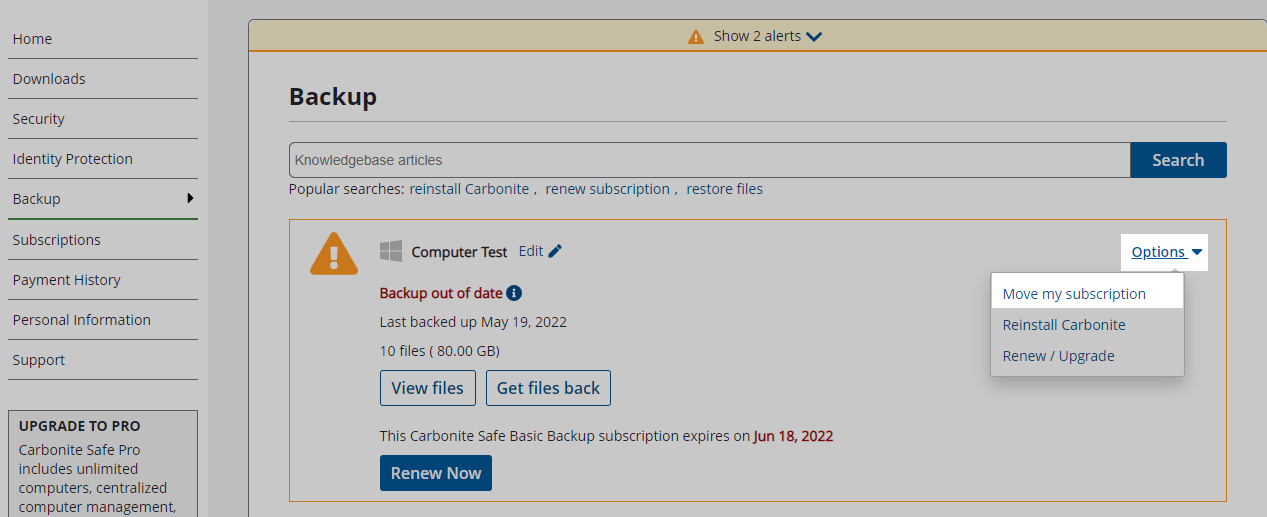
- Choose the option that best fits your scenario.
- Option 1: Move my subscription and start a new backup: Transfers the Carbonite Safe subscription from the old computer to the current computer and starts a new backup.
Files that are not restored or do not exist on the computer will be removed from the backup after 30 days. Learn more… - Option 2: Move my subscription and transfer my files (Recommended): Transfers the Carbonite Safe subscription from the old computer to the current computer and walks you through restoring all the files from the previous backup.
- Option 1: Move my subscription and start a new backup: Transfers the Carbonite Safe subscription from the old computer to the current computer and starts a new backup.
- After you have made your option, click Continue to Download to proceed.
- On the next page, click Download now.
The Carbonite installation file will download to the default download location on your computer.
Step 2: Install Carbonite Safe
After the Carbonite file downloads, you can use your web browser or File Explorer to open the Carbonite setup file. Choose the method that is easiest for you.
- For Google Chrome: Click the Carbonite setup file from the bottom left of the web browser.
- For Mozilla Firefox: Click Save File and open the file from the down arrow in the top right of the web browser.
- For Microsoft Edge: Click Run at the bottom of the web browser.
- For Internet Explorer: Click Run at the bottom of the web browser.
- For Windows File Explorer: Open the Downloads folder and double-click the Carbonite setup file.
If you see a User Account Control window that says, “Do you want to allow this app to make changes to your device?” click Yes.
Agree to Terms of Service and click OK and the reinstall will complete.
Step 3: Configure Your Backup or Restore
Option 1: Move my Subscription and Start a New Backup
If you chose Move my subscription and start a new backup at the beginning of the instructions, Carbonite will automatically scan for new files and back up any new changes.
With your Carbonite subscription computer transferred, you can open the Carbonite interface for more information about your backup or select additional files for backup.
Option 2: Move my Subscription and Transfer my Files (Recommended)
This process will install Carbonite to your device and set it to Recover Mode. You should leave Carbonite in Recover mode until your files are finished transferring. After reinstalling, the Restore Manager will walk you through restoring your files.
Before you start restoring files with multiple users, you will need to select the restore location and choose the user(s) on your computer that Carbonite will restore.
If some or all of your backed up data is already on the new or repaired computer, you can set up a full restore with the Restore Manager to the new or repaired computer to get the rest of your backed up data restored and resume your backup again. Please keep in mind that while this can be faster, it depends entirely on the data being in the same location it was backed up from.
The Restore Manager will check for existing files as it restores, so if a file exists on the new or repaired computer in the same location as in the backup, the restore will skip it. If the backed up files being restored are already on the computer, but in a different location, the Restore Manager will restore a new copy—a duplicate—of the file in the restore location.
Step 1a: Select Restore Location
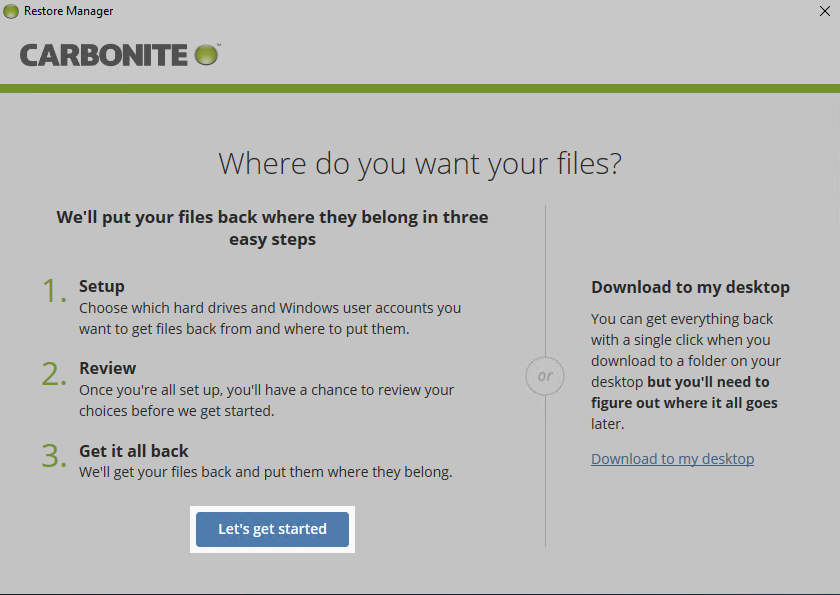
You will be prompted to restore all the files to where they belong or to download them to your desktop. In this example, we’ll click Let’s get started to setup a full restore.
In the next screen, you will be prompted to choose the drives from your backup that you would like to restore.
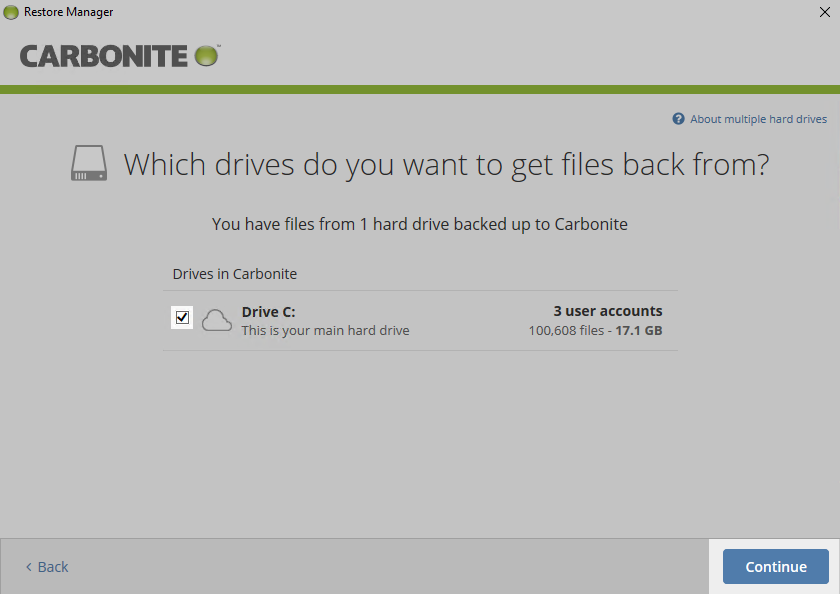
After making your selections, click Continue to proceed.
After making your selection, click Continue to proceed.
Step 1b: Select User Location
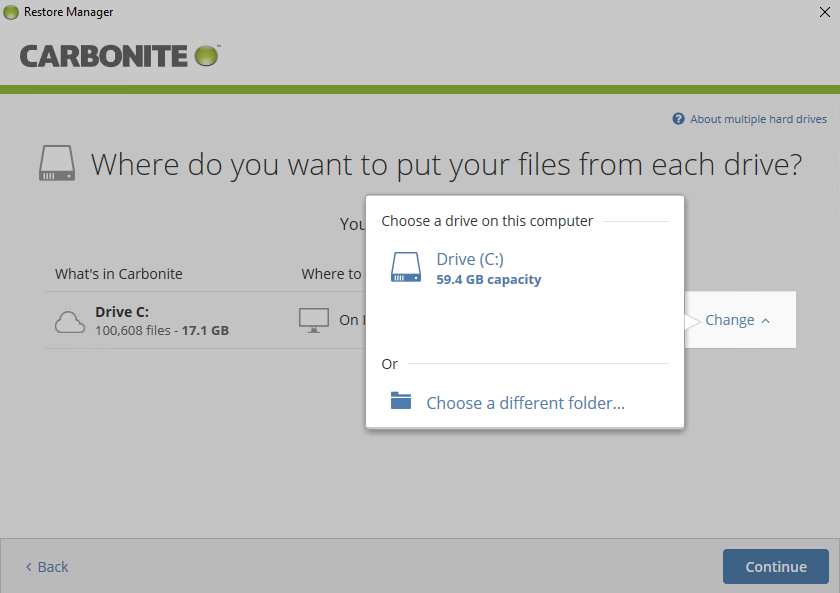
After you select which drives will be restored, you can select the Windows user profiles or folders that you want the files restored to.
For users that don’t exist on the current computer or users that are not configured to your preferences, click Choose a location to select the option that best fits your scenario.
- Username – This is the user account that will receive the restored files from Carbonite.
- Create a Windows user account - This will create the Windows username with the same name from your previous computer.
- Choose a different folder - This will restore the files to a folder of your choice on your new computer.
- Don't get these files back - This will not restore the data from that Windows user account. Files from this user will be removed from Carbonite after 30 days of backup on the current computer.

After making your selection, click Continue. In the next screen, confirm your options are configured properly and click Continue.
Step 1c: Start Restore
You will be presented with your final restore preferences. If you need to make any changes, click View details.
After you review and are satisfied with your choices, click Start getting files back.
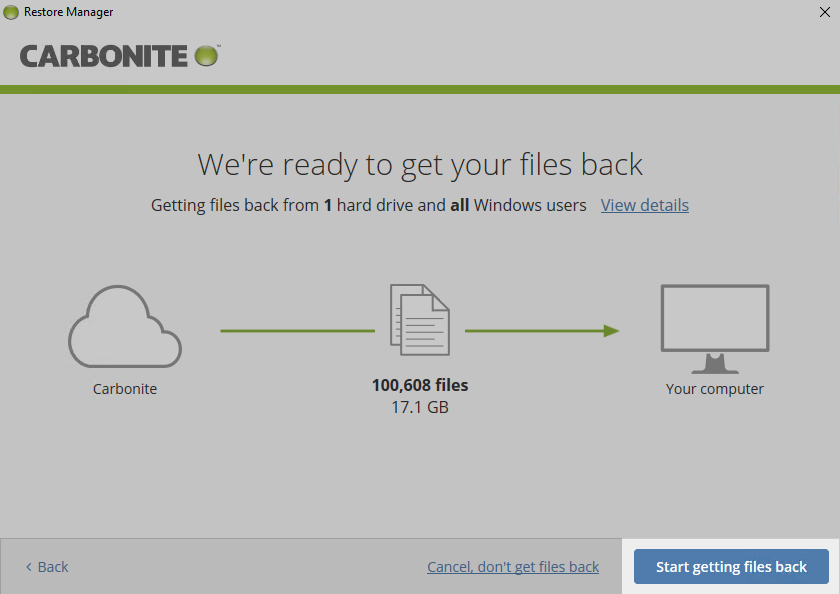
Carbonite will start restoring your files.
During this time, you can continue to use your computer or leave it after you configure Windows for the restore.
Step 2: Configure Windows for the Restore
Before you start doing other things or leave your computer while Carbonite restore your files, it is highly recommended that you configure Windows Power & Sleep Settings and Windows Updates to avoid a restore interruption.
Additionally, it is best to use a wired connection to restore at the quickest speeds.
Step 2a: Configure Windows Power & Sleep Settings
Carbonite cannot continue restoring files if your computer goes to sleep or loses power. For these reasons, we recommend leaving your computer plugged in and configure the settings so that Windows doesn’t automatically put your computer asleep.
In Windows 10, you can configure the Power & Sleep Settings by following the instructions below:
- Click the Windows logo to open the Start Menu.
- Click System.
- From the left sidebar, click Power & sleep.
- Under the Sleep section, set When plugged in, turn off after to Never.
For information on other Windows operating systems, please refer to Hibernation and Sleep Mode.
Step 2b: Configure Windows Updates
Like the previous section, Carbonite cannot continue restoring files if Windows automatically restarts your computer for a Windows Update. For this reason, we recommend temporarily pausing Windows Updates.
In Windows 10, you can configure Windows Updates by following the instructions below:
- Click the Windows logo to open the Start Menu.
- Click Update & Security.
- Click Advanced options.
- Under the Pause updates section, use the dropdown menu to select the date.
Generally, we recommend pausing Windows Updates for 1 week after the day you start the restore, which should give you plenty of time for the restore to complete. However, if you have a large backup or a slower internet connection, please extend the date accordingly.
For information on other Windows operating systems, please refer to Configuring Windows Update.
Step 3: View The Restore Status
While the restore is in progress, you can continue to use your computer or leave it after you configure Windows for the restore. If you exited out of the restore status window, you can re-open it at any time from the Windows taskbar.
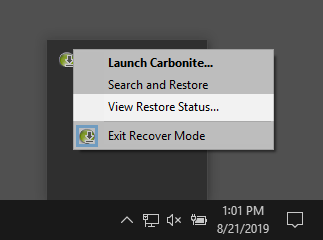
- Click the Show hidden icons arrow near your Windows clock.

- Right-click the Carbonite icon and select View Restore Status...
You will not see this option if the restore is completed, paused or stopped.
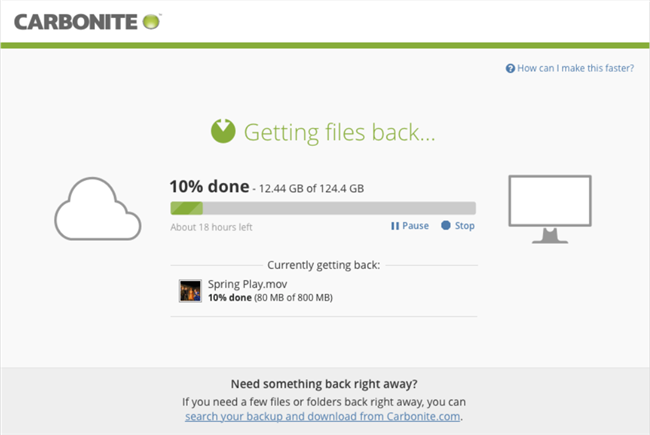
The restore progress of the current file and overall restore will be displayed.
Step 4: Restore Confirmation and Next Steps
After the restore completes, you will need to exit Recover Mode and select any additional files for backup.
Step 4a: Exiting the Restore/Recover Mode
After the restore completes, a confirmation window will appear asking if you want to resume backing up, which will exit Recover Mode.
Files that were not restored will be removed from Carbonite after 30 days of backing up on the current computer.
- If everything seems to be in order, click Continue Backing up to back up the new computer.
- If you are having trouble finding restored files, importing the restored files with programs, or need to exit Recover Mode to continue backing, check out our Carbonite Post-Restore Checklist.
With the restore complete and your files back, your Carbonite subscription was successfully transferred, and Carbonite will begin backing up your current computer.
Step 4b: Selecting Additional Files for Backup
With Carbonite backing up, use this opportunity to review your backup selections with the Carbonite Backup Drive. You can select (or reselect) data that was associated with the previous computer to prevent future data loss.
Below is a list of locations that you should double-check are selected for backup.
- Files outside of Carbonite’s default locations (outside of C:\Users)
- Files on an external hard drive (needs to be reselected)
- Video files (excluded on Safe Basic plans by default)
After you select this data for backup, Carbonite will back up the remaining files and keep your current computer protected.
 Feedback