
 Support
 Contact
 Sign In



Transferring Your Carbonite Safe Subscription to Restore Files (Mac 2x)

Summary:
You can transfer your Carbonite Safe subscription to restore your files to another computer.
Note: Alternatively, you can transfer Carbonite to another computer to start a new backup.
This article applies to:
| Carbonite Plans | Products | Platform | Version |
| Basic, Plus, and Prime (Not sure?) | Safe (Not sure?) | Mac - View the Windows article | 2.x (Not sure?) - View the 1.x article |
Note: If you used the Mac Migration tool or performed a Time Machine restore to your new Mac Carbonite may appear to be installed already, but it isn’t. You will need to uninstall before following the steps below.
Solution:
The sections below are collapsed. Please click a section title to open / close the appropriate section.
Step 1: Transfer Carbonite to your Current Computer
- Sign in at https://account.carbonite.com from the computer you want to restore to.
- Click Backup.
- From the backup you want to restore, click Options > Move my subscription.
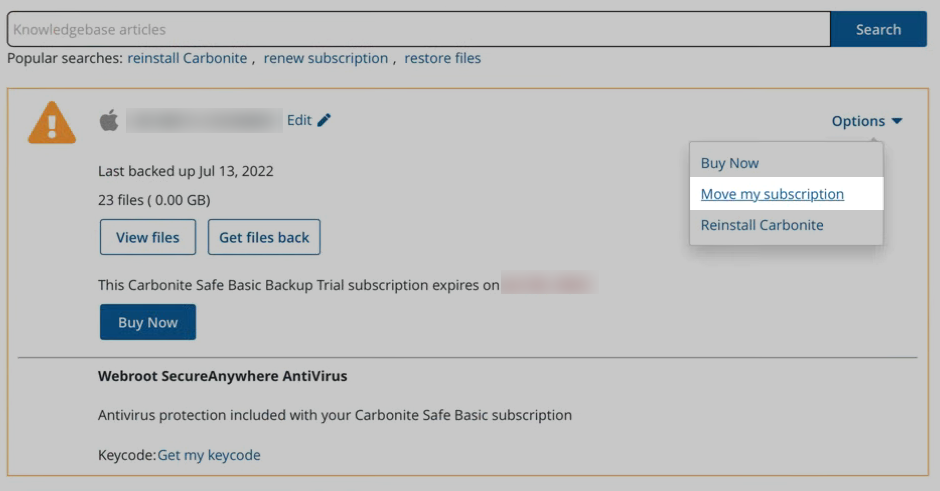
- Click Continue.
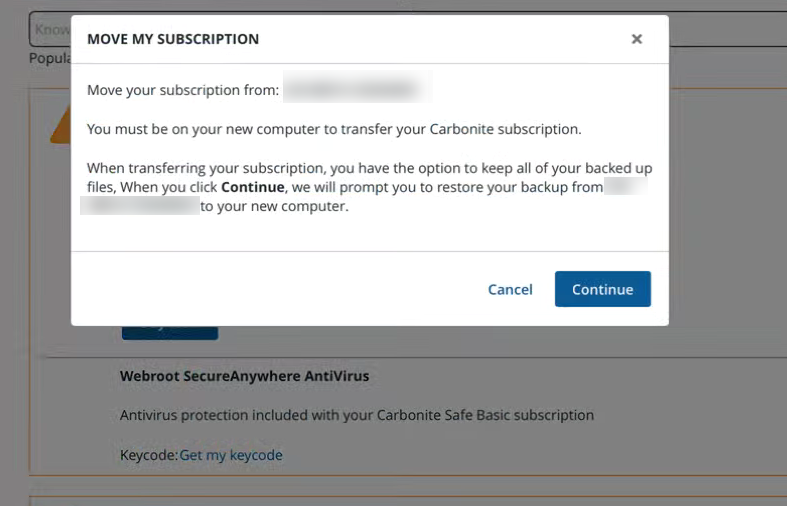
- Download the Carbonite setup file by clicking Download.
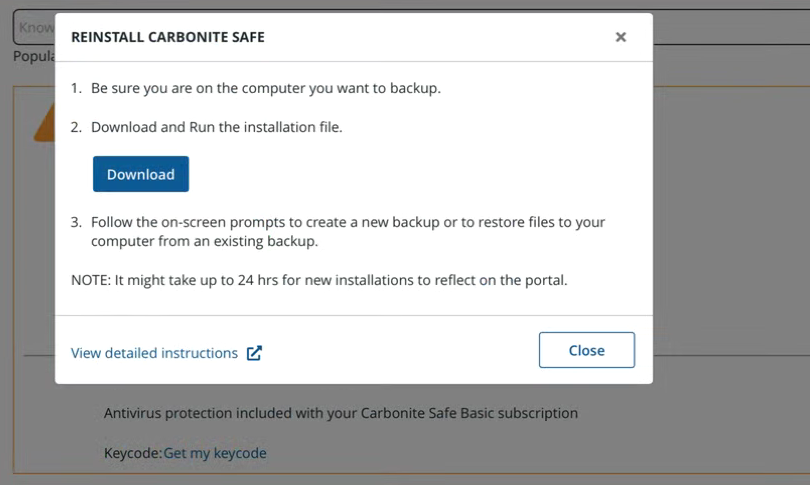
- Depending on your web browser, use the instructions below to open Carbonite.
- Google Chrome: If prompted to Save or Keep in the popup message, please do so to starrt the download. When the download completes, click the arrow in the top right corner of your browser to view your downloads. Double-click the Carbonite file to open it.
- Mozilla Firefox: Click Save in the pop-up message that appears to start the download. When the download completes, click the arrow in the top right corner of your browser to view your downloads. Double-click the Carbonite file to open it.
- Safari: Click Save in the pop-up message that appears to start the download. When the download completes, click the arrow in the top right corner of your browser to view your downloads. Double-click the Carbonite file to open it.
- On the Carbonite Terms of Service window, click Continue.
- Enter your Mac password and click Add Helper.
- During the installation, choose Get all files back.
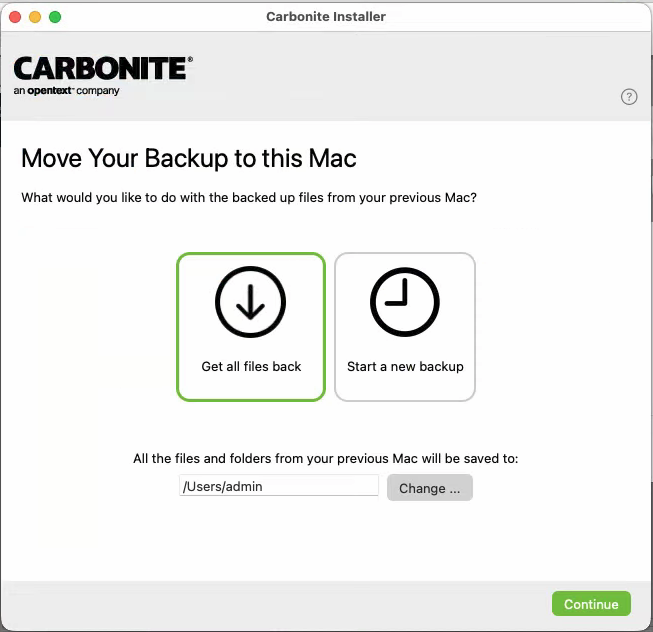
- If you wish to restore files to a different location than your current Home directory, click Change…
- Click Continue.
- Select whether you want the Automatic Settings or Advanced Settings for backup.
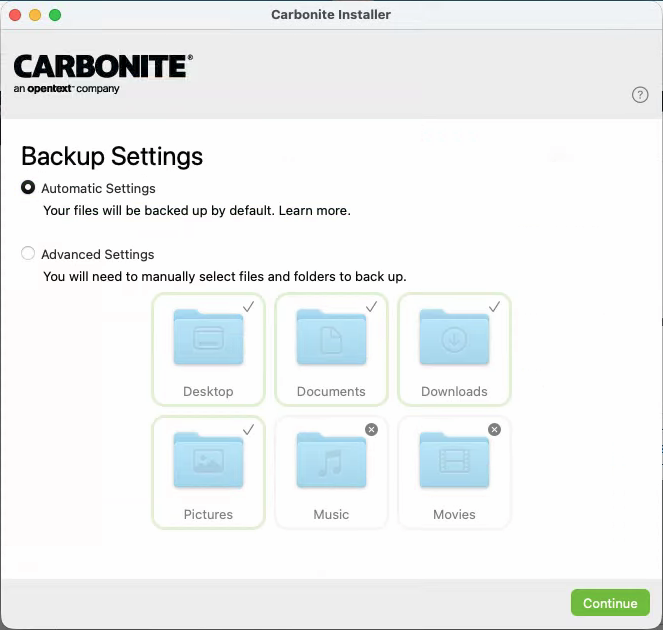
- If you choose advanced you will only be prompted with the 6 most common folders and additional selections will need to be done after install completes.
- During a trial, Carbonite does not back up Music or Videos automatically. However, you can select them manually.
- From here, configure Full Disk Access to ensure Carbonite can access and backup your files.
- Following Backup Settings selection click Continue.
Carbonite will restore your files in the background.
Step 2: Configure Energy Saver
Carbonite cannot restore if your computer goes to sleep or shuts off. For the duration of the restore, keep your computer plugged and see Hibernation and Sleep Mode for information on how to configure your energy settings.
After making these adjustments, close System Preferences. You can continue with your normal computer tasks.
Once the restore completes, you can click Restore Defaults to return your settings to the original version.
You successfully transferred Carbonite to the computer and started a restore of your files. You can close out of the restore progress window and view the restore status at any time.
Files that were not restored will be removed from Carbonite after 30 days of backing up on the current computer.
If you are having trouble finding restored files, importing the restored files with programs, or need to exit Recover Mode to continue backing, check out our Carbonite Post-Restore Checklist.
With the restore complete and your files back, your Carbonite subscription was successfully transferred, and Carbonite will begin backing up your current computer.
 Feedback