

Configuring Full Disk Access for Carbonite (Mac 1x)

Summary:
Starting with macOS Mojave 10.14, Apple added a security feature called Full Disk Access which blocks third party applications like Carbonite from accessing certain files and folders. With the recent release of macOS Catalina, Apple further increased security and restricted applications from accessing user files, including the following locations:
- Apple Mail
- Photos
- Calendar
- Contacts
- Messages
- Safari bookmarks
- Documents
- Desktop
- iCloud Drive
- Downloads
- External hard drives
Due to these restrictions by Apple, Carbonite must be granted access to Full Disk Access to allow the backup and restore of your files.
Adding System Preferences to Full Disk Access will grant any other application or program that lives in System Preferences with the same access. To learn more about Apple’s new security feature, see the release notes.
This article applies to:
- This article is for Mac 1x - View the Mac 2x article (Not sure?)
Solution:
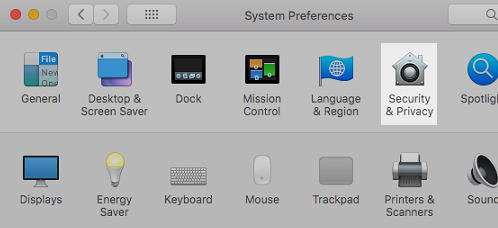
- Click on the Apple icon at the top-left corner of the screen and select System Preferences.

- Within the System Preferences window, click on Security & Privacy.
 If you don’t see this option, click
 to get back to the main System Preferences screen.
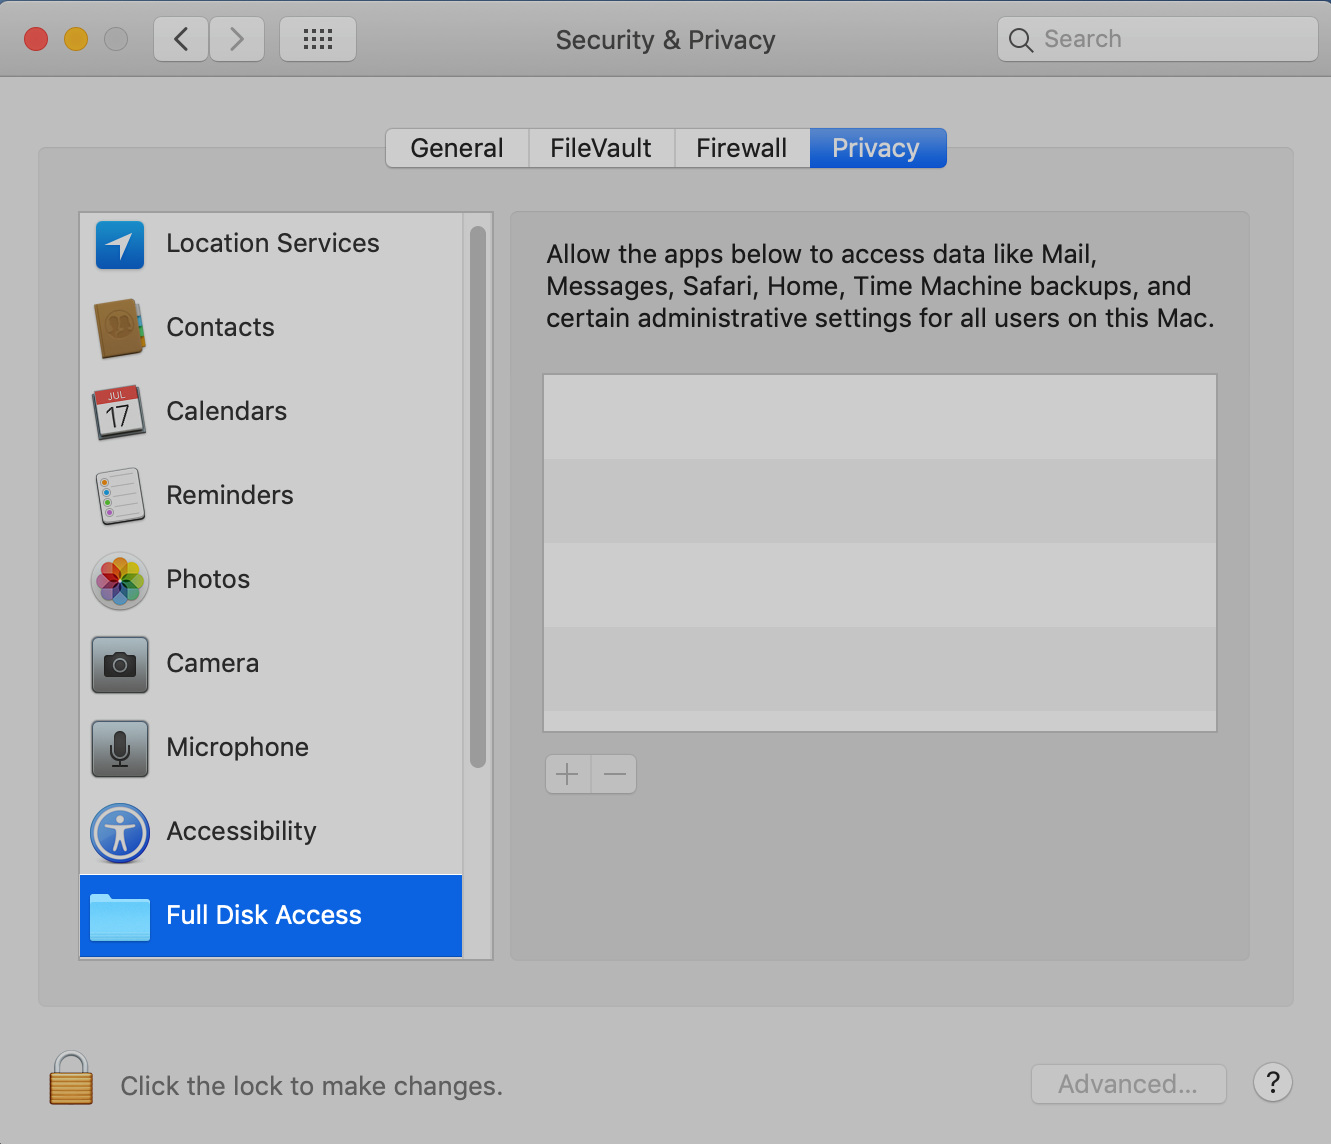
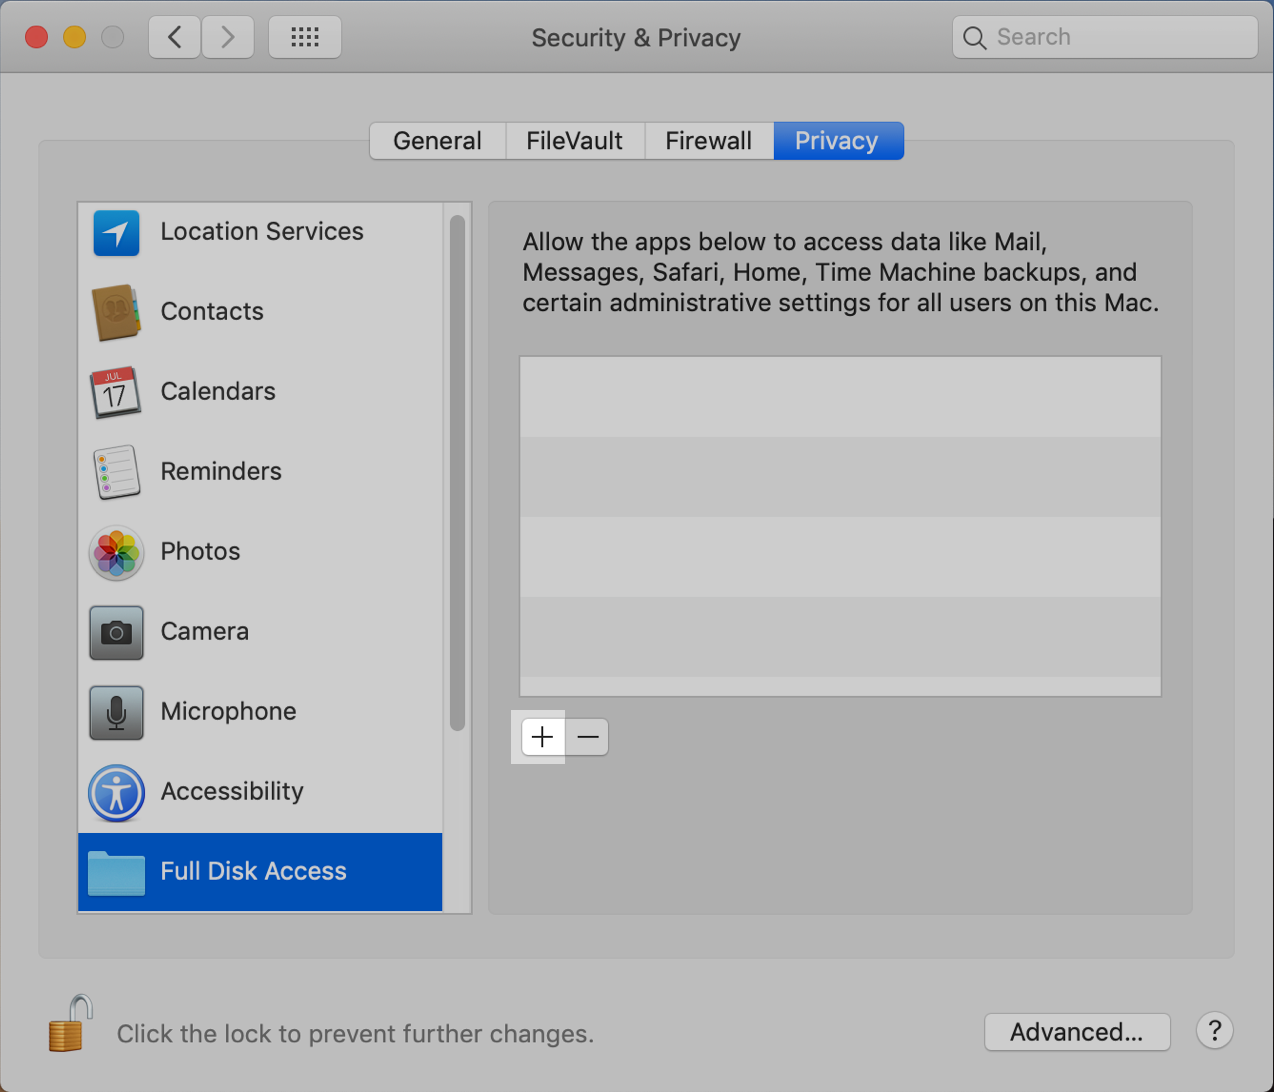
 - Click the Privacy tab.
- From the Privacy tab, select Full Disk Access.
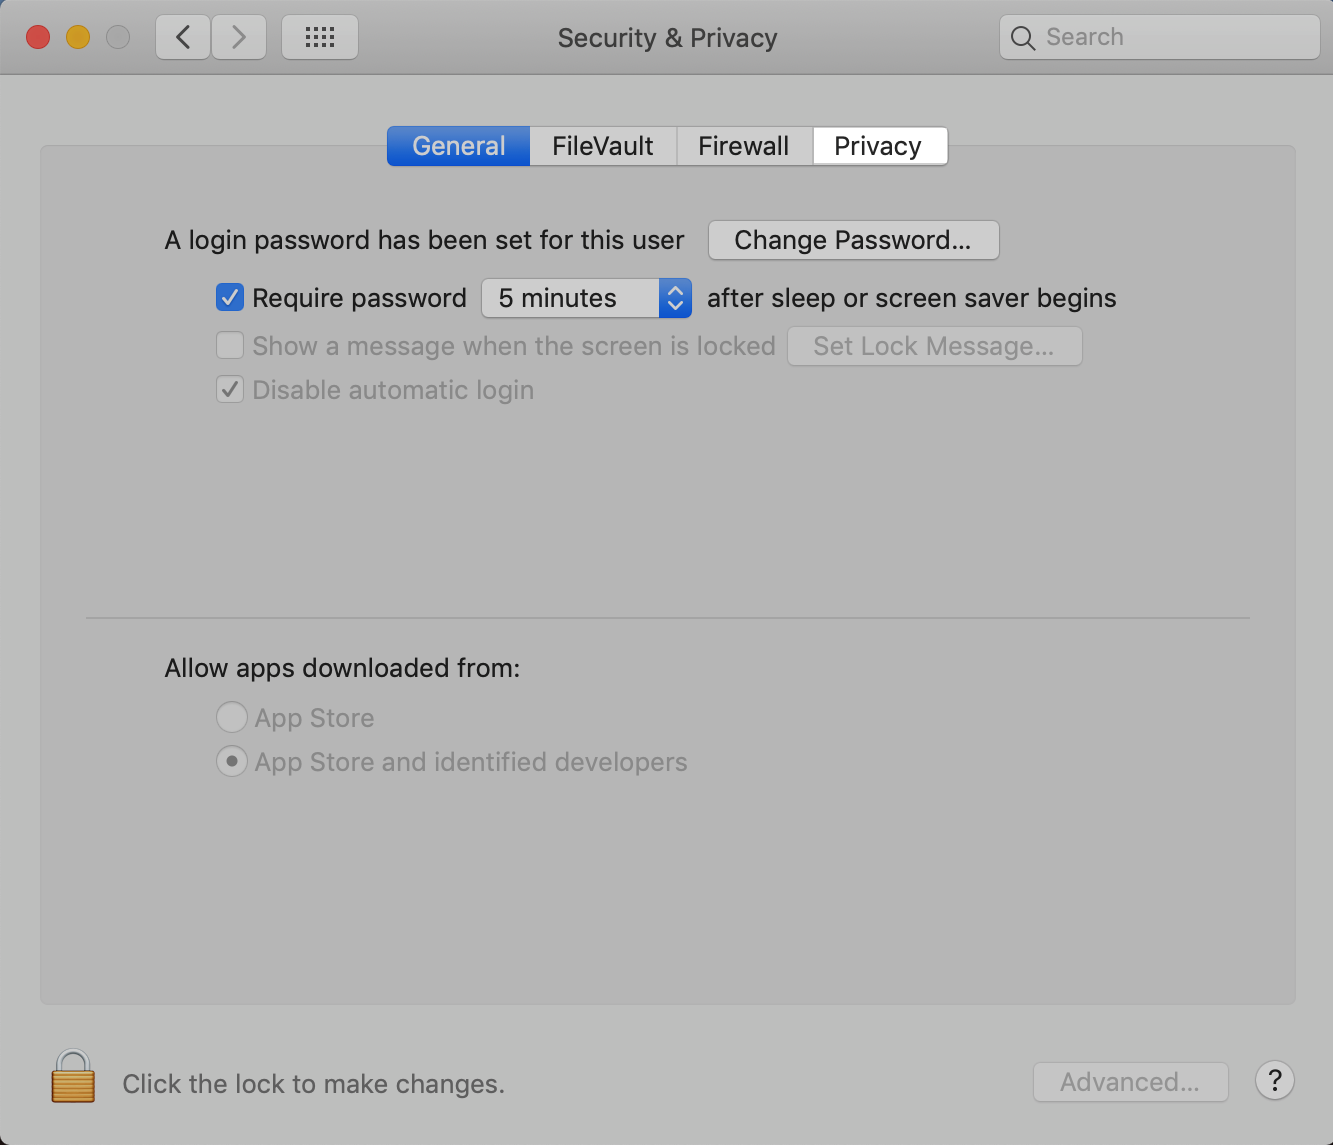
- Click the padlock icon and enter you Mac’s username and password (not your Apple ID or Carbonite password) to allow changes.
- Click the ‘+’ button to the right of the highlighted Full Disk Access.
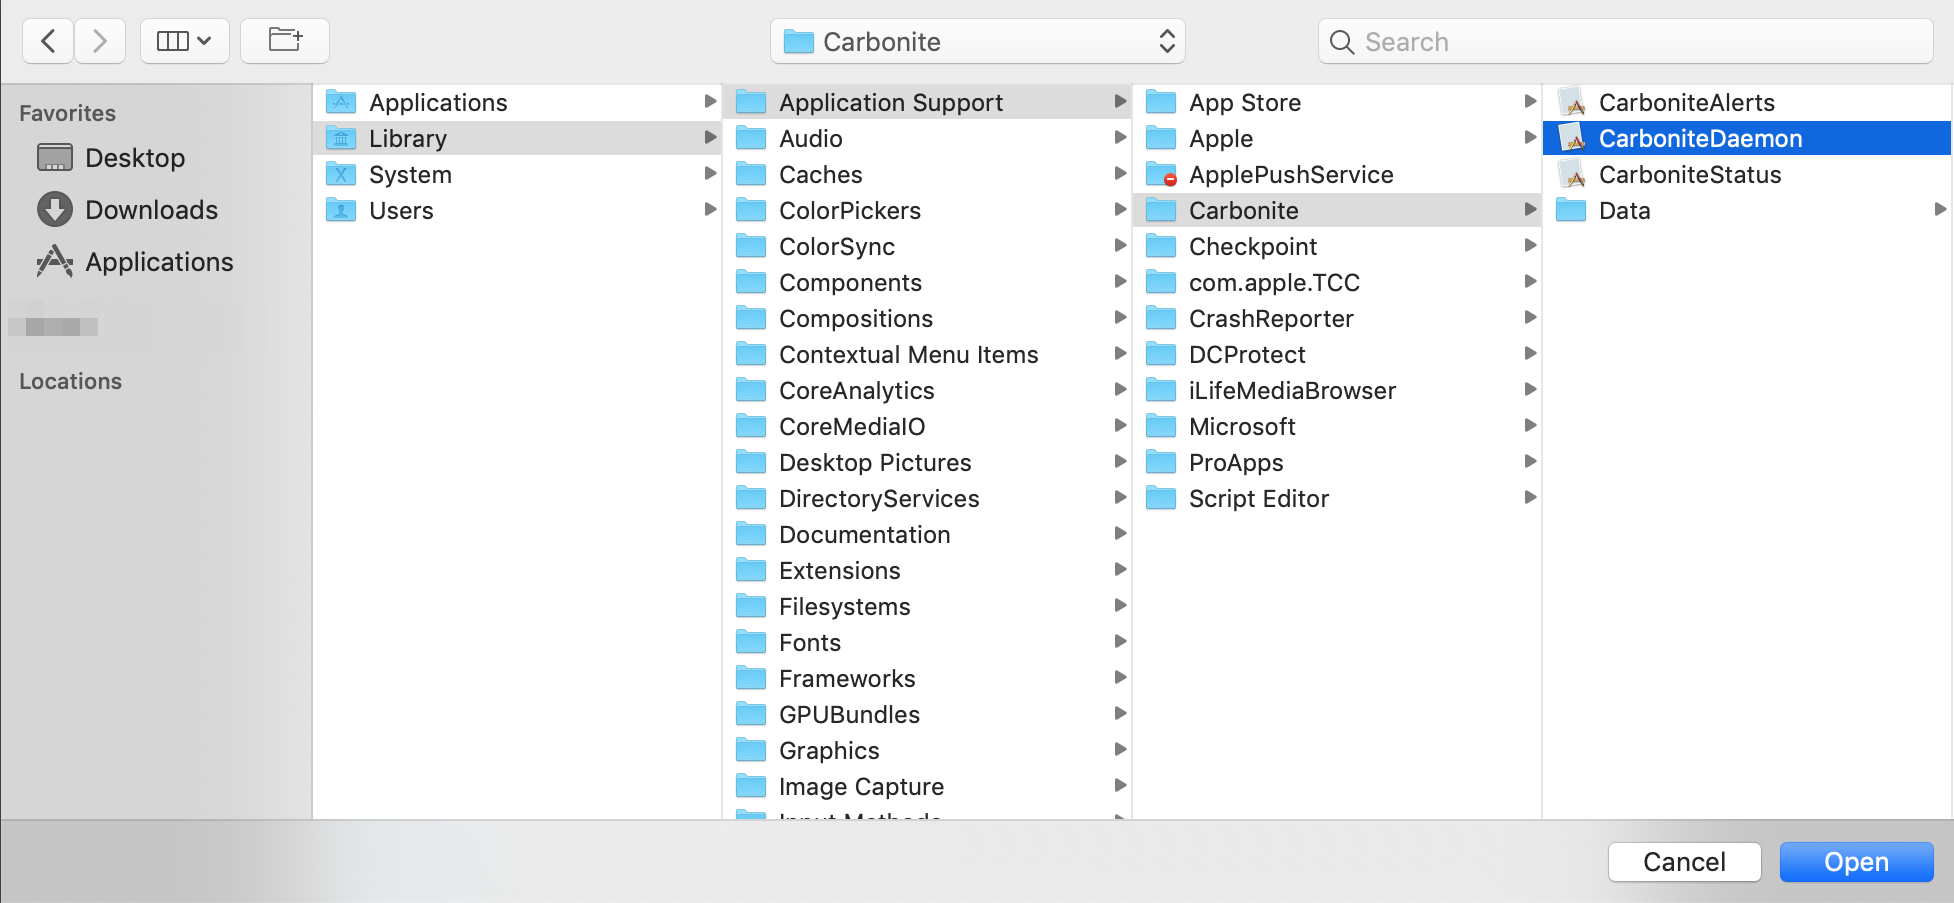
- From the dropdown menu, choose Macintosh HD.
If you do not have an option for Macintosh HD in the dropdown, click Applications from the side menu and try again. - Navigate through the folders to Library/Application Support/Carbonite, select CarboniteDaemon, and click Open.
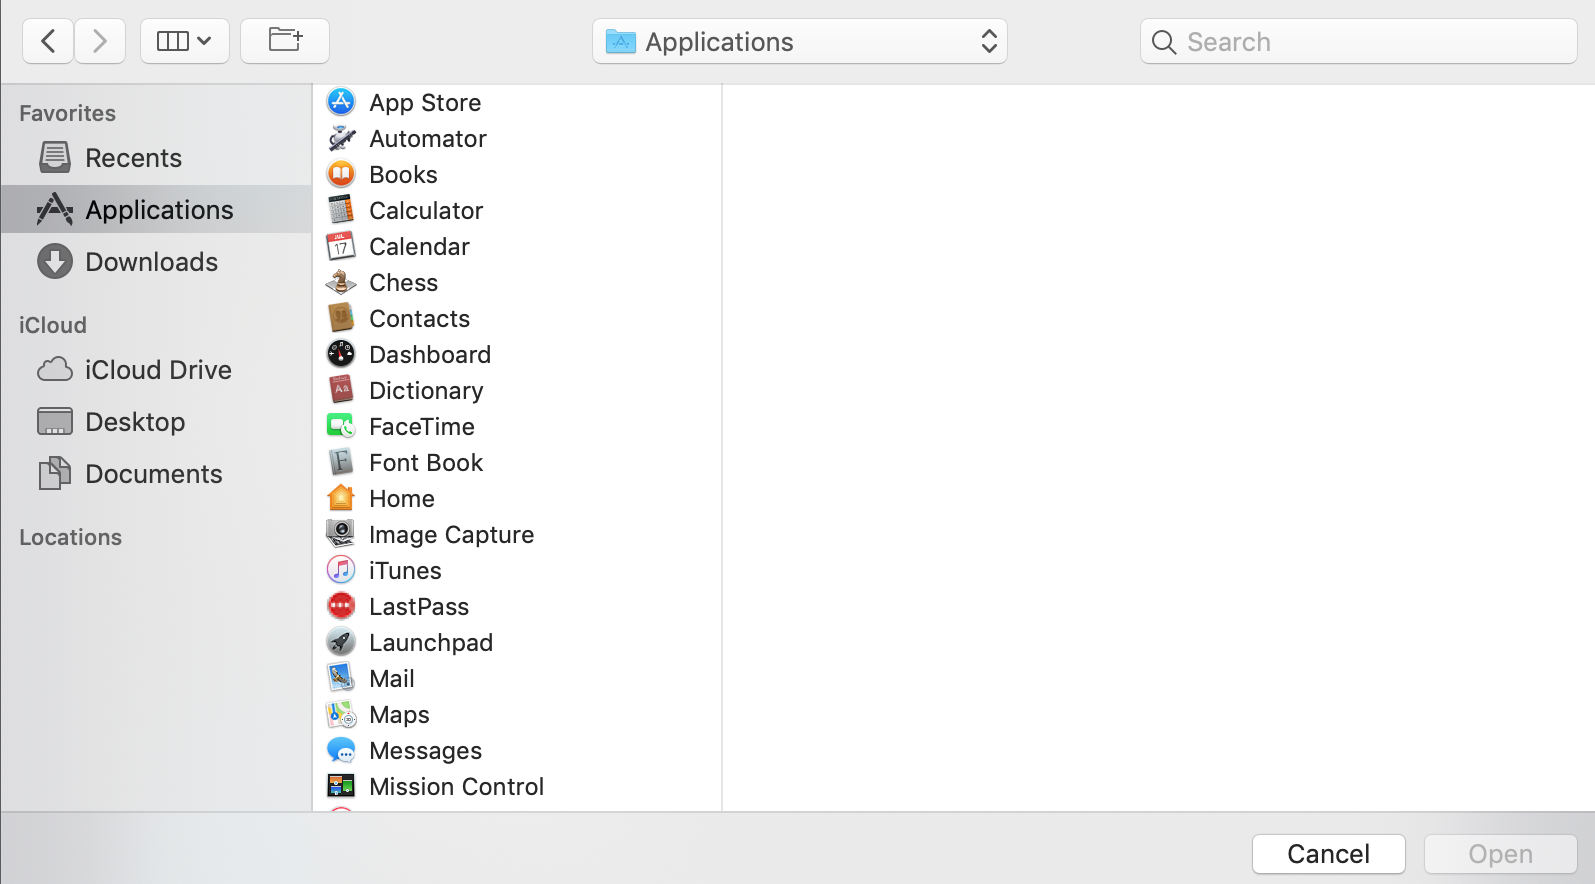
- Click the ‘+’ button to the right of the highlighted Full Disk Access.
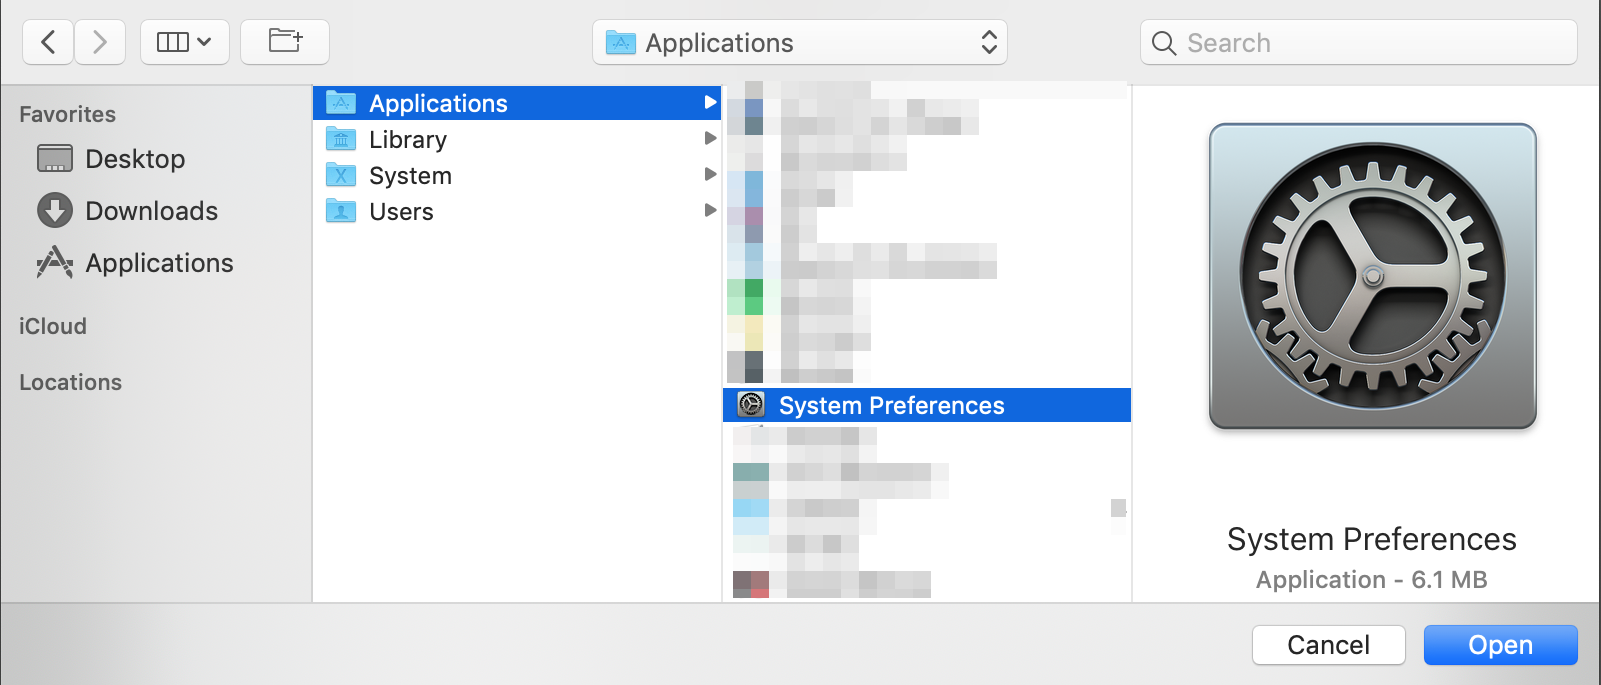
- Select Applications from the side menu.
 If you do not see Applications on the side menu, click the dropdown menu and select Macintosh HD. Within this location, select Applications.
 - Open the Applications folder, select System Preferences, and click Open.
- After adding System Preferences to Full Disk Access, click Later if you see the following window.
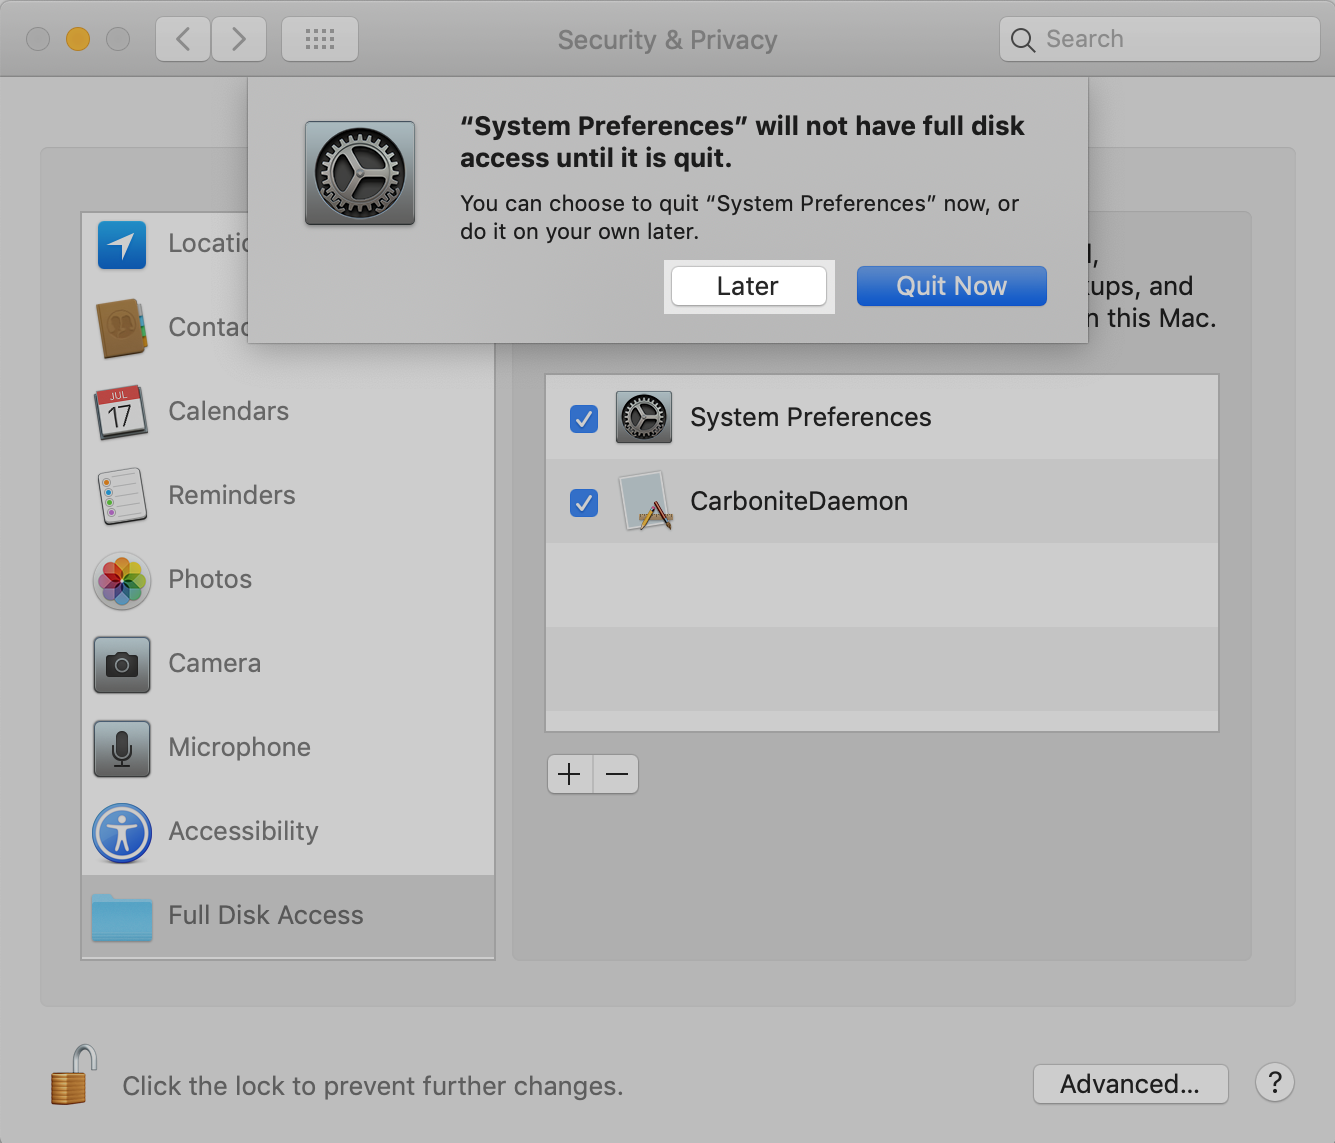 If you clicked Quit Now, follow steps 1-4 and continue below.
 - Click the padlock icon to prevent further changes to Full Disk Access.
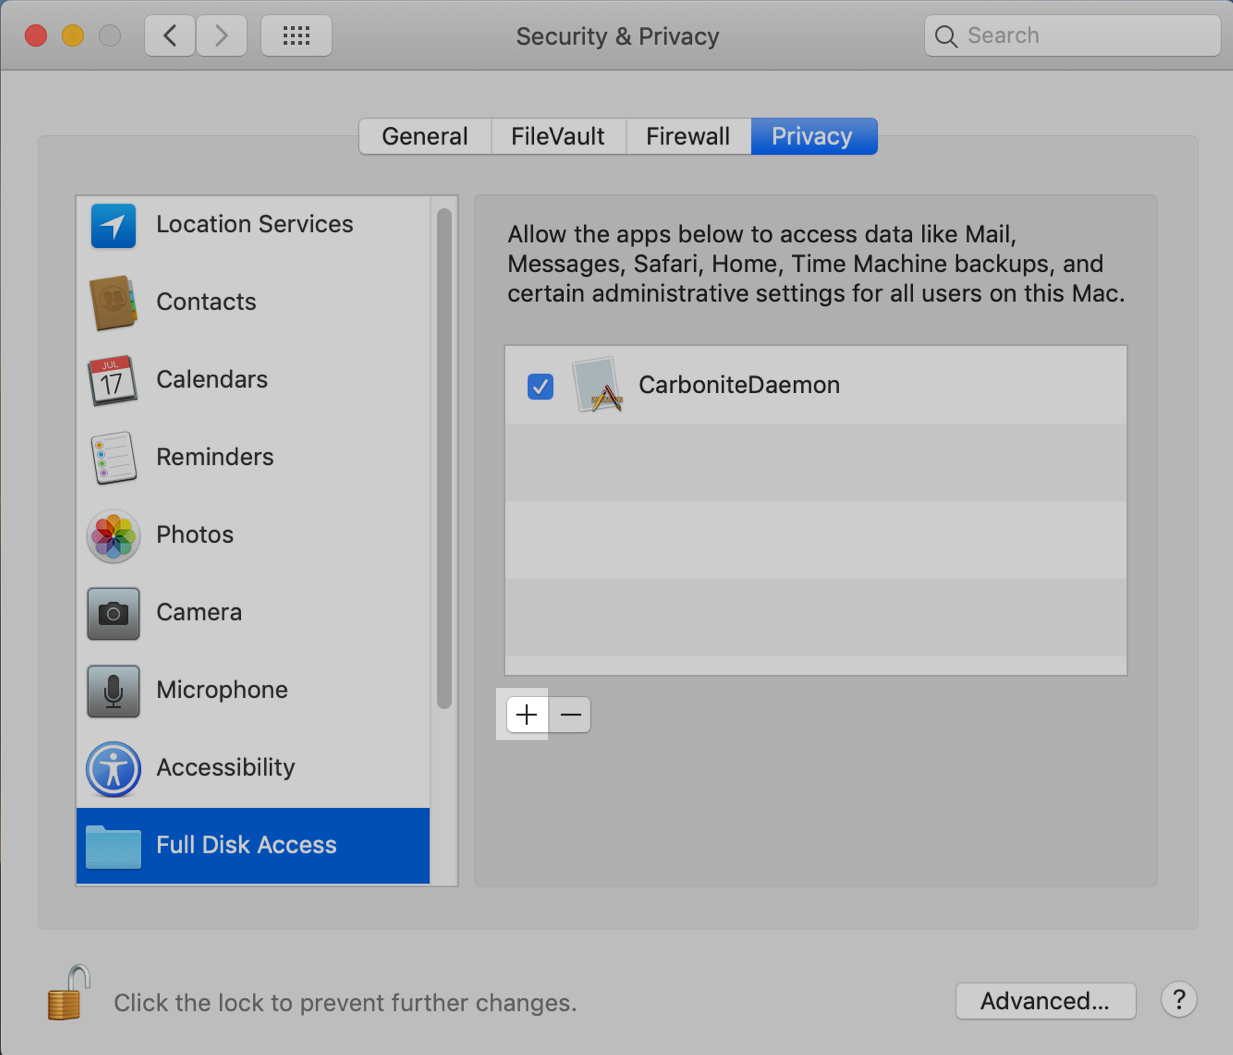
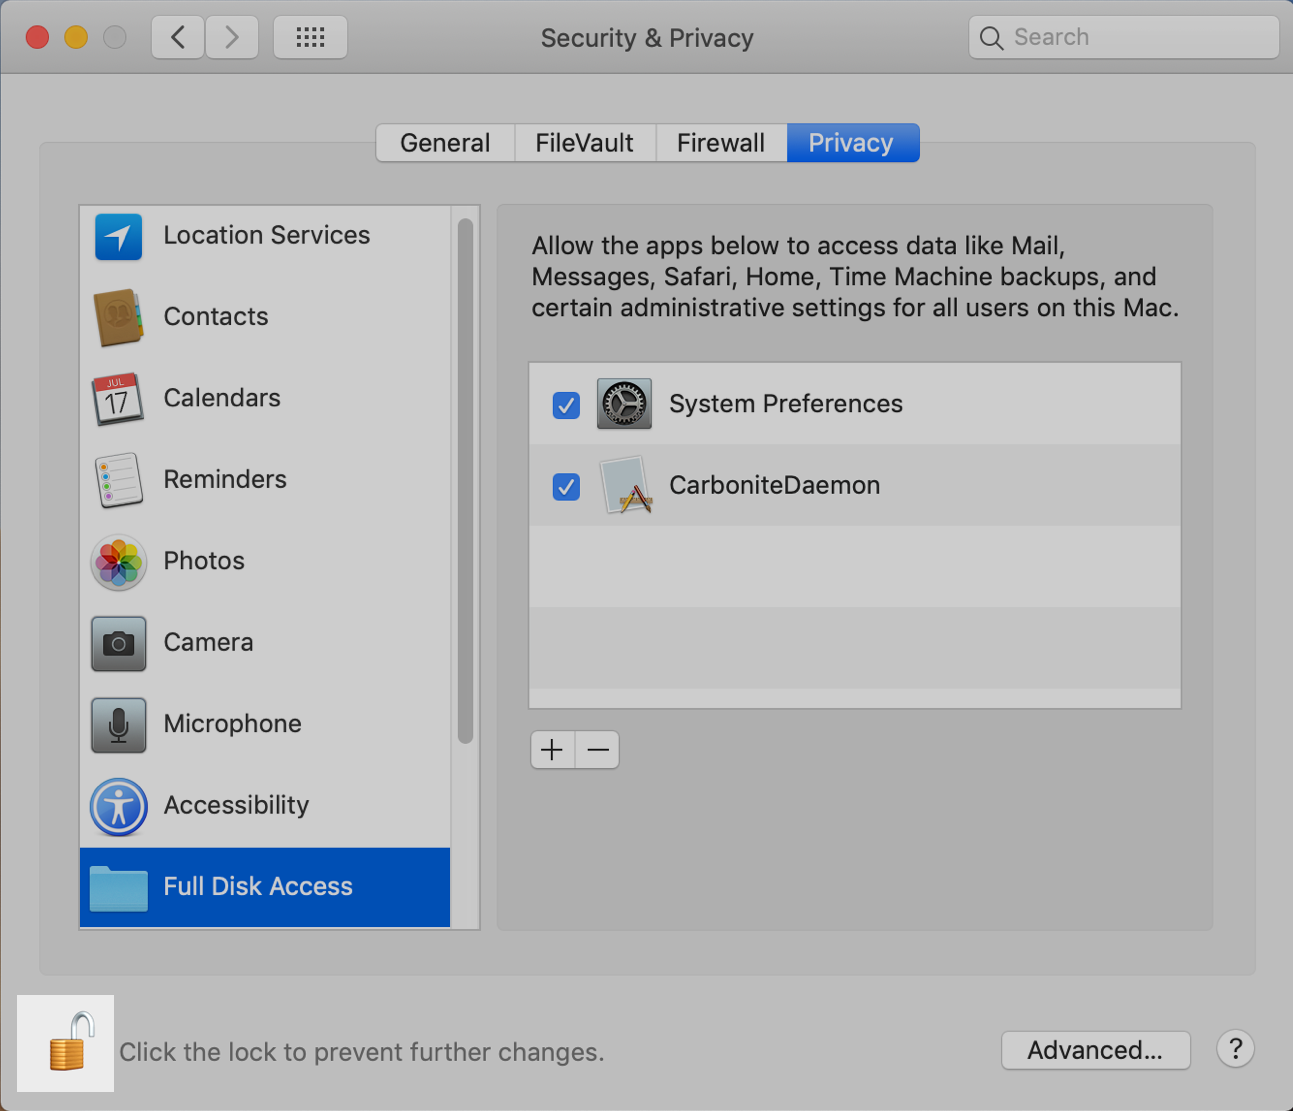 Full Disk Access has been successfully configured for Carbonite if CarboniteDaemon and System Preferences appear in the window above.
 - Restart your computer.

Carbonite will now resume backing up your files as normal.
 Feedback