

Transferring Your Carbonite Safe Subscription to Start a New Backup (Mac 2x)

Summary:
You can transfer your Carbonite Safe subscription to another computer to start a new backup.
This article applies to:
| Carbonite Plans | Products | Platform | Version |
| Basic, Plus, and Prime (Not sure?) | Safe (Not sure?) | Mac - View the Windows article | 2.x (Not sure?) - View the 1.x article |
Note: If you used the Mac Migration tool or performed a Time Machine restore to your new Mac Carbonite may appear to be installed already, but it isn’t. You will need to uninstall before following the steps below.
Solution:
The sections below are collapsed. Please click the section title to open / close a particular section.
Step 1: Transfer Carbonite to your Current Computer
- Sign in at https://account.carbonite.com from the computer you want to start a new backup.
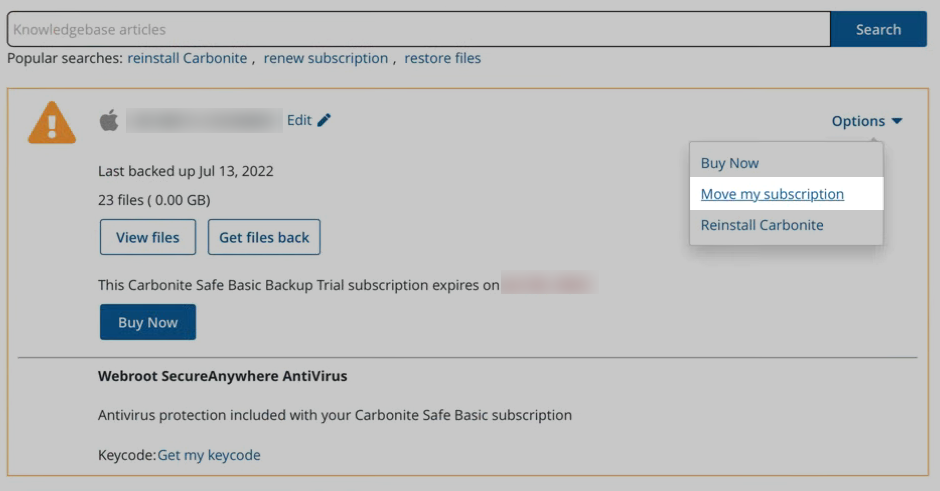
- Click Backup.
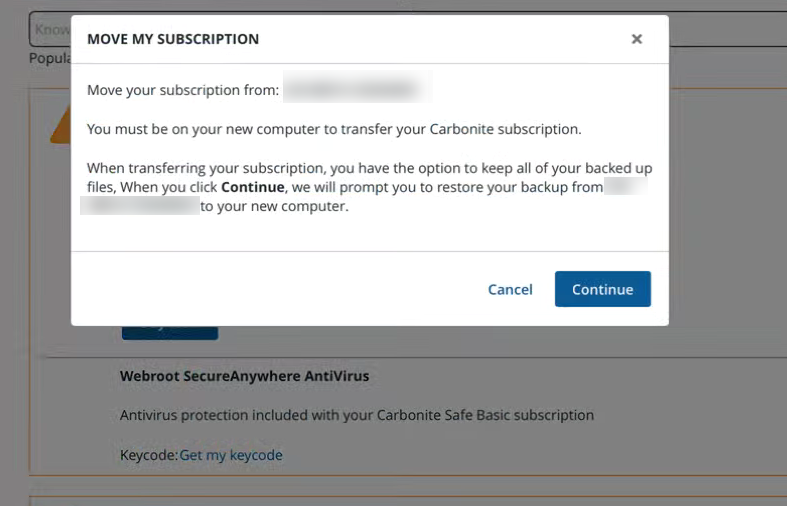
- From the backup you want to restore, click Options > Move my subscription.
- Click Continue.
- Download the Carbonite setup file by clicking Download.
- Depending on your web browser, use the instructions below to open Carbonite.
- Google Chrome: When the download completes, click the arrow in the top right corner of your browser to view your downloads. Double-click the Carbonite file to open it.
- Mozilla Firefox: Click Save in the pop-up message that appears to start the download. When the download completes, click the arrow in the top right corner of your browser to view your downloads. Double-click the Carbonite file to open it.
- Safari: Click Save in the pop-up message that appears to start the download. When the download completes, click the arrow in the top right corner of your browser to view your downloads. Double-click the Carbonite file to open it.
- On the Carbonite Terms of Service window, click Continue.
- Enter your Mac password and click Add Helper.
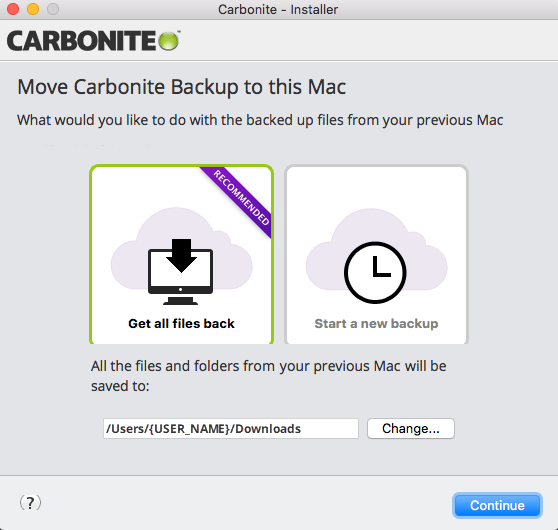
- During the installation, choose Start a new backup, then click Continue.
- Put a checkmark on the box for the 30 day deletion policy of the old files, click Continue.
- Select folders for backup and click Install.
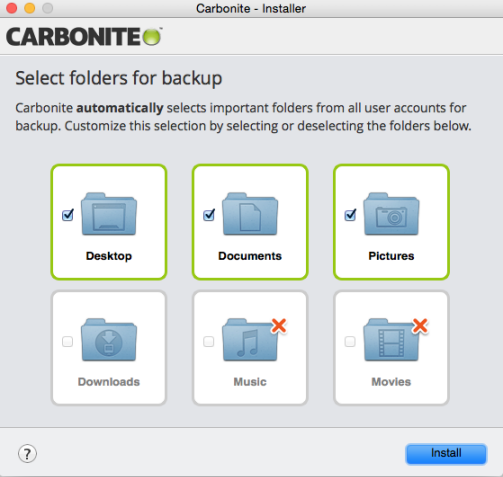
- During a trial, Carbonite does not back up Music or Videos automatically. However, you can select them manually.
- From here, configure Full Disk Access to ensure Carbonite can access and backup your files.
You successfully transferred Carbonite to the computer. Carbonite will scan for files and start backing up within a few minutes.
For more information on your backup status, see How to Tell What Is Backed Up.
Step 2: Configure Energy Saver
The first backup does take time and if your computer goes to sleep or shuts off, the backup gets stalled. For the duration of the first backup, keep your computer plugged and see Hibernation and Sleep Mode for information on how to configure your energy settings.
You successfully transferred Carbonite to the computer and started a new backup.
Files that were not restored will be removed from Carbonite after 30 days of backing up on the current computer.
 Feedback