

Carbonite Post-Restore Checklist (Mac 1x)

Summary:
This checklist will assist you with performing post-restore functions to get your data where it needs to be and resume your backup.
- This article is for Mac 1x - View the Mac 2x article (Not sure?) | View the Windows article
Solution:
The sections below are collapsed. Please click a section title to open / close the appropriate section.
Step 1: Determine if Your Restore is Complete
Once your restore has completed with Carbonite, you will see a pop up from Carbonite indicating the restore is finished. This popup indicates that all of your files have been restored.

If you do not see this pop up, your restore is likely still in progress. You can view the progress of your restore through the Carbonite Preference pane. This will show you the percentage of your selected files that has been restored so far.
Click the Apple symbol in the menu bar and select System Preferences to open the System Preferences window.

Within the System Preferences window, click on the Carbonite icon.
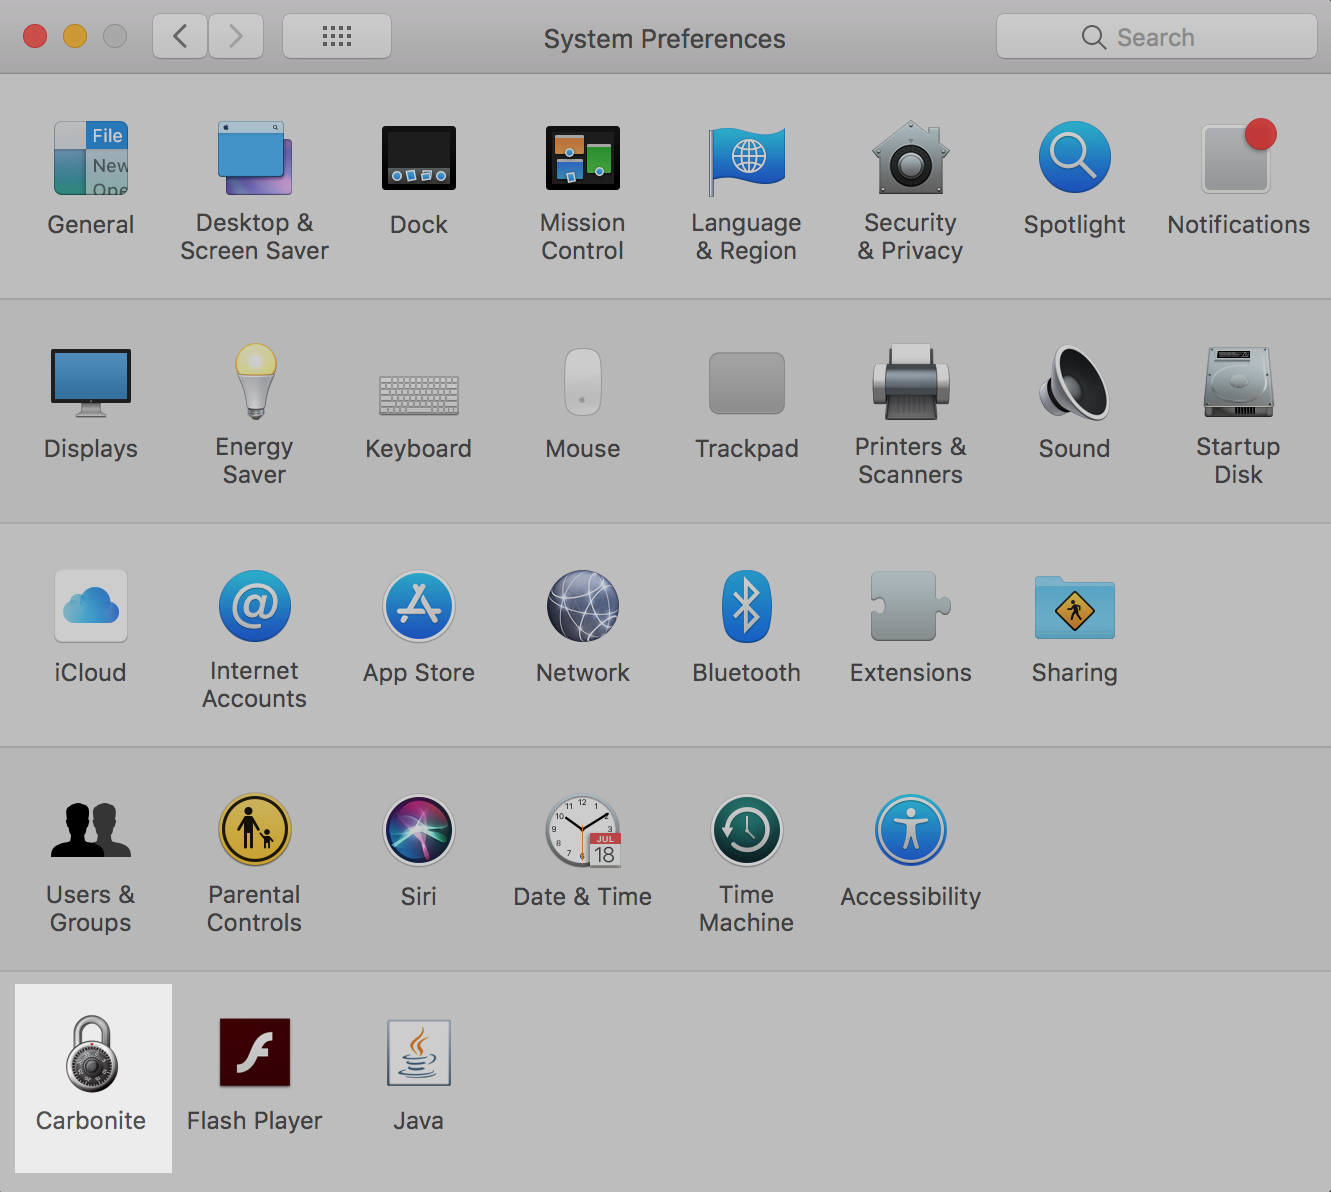
You will see the Carbonite Preferences pane displayed showing the status of your restore in progress.
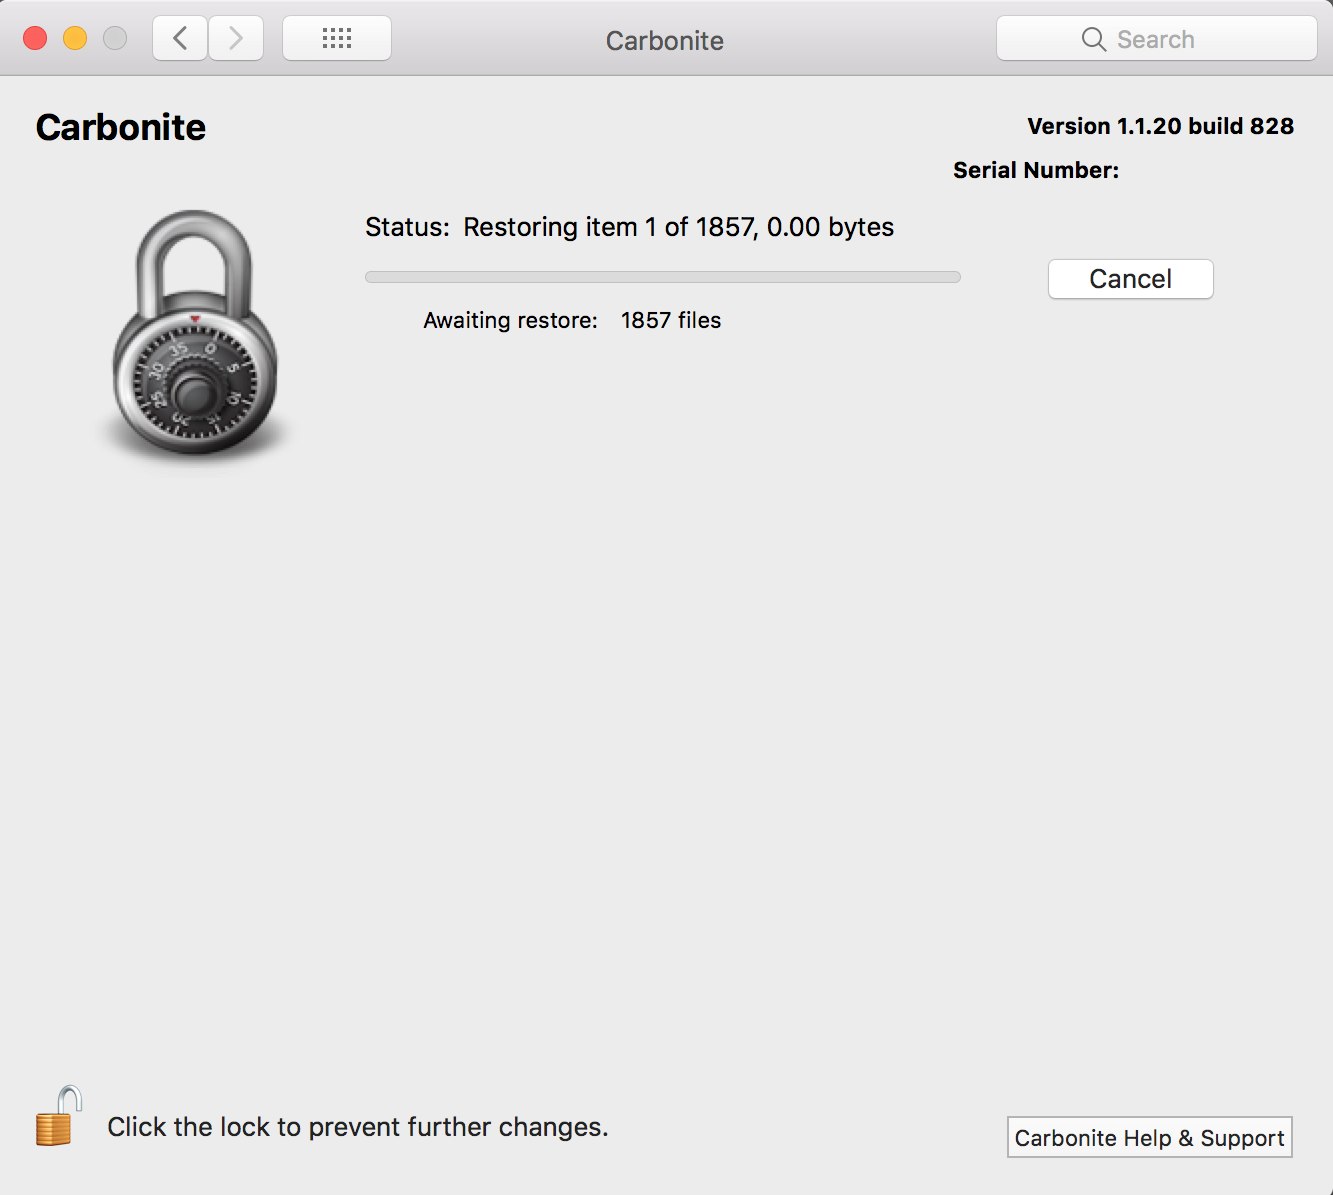
Note: If you see the backup status when you open the Carbonite Preferences pane, then there is no restore currently taking place.
Step 2: Locate Your Restored Files
If you can't find your files after a restore, you can use your computer's Spotlight search feature to quickly track them down.
This is accomplished by clicking the Magnifying Glass in your menu bar and typing the name of the file or folder you're looking for. Your search results will be populated as you type. Clicking a folder in the results will open it in Finder. If you were looking for a file, it would open with the proper program on your computer, provided the required program is installed on your computer.
If your data was restored to an unexpected or unfamiliar location due to differences between the old computer and the new computer, you can drag and drop it to a more suitable location.
Any files that were not restored and are no longer on your computer (or are on your computer and not selected for backup) are kept on the Carbonite servers for 30 or 60 days before they are removed.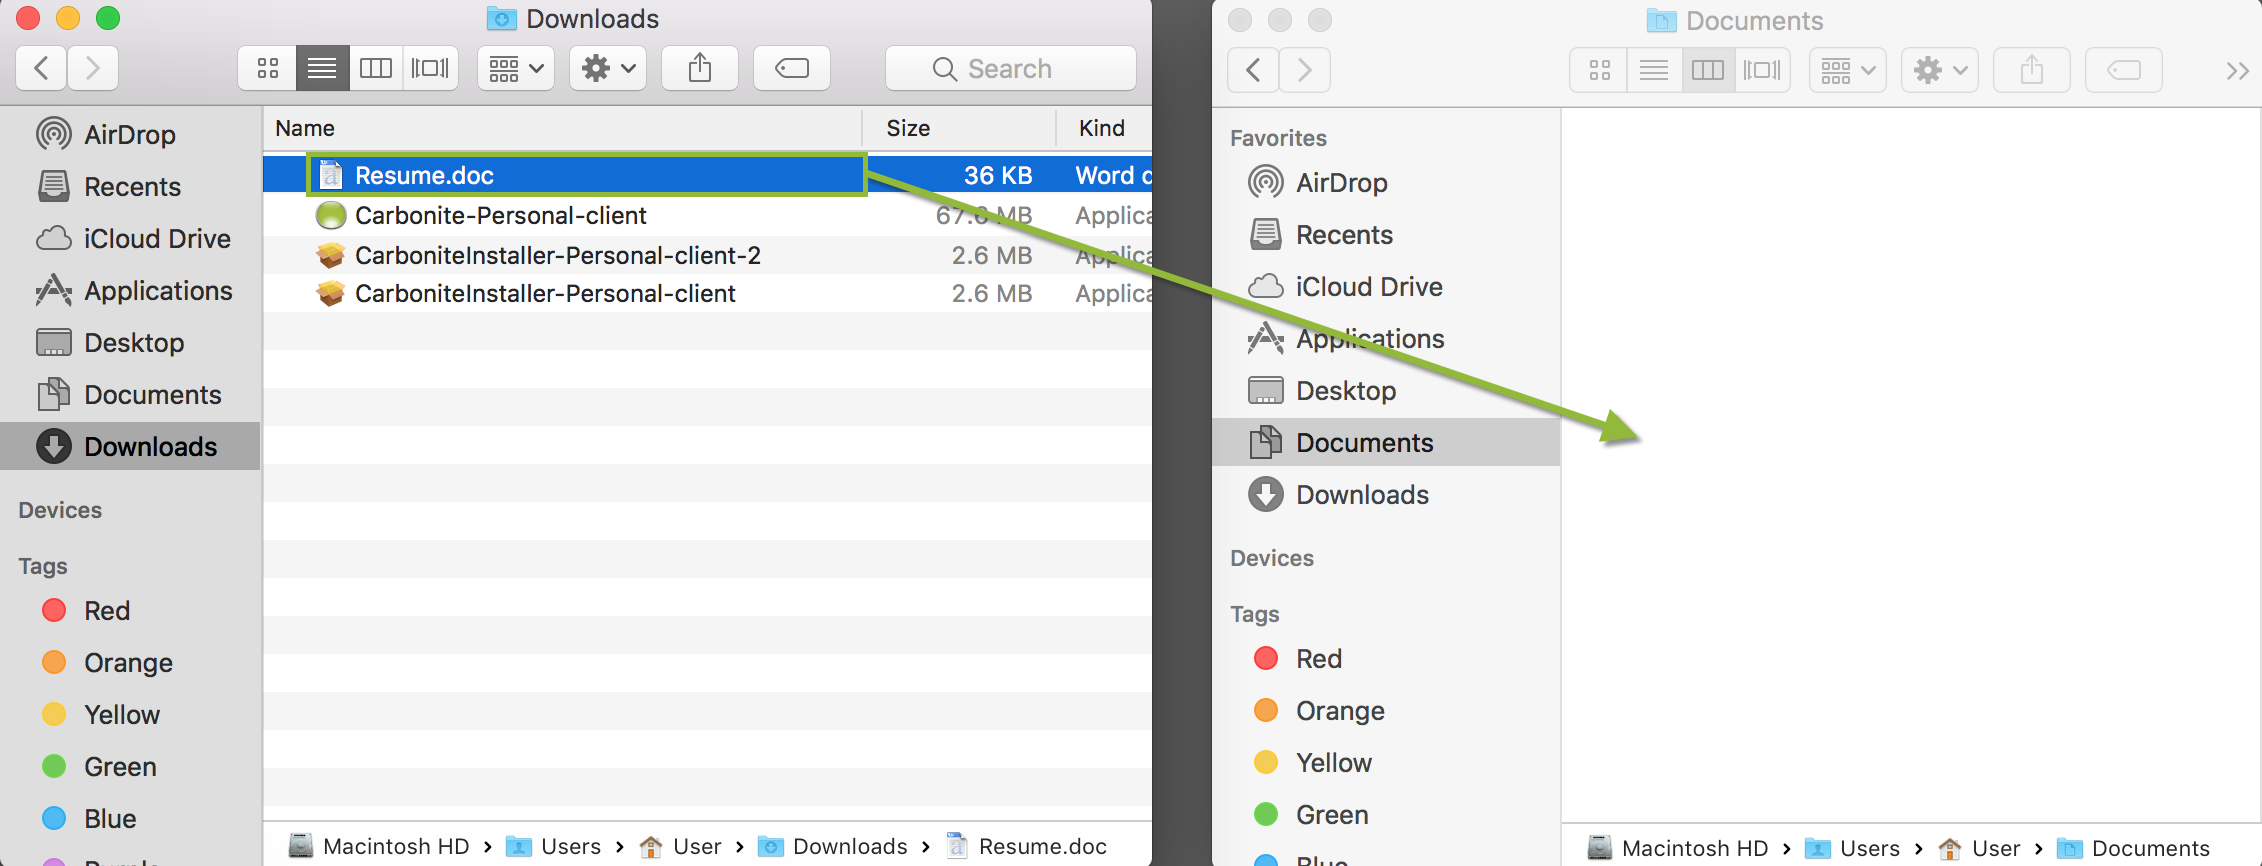
If any errors were encountered with the restore, they will be listed in a Carbonite Restore Errors file.
Step 3: Importing Your Restored Files
Carbonite's first priority is the safe retention and return of your personal data files. Our support staff is fully engaged in this focus to provide the best service we possibly can for all of your Carbonite-related needs. For certain programs, it may be necessary to perform additional steps to import restored data before that data will be accessible. These steps are outside of our expertise, but you can contact Apple Support or a local computer technician.
If you prefer to complete these steps yourself, you can access self-service instructions for importing data into each of the programs listed below by clicking the appropriate link in the Carbonite Instructions column:
| Program | Carbonite Instructions |
| Apple Address Book | Importing into Address Book |
| Apple Mail | Importing into Apple Mail |
| Apple Calendar | Importing into Apple Calendar with iCloud Importing into Apple Calendar without iCloud |
| Apple Photos | Importing into Apple Photos |
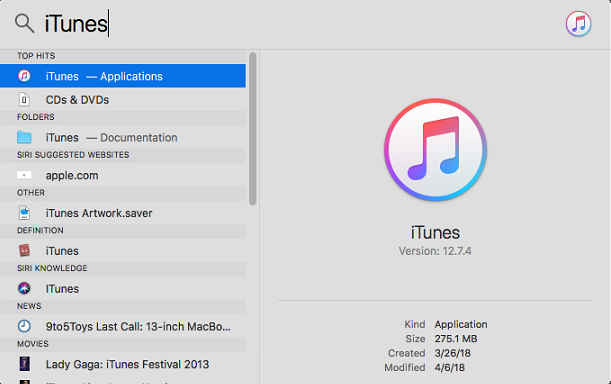
| iTunes | Importing into iTunes |
| Mozilla Firefox | Importing into Firefox |
| Microsoft Outlook 2016 | Importing into Microsoft Outlook |
| Safari | Importing into Safari |
For any additional questions or concerns about a specific program, please check with the vendor of that program.
Step 4: Exiting Recover Mode
Recover Mode through the Carbonite Preference pane. Leaving Recover Mode will scan your system for any new or changed files and then start your backup.
Within the Carbonite Preference pane, click on the Backup Is: drop-down box and select Enabled.
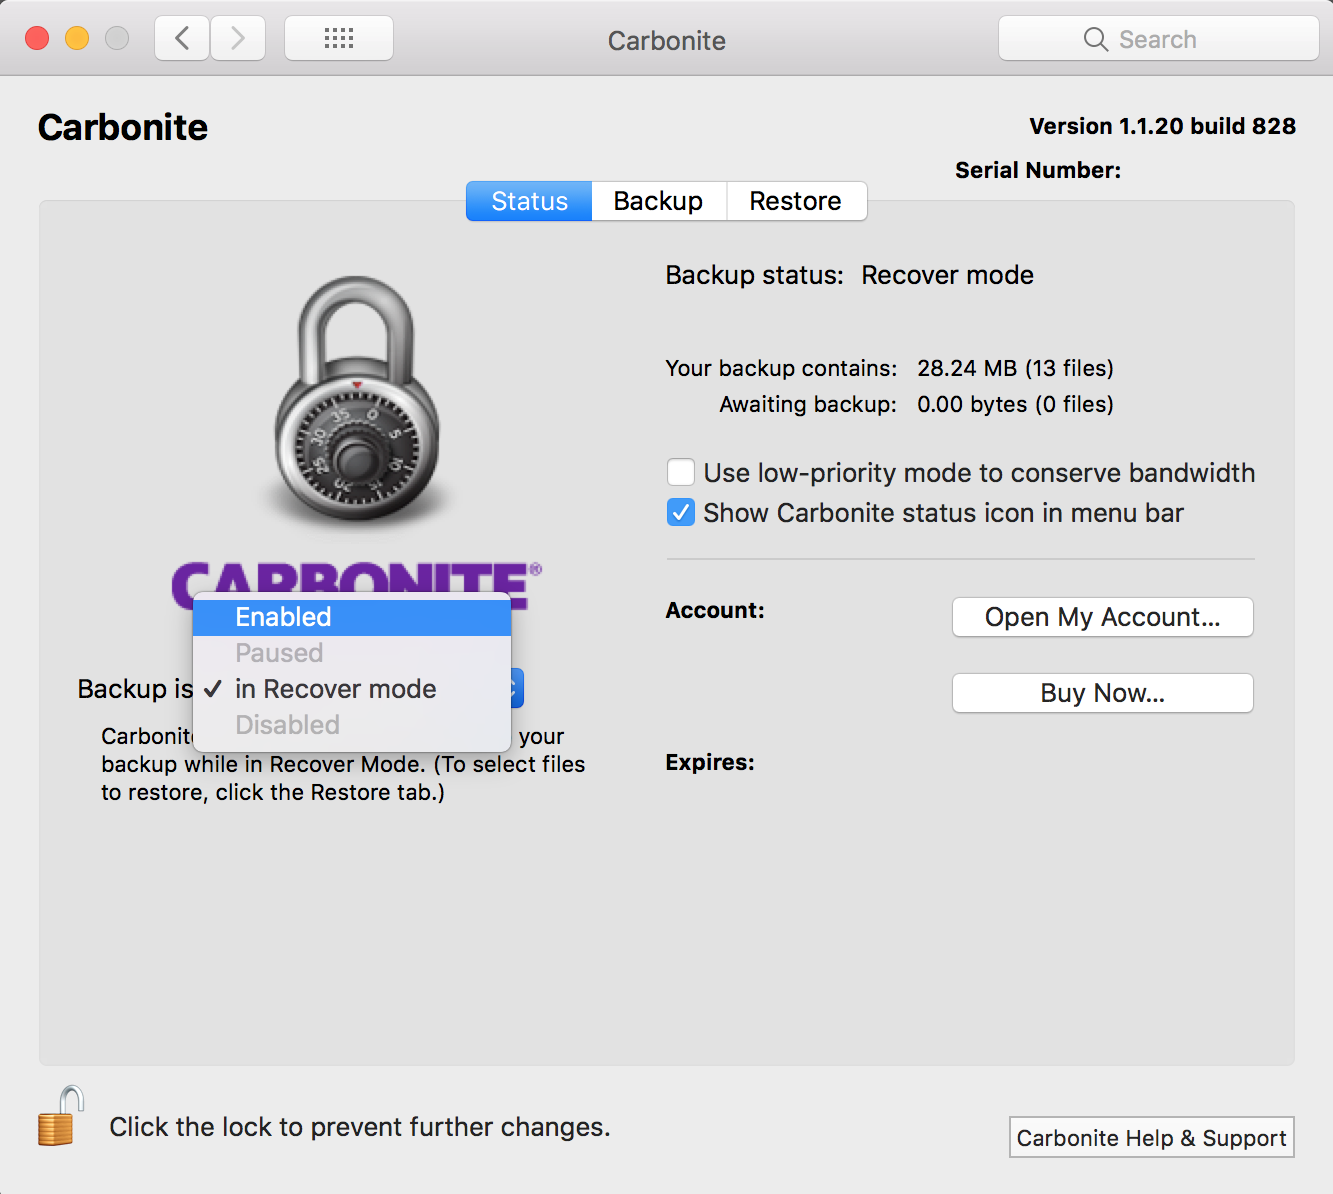
You will receive a pop-up message about leaving Recover Mode. Click Proceed to exit and resume your backup.
Any files that were not restored and are no longer on your computer (or are on your computer and not selected for backup) are kept on the Carbonite servers for 30 or 60 days before they are removed.
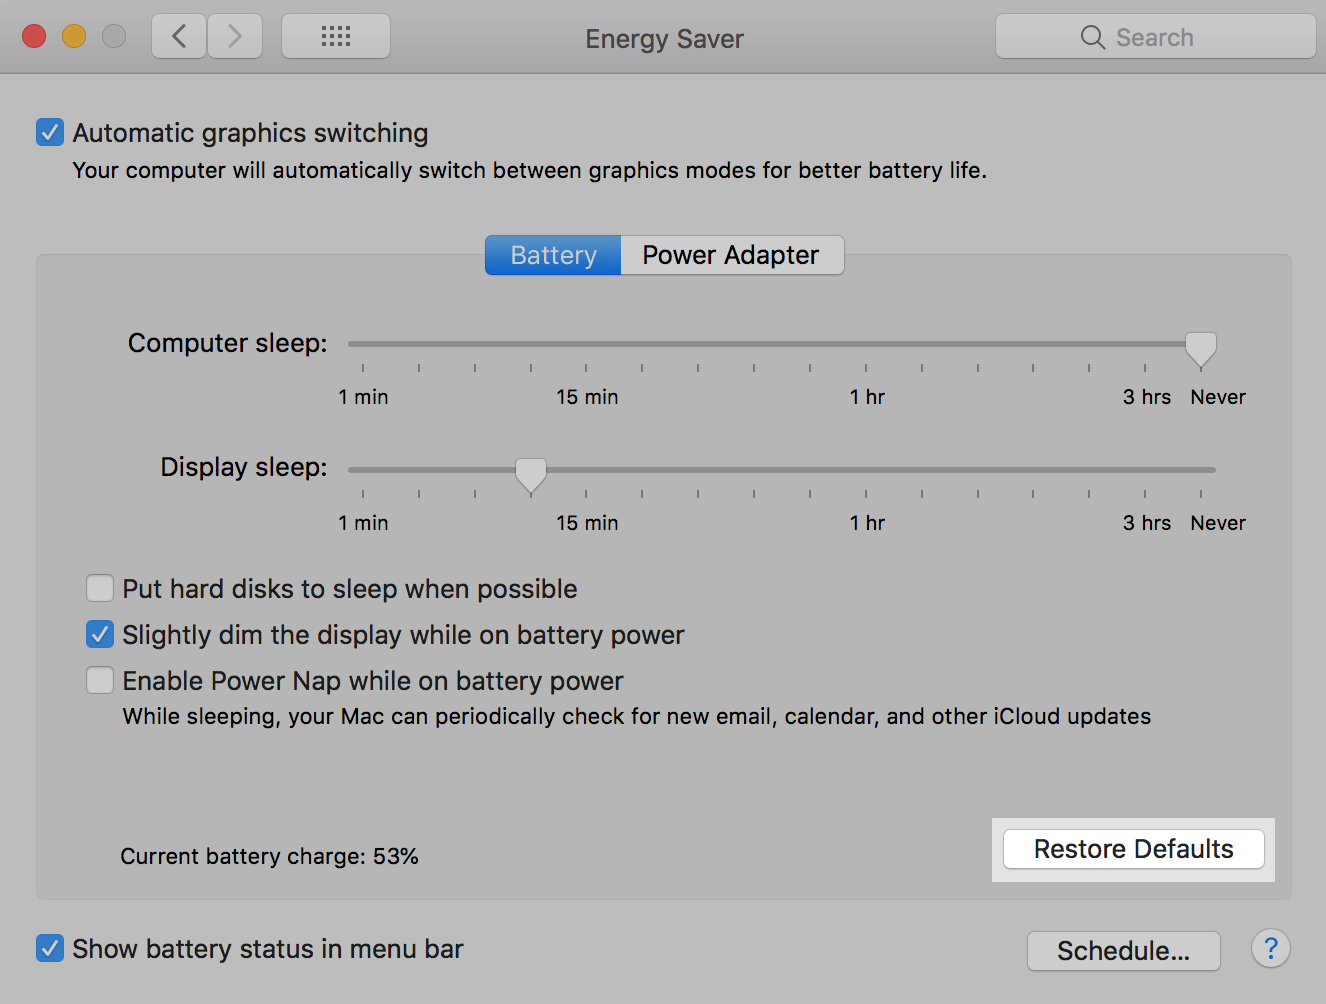
Step 5 (Optional): Adjust Power Settings
If you had adjusted your power settings to allow the computer to remain on for a quicker restore, you can use the instructions within this section to set them back.
Click the Apple symbol in the menu bar and select System Preferences to open the System Preferences window.
In the System Preferences window, click on the Energy Saver icon.

Click the Restore Defaults button to place the settings back to default.
 Feedback