Installing Carbonite Safe and Initial Backup Selections (Mac 1x)
Summary:
After you set up your Carbonite Safe account, you can install Carbonite to start backing up your files.
If you have installed Carbonite on your computer before, you will need to reinstall Carbonite Safe instead.
This article applies to:
| Carbonite Plans | Products | Platforms | Version |
| Basic, Plus, and Prime (Not sure?) | Safe (Not sure?) - View the Safe Pro article | Mac - View the Windows article | 1.x (Not sure?) - View the Mac 2.x article |
Solution:
- Sign into your account at https://account.carbonite.com from the computer you want to back up.
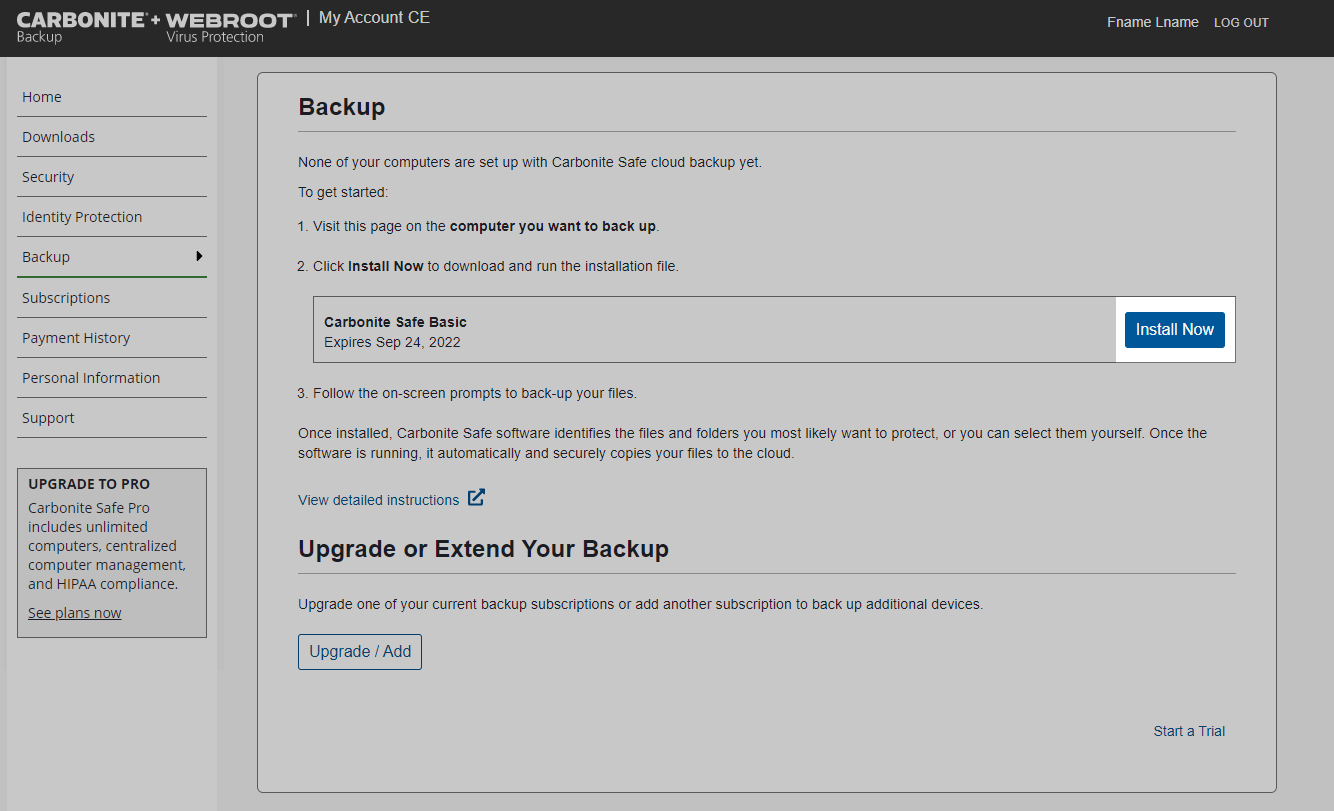
- Click Backup.
- From here, click Install Now.
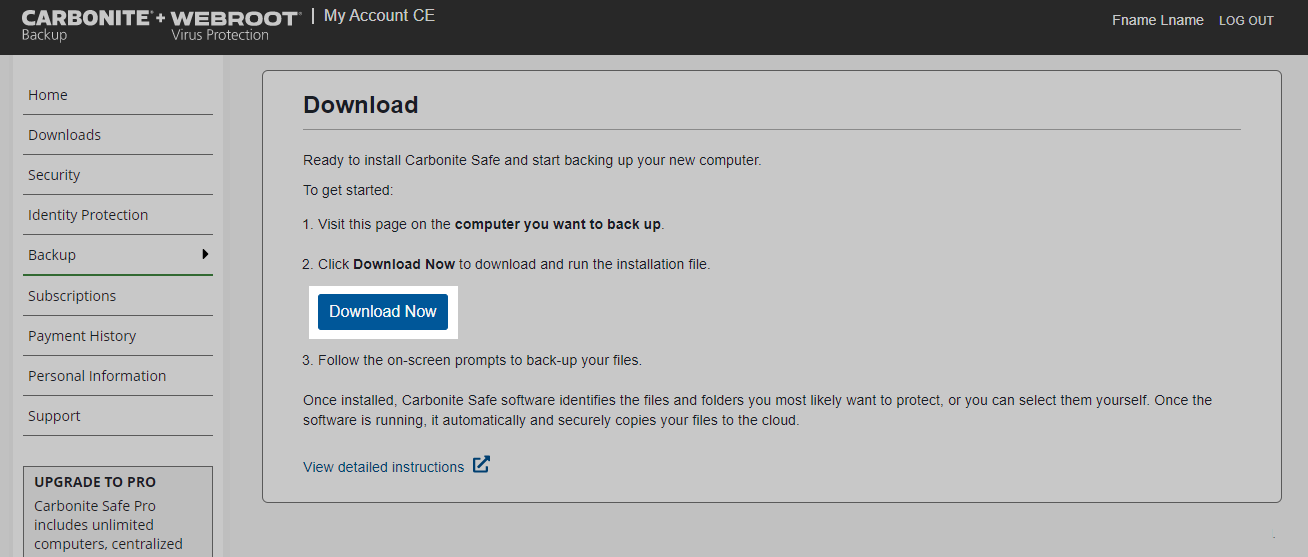
- Download the Carbonite setup file by clicking Download Now.
- Depending on your web browser, use the instructions below to open Carbonite.
- Google Chrome: The downloaded file appears at the bottom left of the browser. Double-click the Carbonite file to open it.
- Mozilla Firefox: Click Save in the pop-up message that appears to start the download. When the download completes, click the arrow in the top right corner of your browser to view your downloads. Double-click the Carbonite file to open it.
- Safari: When the download completes, click the arrow in the top right corner of your browser to view your downloads. Double-click the Carbonite file to open it.
- Within the initial Install Carbonite screen, click Continue.
- Agree to Carbonite's Terms of Service, select an install location, enter your Mac password, and click Install Software.
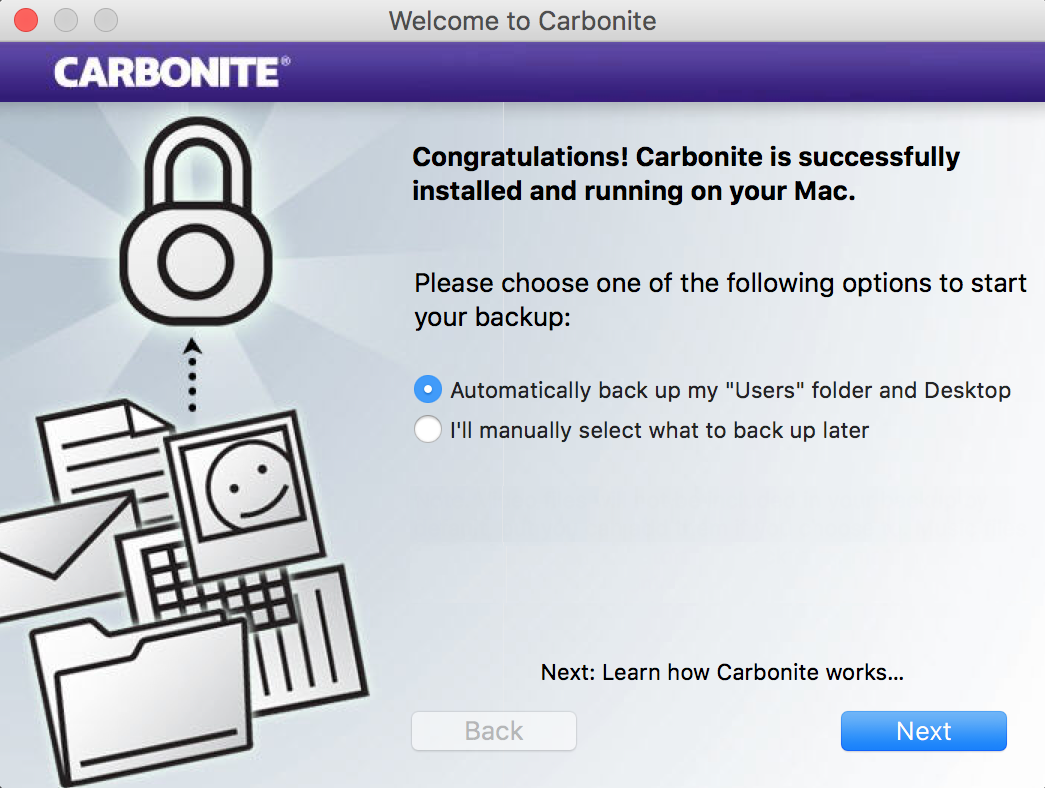
- Choose your backup settings:
- Automatically back up my “Users” folder and Desktop: Carbonite backs up your /Macintosh HD/Users folder, which holds your documents, pictures, music, and other important files that you may wish to back up.
- I’ll manually select what to back up later: Carbonite doesn’t select anything for backup. You will have to manually select the files you want to backup.
- During a trial, Carbonite does not back up Music or Videos automatically. However, you can select them manually.
- After you configure your backup settings, click Next to finish installing Carbonite and begin backing up your computer.
- From here, configure Full Disk Access to ensure Carbonite can access and backup your files.
Regardless of whether you choose automatic or advanced settings, you can select files for backup at any time.


 Feedback