

Restoring All of Your Files for Carbonite Safe Backup Pro

- This article is for Windows - View the Mac article
Summary:
The Carbonite Restore Process
When you restore your files, you download them from our cloud to your computer. You can restore all of your files from your backup using the Carbonite Safe software.
If you already started a restore, you can determine the restore status.
Solution:
The sections below are collapsed. Please click a section title to open / close the appropriate section.
Signing in to your account and installing Carbonite is the first step to restoring all of your files. This section will walk you through this process. If Carbonite is already installed on your computer, you may skip ahead to the next step.
From the computer you would like to restore the data to, sign into your account at https://account.carbonite.com or with the button below.
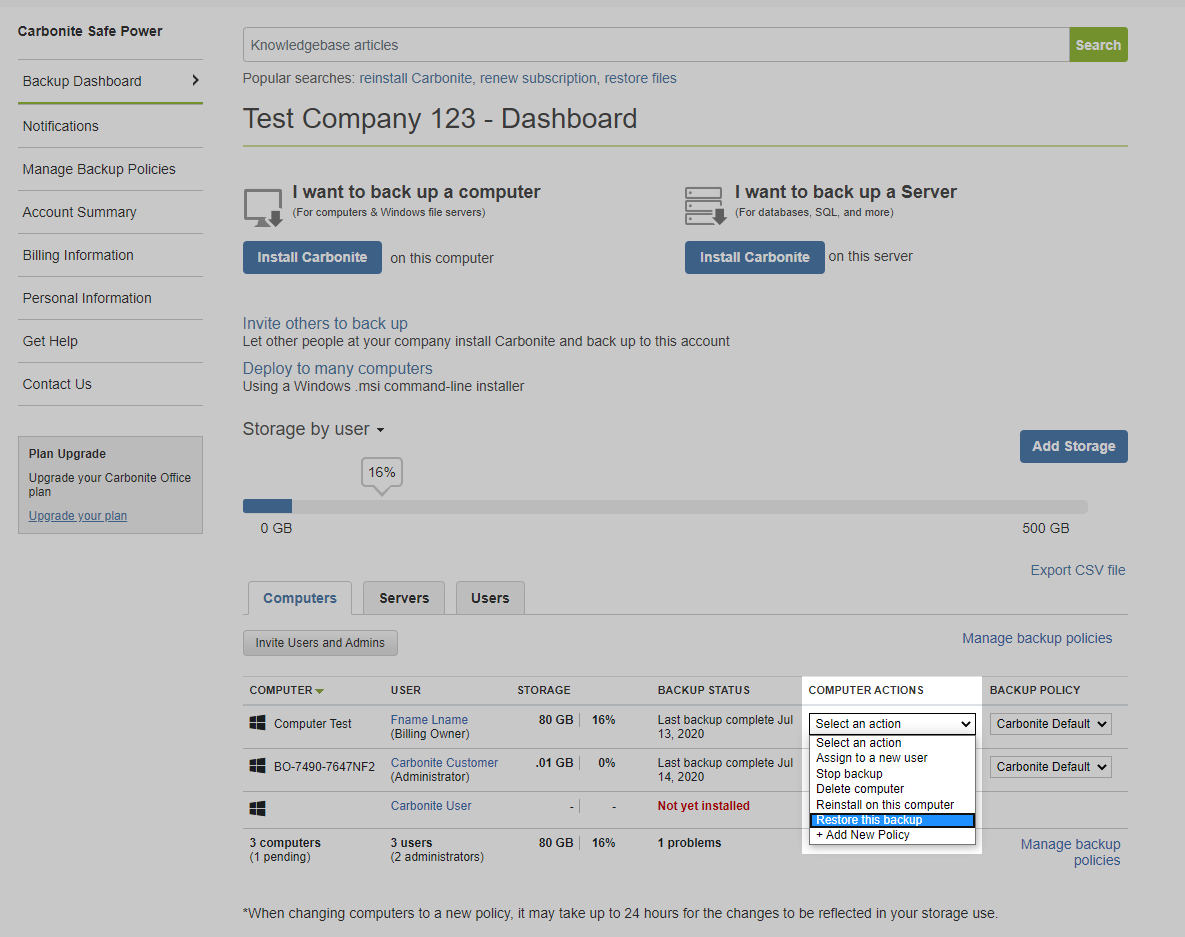
Locate the computer that you wish to restore and select Restore this backup from the Computer Actions dropdown menu.
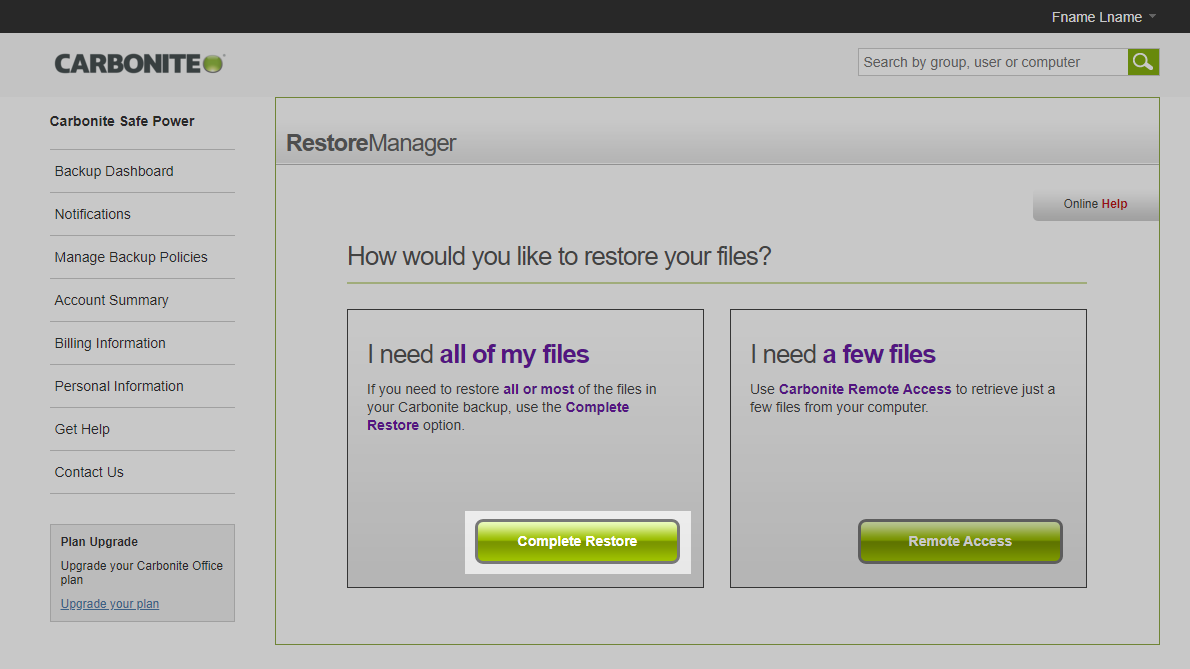
Click Complete Restore on the next page.
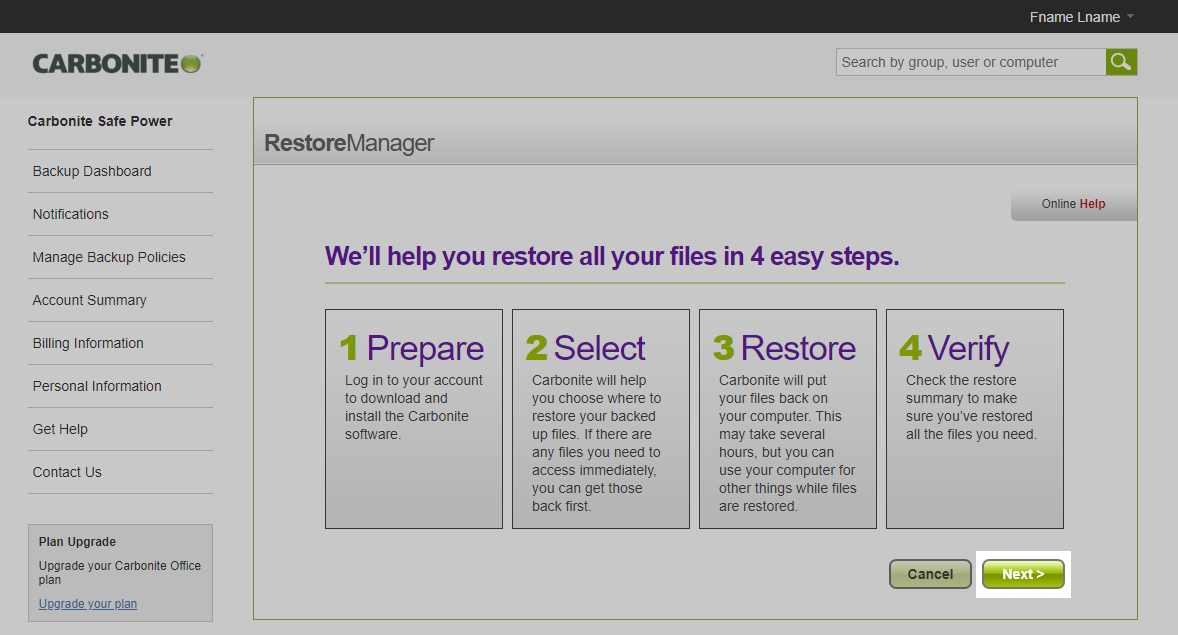
You will be presented with the steps of the restore. Click Next>.
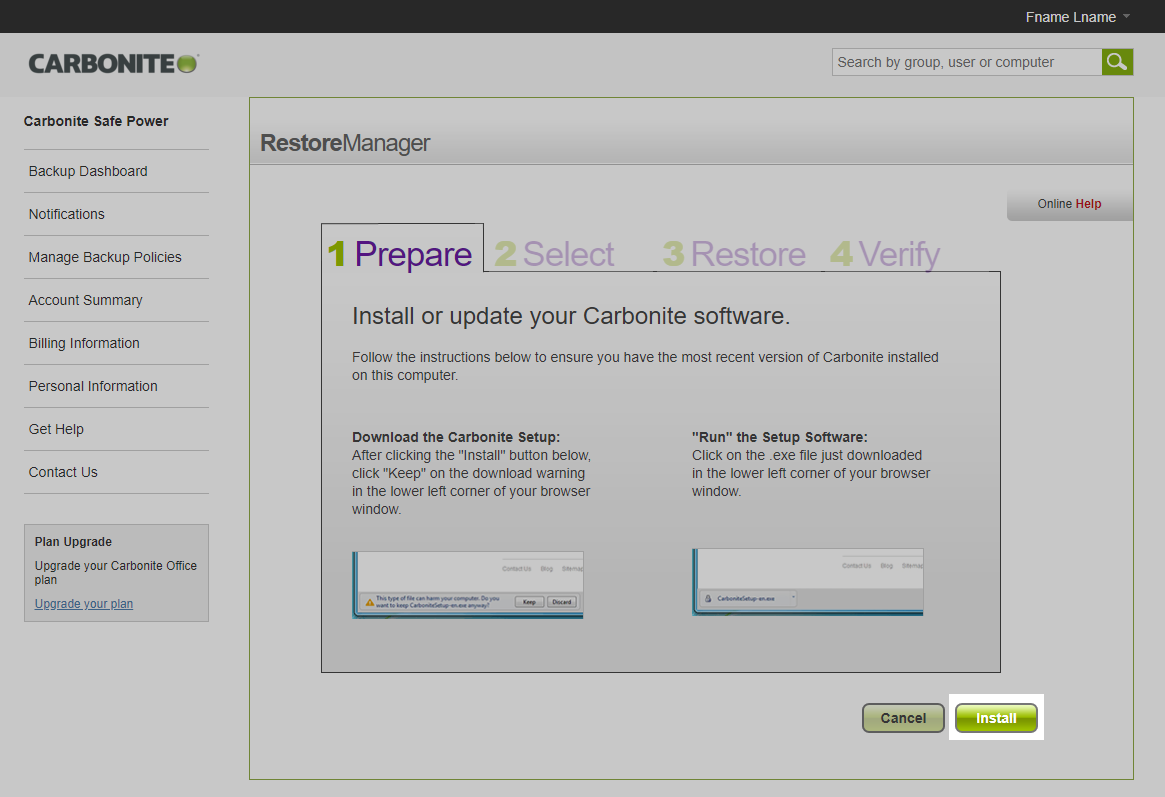
Then click Install to download Carbonite.
Depending on your web browser, use the instructions below to open the downloaded file.
- Within Google Chrome, the Carbonite icon will appear in the bottom left of your screen. Click the file to open it.
- Within Mozilla Firefox, a message will appear asking if you would like to save the file. Click Save File, click the arrow in the top right corner of your screen, and double-click the file to open it.
- Within Microsoft Edge or Internet Explorer, click Run at the bottom of the screen to open the Carbonite file.
A User Account alert will appear. Click Yes to continue.
The Carbonite Terms of Service will appear. Click I agree to start the installation process.
Note: If you don't see the Terms and Conditions screen of the installation wizard after running the setup file, check your taskbar for the Carbonite icon:

Click this icon to make the Terms and Conditions screen appear. If the installation wizard gets hidden again at a later step, you can always click this icon to bring it back up.
After accepting the Terms and Conditions, a progress bar will appear. As it fills up, you'll see helpful information about Carbonite.
- The progress bar will disappear when Carbonite finishes installing.
- Carbonite will then connect to your backup on our servers automatically.
- Please note that this may take a couple minutes.
- After the connection is established, the Restore Manager will open.
Within the Restore Manager, you will be presented with two options:
- Let's get started - Selecting this option will allow you to choose which hard drive(s) and Windows user accounts Carbonite restores. You will also have the ability to select the destination location of your restored files.
- Download to my desktop - Selecting this option will download all your files into a folder on your desktop.
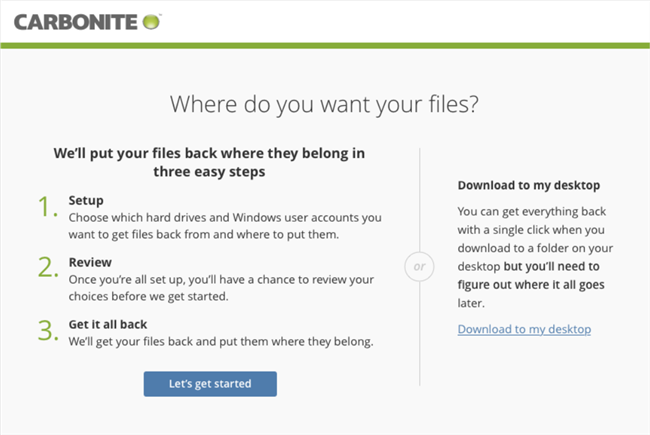
If you choose Let's get started, you may proceed to the next step.
The Restore Manager will walk you through restoring your files. If the Restore Manager is open already, skip to the Select Hard Drive(s) to Get Files Back From section below. Otherwise, let's open the Restore Manager:
- Double-click the Carbonite icon on your desktop to open the Carbonite application.
- Within the Carbonite application, click the Get my files back link.
- Click the Get all of my files button.
- Follow the on-screen instructions within the Restore Manager.
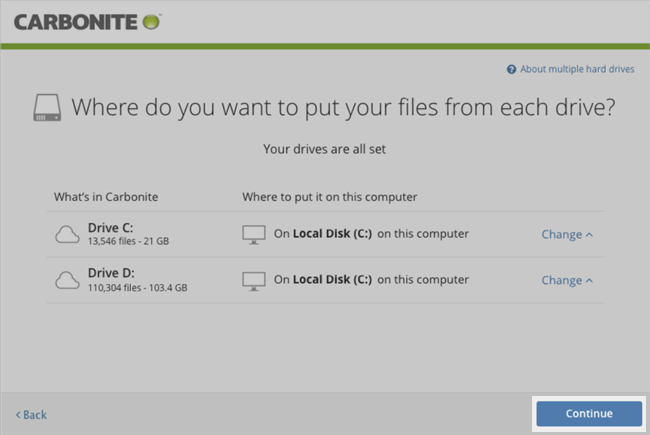
Select Hard Drive(s) to Get Files Back From
If you had backed up multiple hard drives with Carbonite, you will be given the option to select which drive(s) you would like to restore your files from.
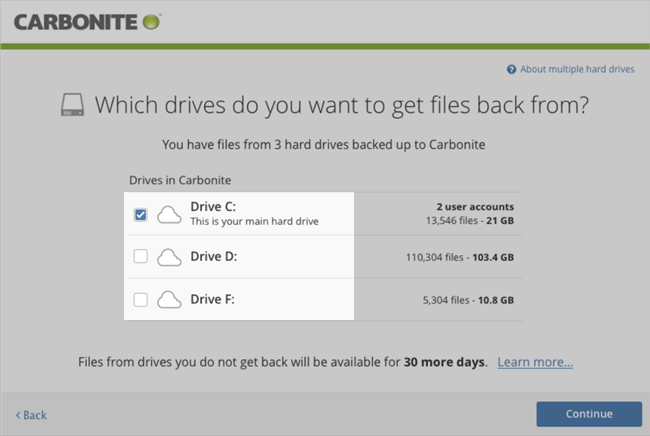
After making your selection, click Continue to proceed.
Select Restore Location
If a hard drive on your old computer no longer exists on your new computer, you can select a restore location on your new computer.
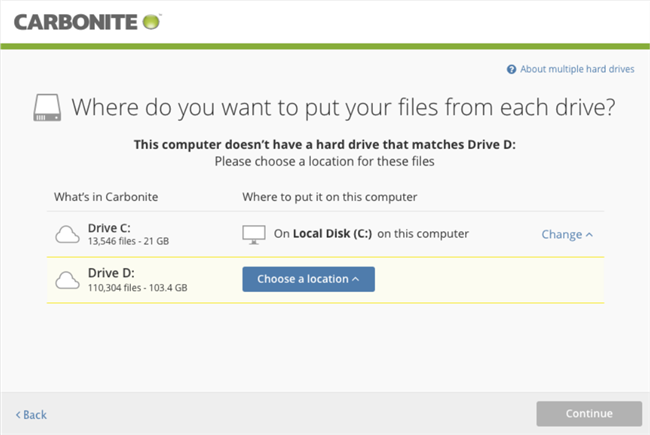
From the Choose a location drop-down menu, you will be presented with available restore locations on your new computer.
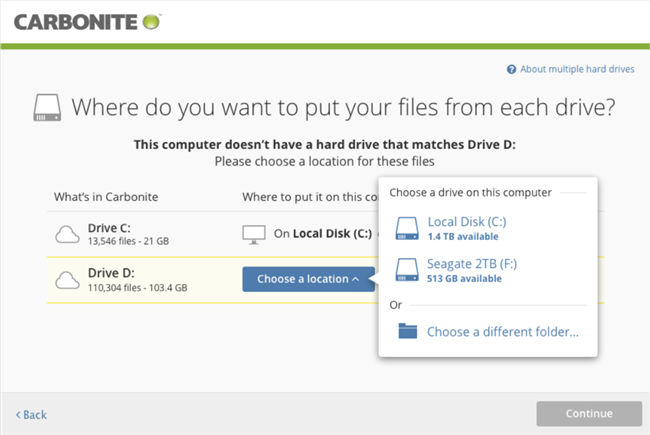
After making your selection, click Continue to proceed.
Match User Accounts
Here you can choose how Windows User data in your backup will be restored.
- The name of each user account will appear on the left under What's in Carbonite.
- If any of the Windows user accounts on your old computer don't exist on your new computer, a Choose a location drop-down menu will appear to the right. This will allow you to choose a restore location for that user.
Carbonite attempts to automatically match the backed up users to user accounts on the current computer. If it finds a match, Carbonite will select the matching username automatically.
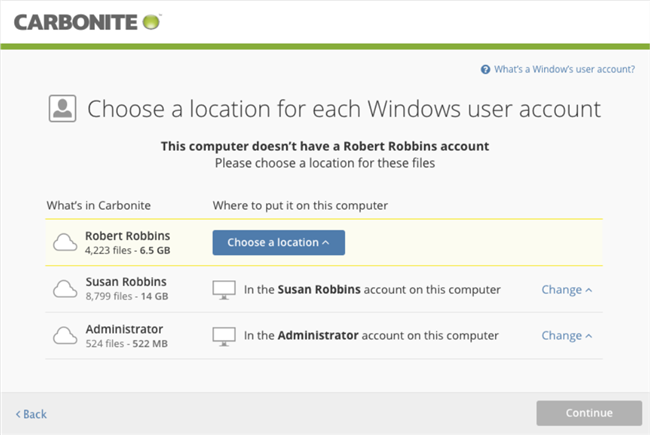
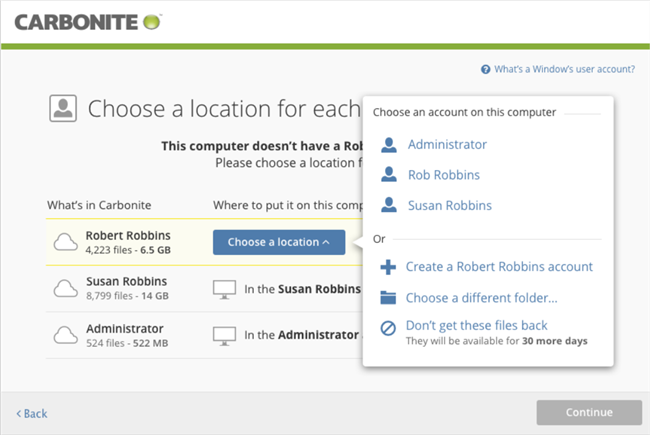
For a user account that no longer exists on your new computer, you can manually choose its restore location in the drop-down menu under Where to put it on this computer :
- Choose an account on this computer - This will list all Windows user accounts on the new computer you can restore your files to.
- Create a Windows user account - This will create the Windows user account on your new computer that existed on your old computer.
- Choose a different folder - This will restore the files to a folder of your choice on your new computer.
- Don't get these files back - This will not restore the data from that Windows user account.
After making your selection, click Continue to proceed.
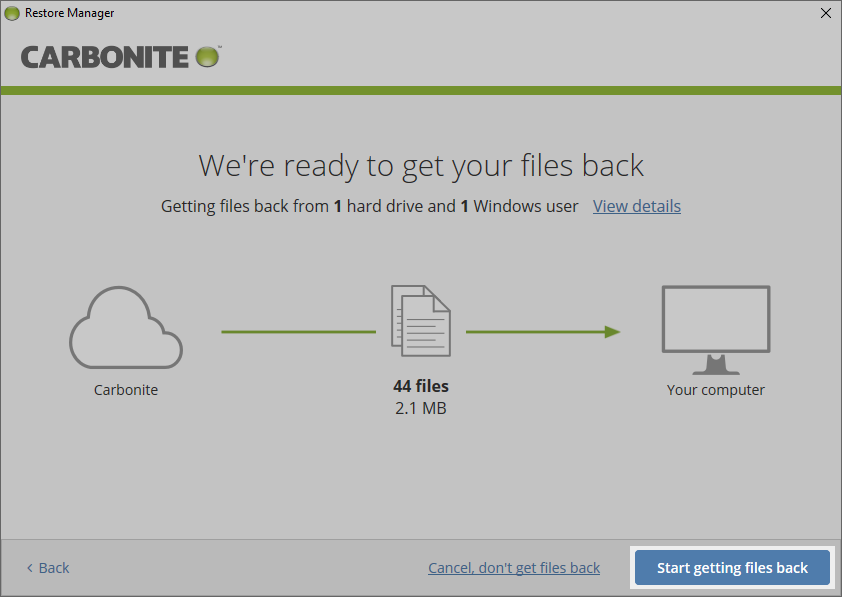
Review Restore Selections and Start Restore
You will be presented with your restore choices. Click View details to review your restore selection. Once you're satisfied with your choices, click Start getting files back.
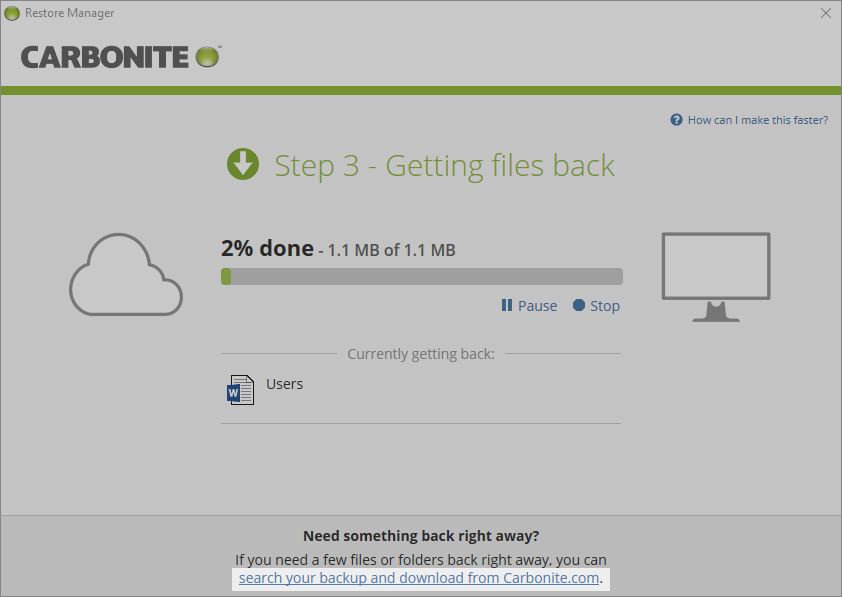
View Restore Progress
Once your restore has started, you will be able to review the overall and individual progress of your restore. The progress of your restore will be displayed as a percentage. Information about the file currently being restored will also be displayed.
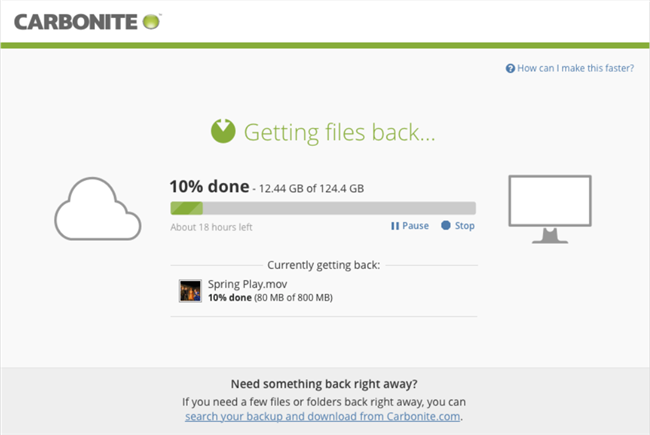
You may see screens indicating that your backup is "paused for safekeeping."
- This is the correct setting during restores and is perfectly normal.
- Please stay in recover mode while you are restoring your files to ensure everything progresses smoothly.
It is strongly recommended that you keep your computer powered on to help restore as quickly as possible. You can find out more information about this in the Configure Your Power Settings section below.
Restore Priority
If you need a few files or folders back right away, click the search your backup and download from Carbonite.com link.
You will be directed to log into your Carbonite account to access the Anytime Anywhere Access feature.
To help your restore finish as quickly as possible, we recommend that you configure your power settings and Windows Automatic Updates so your computer doesn't sleep or restart. If your computer restarts for any reason, your restore will resume from where it left off when it reconnects to the Carbonite servers, but it will delay the process
Your restore will progress automatically as long as your computer is powered on and connected to the internet.
- You can continue to use your computer as needed, but please try not to move or delete any restored files while the restore is happening to avoid potential issues.
- After the restore is finished, please see our post-restore checklist article for instructions on what to do next.
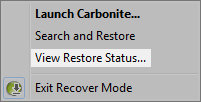
You can close the Restore Manager window during the restore process.
- Your restore will simply continue in the background.
- You can reopen the Restore Manager by right-clicking the Carbonite icon in the notification area and selecting View Restore Status....
Note: The View Restore Status... option will only appear after the restore queue is created and file restores are under way. If you do not see this option shortly after beginning a restore, it should appear within a few minutes.
- After installation, you may see popups on your screen indicating that your backup is paused for safekeeping.
- This is perfectly normal and helps preserve your backup so you can safely restore your files.
- The Restore Manager wizard allows you to restoreTo download files from Carbonite's servers to your computer. your entire backup to your computer.
- If your restore is in progress but appears to be stuck, you may need to troubleshoot the restore for step-by-step help in diagnosing and resolving the issue.
- Do NOT exit Recover Mode at any time while you are restoring files.
- You should only exit Recover Mode when you have restored all of your files and are ready to start backing up again.
- The Restore Manager will prompt you to resume backup after everything is complete.
- Do NOT delete any restored files or move/edit/delete any restored folders until the full restore operation is complete.
- You can safely open, edit and save a restored file while other files are still restoring.
 Feedback