

Restoring Microsoft Exchange Online hosted for Office 365

- This article is for Windows only
Summary:
Any number of mailboxes can be selected for restore, including individual mailboxes. Mailbox contents can be restored to the original server, an alternate server, to a local Exchange server, or to disk. For all options except restore to disk, mailbox contents can be restored to a mailbox with the same name as the original or to an alternate mailbox with a different name.
Restores to disk can be done as .pst files (one for each mailbox) or as files (.eml, .png, etc) that correspond to each item within the mailboxes restored. For more information about restoring as files, please refer to How to Use Restored Files after an Exchange Mailbox Restore to Disk.
Solution:
Restore Requirements
The following requirements must be met, whether restoring to the original computer or to an alternate computer:
- The amandabackup / CarboniteUser user must have full access to the folder where the backups are stored.
- For cloud backups, this is the chosen Download Folder.
- For local backups, this is the folder where the backups are stored on the local disk.
- If the backups are stored in a network location, amandabackup / CarboniteUser must have access to the network folder. Please refer to How to Use External or Mapped Network Drives with CSSB.
- Likewise, the amandabackup / CarboniteUser user must have full access to the folder(s) to which the backups are being restored.
Additional Restore Requirements
The following additional requirements must be met for Exchange Online Mailboxes:
- An administrator account must be specified within CSSB. This user must have the Global Administrator role. The username must be in the User Principal Name (UPN) or email format, such as UserName@Domain. For example, Admin@company.com and username@company.onmicrosoft.com are both in the correct format.
- The Exchange Impersonation right must be granted to this administrator account.
- This right can be granted to an account from the Admin page in the Office 365 portal.
- The Exchange Impersonation right must be granted to this administrator account.
- The Exchange Discovery Management role must be granted to this administrator account.
- This role can be granted to an account from the Admin page in the Office 365 portal.
- When restoring to a local Exchange server, a server URL must be specified. The system performing the restore must be able to reach and resolve the server URL.
- When restoring to an Exchange Online account, the system performing the restore must be able to connect to the Office 365 account. Connectivity can be verified from any browser.
- Restore to an Alternate Mailbox is allowed with three exceptions:
- An alternate mailbox cannot be specified for restores to disk. The files will always restore to a folder with the same name as the original mailbox.
- An alternate mailbox is not allowed when Restore All is selected, even if the backup contains just one mailbox.
- An alternate mailbox is not allowed when more than one mailbox is chosen in Restore Select.
- When restoring to .pst files, Microsoft Outlook must be installed on the system.
Please choose the scenario that best fits your situation.
Restoring to the Original Computer
If Carbonite Safe Server Backup is already installed on your computer, you can open the user interface and begin restoring your mailbox contents to your computer.
Restoring the Backup Data
To restore Exchange Online mailbox contents, please follow these steps:
- Navigate to the Restore page and select the backup run associated with the backup set you want to restore.
- In the Restore Point drop-down menu, CSSB will show you all the relevant backup images for this restore operation.
- After confirming your restore settings, click Restore Now to start the restore process.
Restoring to a Different Computer
You can restore your Exchange Online mailbox contents originating from one computer to a different computer. This method is mostly used to create a clone of the original system. It is recommended that you install the same Windows Operating System (with the same service packs) on the restore computer as was installed on the original computer. This procedure requires some additional steps before you can launch the actual restore process. The steps are as follows:
The sections below are collapsed. Please click the section title to open / close a particular section.
For complete instructions on Installing Carbonite Safe Server Backup and Importing the Cloud Certificate, please refer to the knowledge base articles linked below:
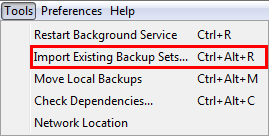
To import existing backup sets, select Tools from the menu option and click Import Existing Backup Sets.
A Import Existing Backup Sets window will appear. You will have the option to select Import Backup Sets from Cloud or Import Backup Sets from Local Directory.

Within this screen, specify information for the following fields:
- Cloud Location - This field will only be visible when the radio button for Import Backup Sets from Cloud is selected. CSSB can back up your data to data centers across the globe. The default selection is All Cloud Locations.
- Host Name - This refers to the host name of the original computer, without the domain name.
- Enter a valid hostname to import backup sets only for the host provided.
- Enter an * (asterisk) to import backup sets for all of the computers which were backed up using CSSB.
- Leave this field blank to use the hostname of the computer on which CSSB is installed.
- Backup Set Name - This refers to the name of the backup set on the original computer when the backup was performed.
- Leave this field blank to import all backup sets.
- Use an * (asterisk) as a wildcard.
- Enter just an * to import all backup sets.
- Enter exchange* to import all backup set names that begin with exchange, such as exchangebackup, exchangeone, etc.
- The backup set name field is case sensitive.
- Restore Location - Information about the backup sets must be downloaded to the local computer temporarily as part of the Import Existing Backup Sets process. This field allows you to specify a temporary location on the local computer where the information is kept.
- Backup Data Location - This field will only be visible when the radio button for Import Backup Sets from Local Directory is selected. It refers to the directory in which the local backups are stored.
- You must specify the exact folder in which the local backups are stored. Sub-folders will not be scanned for backups.
Once the backup sets have been successfully imported by CSSB, you can follow the normal restoration steps outlined in Restoring the Backup Data.
 Feedback