

Importing the Cloud Certificate

- This article is for Windows only
Summary:
After creating an account and installing Carbonite Safe Server Backup, the cloud certificate will be available for download. To start backup operations to the cloud, download the certificate from your account and import it from the CSSB user interface.
Note: The cloud certificate will also have to be imported to perform other restore operations from the cloud.
Solution:
To download and import the cloud certificate, sign in to your account at https://account.carbonite.com.
Click the Servers tab, and click the Download backup certificate button.

An installation page will appear. You must select the version of Windows running on the server in order to get the correct Cloud Certificate.

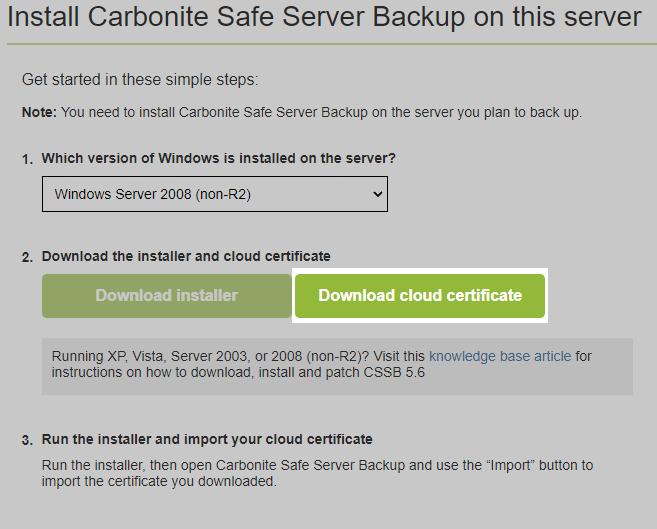
The certificate file is called cloud.carbonite. Note: you must download the correct certificate. Any attempts to import the newer Cloud.opentext certificate will fail.
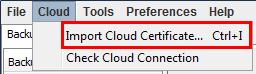
After downloading the cloud certificate, launch Carbonite Safe Server Backup. Within the user interface, select Cloud from the menu option and click Import Cloud Certificate.
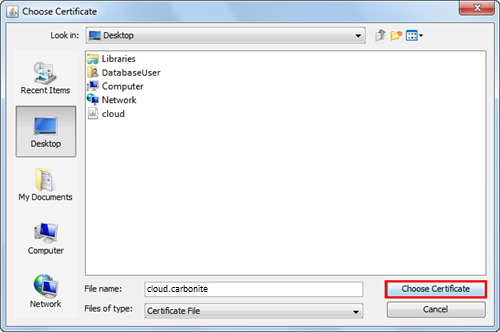
A Cloud Certificate window will appear, allowing you to browse to the location of your cloud certificate (called Carbonite.opentext). Click the Browse button to select and upload your downloaded certificate.

A Choose Certificate window will appear, allowing you to select your cloud certificate. Click Choose Certificate to proceed.
Once your cloud certificate has been successfully uploaded, you will receive a notification message.
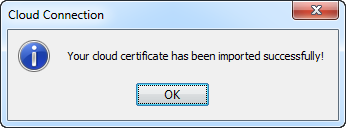
You can now perform backup or restore operations to the cloud.
 Feedback