Installing Carbonite Safe Backup Pro and Initial Backup Selections (Mac 2x)
Summary:
After the Carbonite Safe Backup Pro administrator completes their registration, they can sign into their account and install Carbonite on their computer.
This article applies to:
| Carbonite Plans | Products | Platforms |
| Core, Power, and Ultimate plans (Not sure?) | Safe Pro Version 2x (Not sure?) | Mac |
Solution:
- Sign into your Carbonite account as an administrator at https://account.carbonite.com or with the button below.
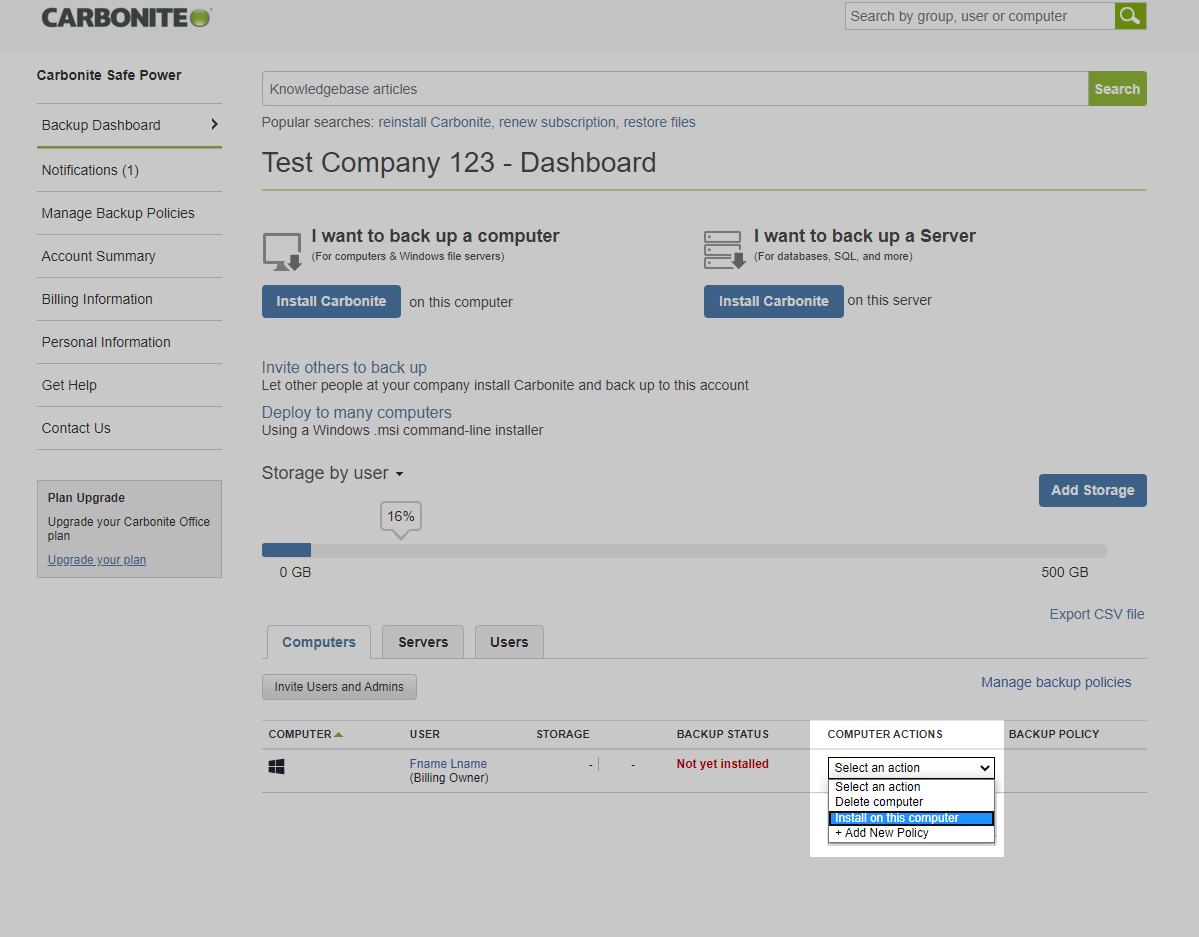
- From the Computer Actions dropdown, select Install on this computer.
- Click Download Now and follow the instructions to download and install Carbonite on your computer.
- During the installation process, Carbonite will prompt you to select Automatic Settings or Advanced Settings.
- Automatic Settings selects Carbonite’s recommended user files and folders for back up.
- Advanced Settings does not select anything for backup. You will need to manually select the files and folders you wish to back up.
- Desktop - This option selects your Desktop folder to be included in your backup.
- Documents - This option will select your Documents folder to be included in your backup.
- Pictures - This option includes your Pictures folder to be included in your backup.
- Downloads - This option selects your Downloads folder to be included in your backup.
- Music - This option selects your Music folder to be included in your backup. During a trial, your music files are not backed up automatically. However, you can select them manually.
- Movies - This option selects your Movies folder to be included in your backup. During a trial, your video files are not backed up automatically. However, you can select them manually.
After your settings are configured, Carbonite will start backing up files based on your preferences. However, you can use the Carbonite interface to add additional files to your backup outside of these settings.


 Feedback