

Allowing Carbonite Through the Mac Firewall (Mac 2x)

Summary:
The purpose of a firewall is to protect your computer from malicious software. If a single program on your computer is having trouble connecting to the Internet or running properly, a common cause is that it is being restricted by your firewall. It is rare for a firewall to conflict with Carbonite. However, ensuring that Carbonite is properly allowed through any firewall or security software on your computer will help prevent or address a conflict.
Note: While Carbonite is a safe program to use, some third-party anti-virus and firewall programs may not allow it to use the Internet. However, you can exclude the Carbonite files from that third-party program and it should allow Carbonite to perform its tasks successfully.
This article applies to:
- This article is for Mac 2x - View the Mac 1x article (Not sure?) | View the Windows article
Solution:
Depending on your Operating System, in order to allow Mac's Firewall to be configured for use with Carbonite,
- Open the System Preferences/Settings based on your applicable options
- macOS Ventura or newer: On your dock, select the System Settings icon.

- macOS Monterey or older: Open the Apple logo menu and select System Preferences…

- macOS Ventura or newer: On your dock, select the System Settings icon.
- Next, click the applicable setting:
- macOS Ventura or newer: Click Network.

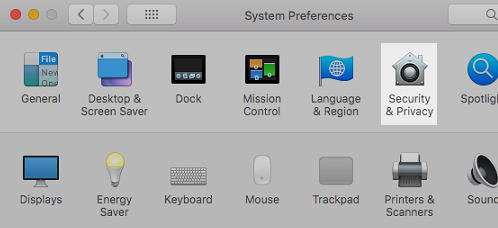
- macOS Monterey or older: Click Security & Privacy.
- macOS Ventura or newer: Click Network.
- Click the Firewall tab, then click Firewall Options.
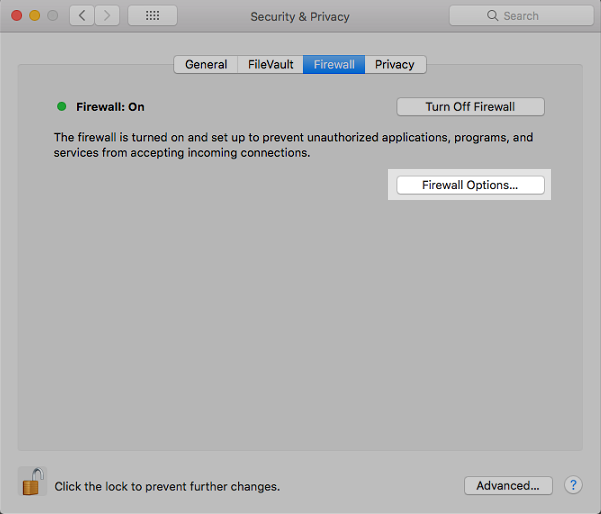
- Note: If you're not able to click anything here, you may have to first unlock the pane by clicking the Padlock and typing your Mac Username and Password into the fields provided.
- A list of trusted Applications will be displayed. If Carbonite isn't on the list, click the + button.
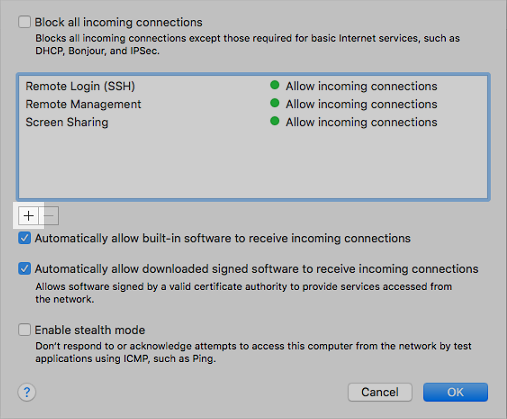
- In the Finder window that appears, navigate to the locations of the Carbonite files (listed below), select the appropriate file(s), and click Add to add the following file:
- /Macintosh HD/Applications/Carbonite
- After adding the Carbonite file, ensure the Block all incoming connections option is not selected, and click OK.
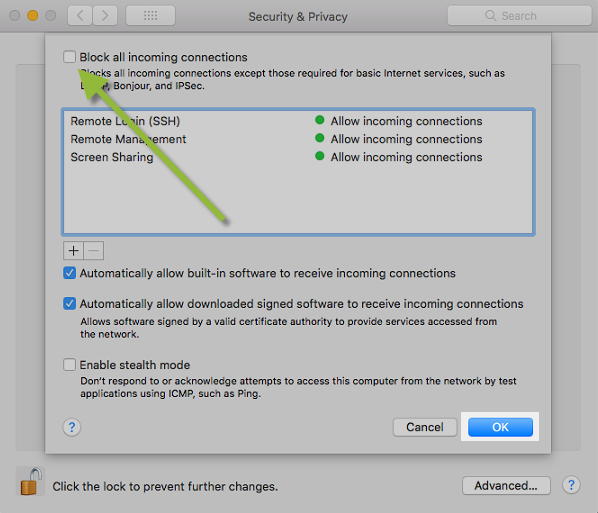

Your Firewall is now configured for use with Carbonite.
 Feedback