Restore Options
- This article is for Windows only
Summary:
Within the Restore page, there are a number of restore options available, including:
- Setting the restore location
- Setting the download folder for the backup archives
- Setting the name conflict options
- Choosing whether or not to keep the downloaded backup runs
- Choosing whether or not to verify the integrity of backup runs
- Running a custom script before starting and/or after finishing the restore
Application restores may disable some of these restore options, or there may be additional options unique to that application.
Solution:
Before starting a restore, you can specify restore settings for your selected backup set. You can change the following options:
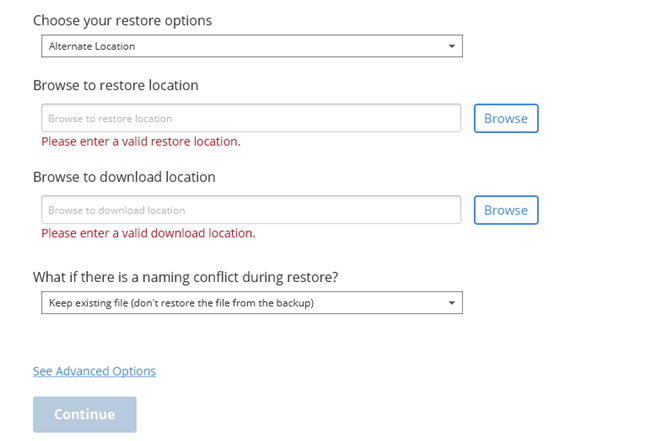
- Choose your restore options - The options in the drop down menu control the location where the data will be restored.
- Original Location - If selected, CSSB will restore data to the original location.
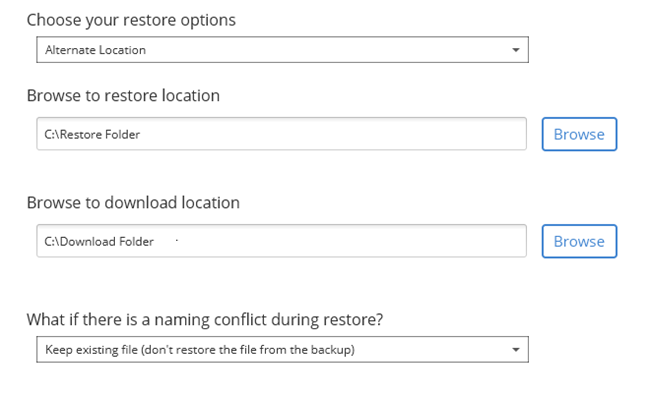
- Alternate Location - If selected, CSSB will restore data to a location defined in the Browse to restore location field.
- Browse to restore location - This field is required if you wish to restore selected files and folders to an alternate location and you have selected the Alternate Location option. You must select a valid restore location the first time you perform a restore for any backup set. Future restores will default to the same folder used by the previous restore. If you have selected Original Location, this field will be inactive.
- Browse to download location - This field refers to the location where CSSB will download your backup archive from the cloud if there is no local archive to restore from. Once downloaded, the files selected for restore will be processed from the archive to the restore location.
- What if there is a naming conflict during the restore? - There are four available options to choose from:
- Keep Existing File - The file will not be restored from the backup.
- Overwrite Existing File - The file will be restored from the backup and the existing file will be overwritten.
- Rename Existing File - The file will be renamed and a timestamp will be added to the existing filename.
- Rename Restored File - The restored file will be renamed and a timestamp will be added to the filename.
In the example below, we have chosen to restore to an alternate location.
For additional restore options, click the See Advanced Options link.
Within the Advanced Settings section, you can change the following restore settings:
- Keep downloaded backup runs after restore - Once the restore is complete, CSSB will delete the backup runs downloaded from the cloud by default. To retain this archive and perform more restores from this backup run later, place a checkmark next to this option.
- This allows multiple restores to be run quickly without the need to download the data anew each time.
- CSSB will never delete the downloaded backup runs if this option is selected. It must be deleted manually from the chosen Download Folder.
- Verify integrity of backup runs - You have the option of directing CSSB to verify the integrity of the backup run pre-restore, ensuring it is not damaged or corrupted. However, archive verification can take a long time, and restore speed may be your priority. Placing a checkmark next to this option sets CSSB to perform the archive verification steps before restoring your data. If you prefer to skip this step, leave it unchecked.
- Run custom script before restore - This optional field allows you to specify an executable file (such as a .bat or .exe file) to be run before the restore begins.
- Run custom script after restore - This optional field allows you to specify an executable file (such as a .bat or .exe file) to be run after the restore ends.
When you are satisfied with your selections, click Continue to save your changes.


 Feedback