

Restoring Mailbox Items in Exchange 2010

- This article is for Windows only
Summary:
It often happens that a mailbox or mailbox items such as emails or folders are accidentally deleted. Carbonite Safe Server Backup supports the restore of mailbox items in Microsoft Exchange 2010 with the Microsoft Local Mailboxes backup type or in combination with native Exchange tools.
To back up and restore mailboxes using the Microsoft Local Mailboxes backup type, please refer to the Carbonite Server User Guide.
Note: Before restoring user mailboxes, verify if Exchange native tools can be used to restore the items.
When a user deletes items from the Deleted Items default folder by using the Delete, Shift+Delete, or Empty Deleted Items Folder actions, the items are moved to the Recoverable Items\Deletions folder. The duration that deleted items remain in this folder is based on the deleted item retention settings configured for the mailbox database or the mailbox.
By default, deleted items are kept for a period of 14 days, and deleted mailboxes are kept for 30 days.
The following Microsoft articles should help you restore items, if they are not purged from your mailbox database:
Solution:
The sections below are collapsed. Please click the section title to open / close a particular section.
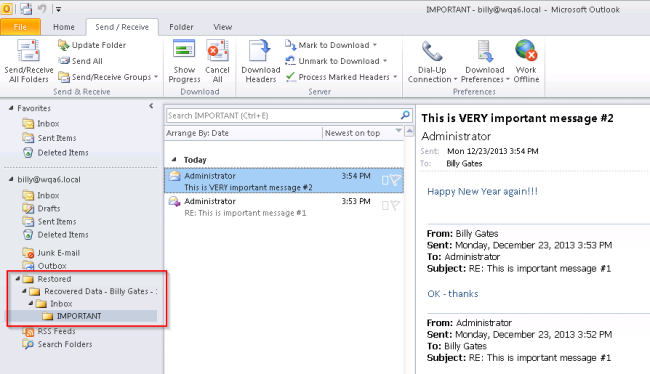
In this scenario, let's assume a user named Billy has accidentally deleted his IMPORTANT folder. By the time he discovered the folder was missing, the item had already been purged from the Recoverable Items folder.
To restore the deleted mail item(s), follow these steps.
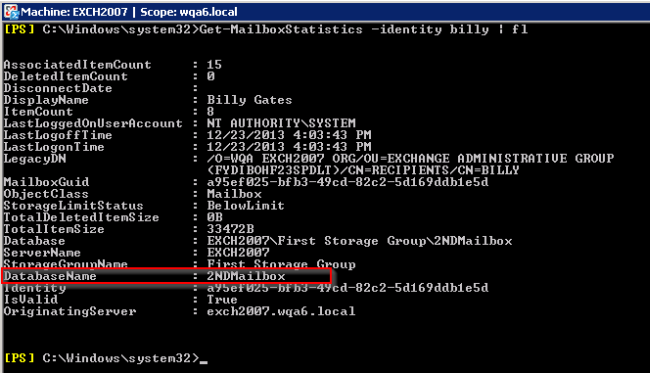
- Determine which database hosts the user's mailbox. If your environment uses a single mailbox for all users, skip this step.
If your environment uses multiple mailboxes, run the following command in the Exchange Management Shell (Powershell): Get-MailboxStatistics -identity [user] | fl, where [user] is billy in this case.
- Create a Recovery Storage Group using the Exchange Management Shell (Powershell) to use as temporary storage for the restored mailbox.
- Create folders where the recovery database will reside. In our example, we will use C:\EXCH-DATA\RDB1-DB\ and C:\EXCH-DATA\RDB1-LOG.
- Run the New-MailboxDatabase cmdlet with the following parameters:
- -EdbFilePath (the path to the restored mailbox database file)
- -LogFolderPath (the path to be used for transaction log files, which must be an empty folder)
- -Server (the server that the recovery is being performed on)
The full command for our example is: New-MailboxDatabase -Recovery -Name RDB1 -Server EXCH2010 -EdbFilePath "C:\EXCH-DATA\RDB1-DB\RDB1.EDB" -LogFolderPath "C:\EXCH-DATA\RDB1-LOG".

Click image to enlarge
Note: A cmdlet is a lightweight command that is used in the Windows PowerShell environment. For additional information on cmdlets, review this Microsoft article.
- Launch Carbonite Safe Server Backup and navigate to the Restore page. Select the backup run containing your mailbox database and restore to the Recovery Database.
- Once the restore begins, you will be able to track the progress of your restore within the user interface.
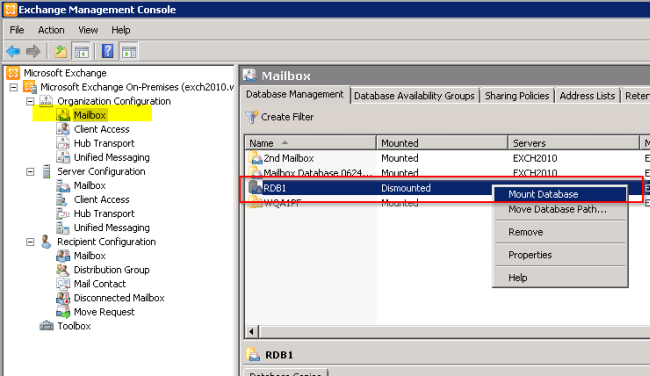
- Once the restore completes, the recovery database can be mounted using one of these methods:
Through the Exchange Management Console (EMC)
To mount the database through the Exchange Management Console, right click it and select Mount Database.
Through the Exchange Management Powershell
To mount the database through the Exchange Managemet Powershell, run the following command: Mount-Database [name of database], where [name of database] is RDB1 in this case.

- Once the database has been mounted, proceed with the restore of mailbox items. Use Powershell to view the available mailboxes to restore with the following command: Get-MailboxStatistics -Database [name of database], where [name of database] is RDB1 in this case.

Click image to enlarge
- It is possible to use the Restore-Mailbox cmdlet to restore items into a sub-folder. To restore the user's entire Inbox (including the IMPORTANT folder) to a sub-folder named Restore, run the following command: Restore-Mailbox -Identity "Billy Gates" -RecoveryDatabase RDB1 -RecoveryMailbox "Billy Gates" -TargetFolder Restore -IncludeFolders \Inbox.

Click image to enlarge
Note: If you want to perform a more granular restore, such as restoring messages with a specific subject, please refer to this article: Restore-Mailbox cmdlet - Exchange 2010.
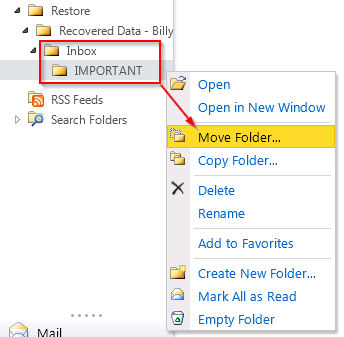
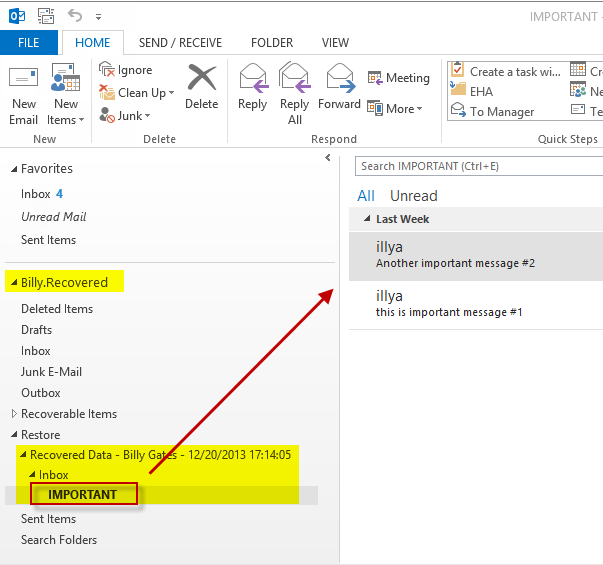
- You can use Microsoft Outlook to view or move restored items to their original location. In this example, the IMPORTANT folder was moved back to its original location under Inbox.
In some scenarios, you might want restored items in the form of a PST file, rather than recovering them directly to a user's mailbox. For example, let's assume you need to recover emails of an employee who is no longer with your organization.
You will have to create a temporary user with its own mailbox, recover email items to it, and then extract the recovered content to the PST file.
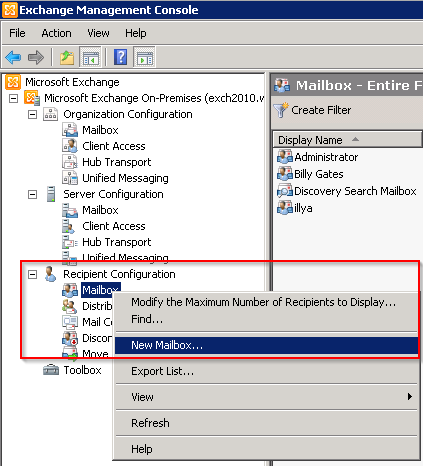
- Create a temporary user mailbox from the Exchange Management Console. In our example, the temporary user is called Billy Recovery and its user name is billyrec. You can choose any mailbox database.
- Restore and mount a recovery database using steps 1 - 7 in the section for Restoring Deleted Mailbox Items in Microsoft Exchange 2010.
- We will use the Restore-Mailbox cmdlet to restore the Inbox folder into the Restore folder of our temporary user Billy Recovery. Run the following command: Restore-Mailbox -Identity "Billy Recovery" -RecoveryDatabase RDB1 -RecoveryMailbox "Billy Gates" -TargetFolder Restore -IncludeFolders \Inbox.

Click image to enlarge
Note: If you want to perform a more granular restore, please refer to this article: Restore-Mailbox cmdlet - Exchange 2010.
- Create a network share folder, where you plan to place the extracted PST file. Ensure that the Exchange Trusted Subsystem group has full permissions on the shared folder.

Click image to enlarge
- You might need to assign Mailbox Import Export role to the Exchange administrator's account, if that has not been done previously. If the Exchange administrator does not have the Mailbox Import Export role, run the following command: New-ManagementRoleAssignment –Role “Mailbox Import Export” –User wqa1\Administrator, where WQA1.local is the domain name. Ensure that you log on/off the exchange server for the role to be applied.

Click image to enlarge
Note: For additional information on Error message when you run the New-MailboxExportRequest cmdlet in Exchange Server 2010 SP1 or Exchange Server 2010 SP2: "Couldn't find the Enterprise Organization container", click this link to the Microsoft Knowledgebase.
- Run the New-MailboxExportRequest cmdlet as follows: New-MailboxExportRequest -Mailbox billyrec -FilePath \\exch2010\Recovered.PST\Billy.Recovered.pst. For additional information about this cmdlet, click this link to the Microsoft Knowledgebase.

Click image to enlarge
- The export process can take some time if the database is large. You can check the progress of the export task by piping Combining cmdlets is known as piping or pipelining. two cmdlets: Get-MailboxExportRequest | Get-MailboxExportRequestStatistics.

Click image to enlarge
- Once your PST file has been exported, you can open it in Outlook to verify its recovered content.
Once the mailboxes have been recovered, you could clean up any unnecessary databases, user accounts, and files.
- Dismount the recovery database and storage group. Delete files from database folders.
- If you used a temporary user for recovery, delete its mailbox and account in Active Directory, along with any associated files such as PSTs.
 Feedback