

Creating Recovery Media for a Bare Metal Restore

- This article is for Windows only
Summary:
Carbonite Safe Server Backup requires you to create recovery media in order to perform a Bare Metal restore. It is recommended that you create the recovery media after you schedule your first Bare Metal Image backup.
- If you have not created the recovery media for a BMI restore, you need to install CSSB on another computer to create it.
The Create Recovery Media button is found within the Notifications panel of the Dashboard. Click this button to begin creation of your recovery media. It can also be found at the top of the Restore page.
Recovery Media refers to a bootable Windows PE environment. Recovery media is required to perform a complete bare metal restore.
Solution:
The sections below are collapsed. Please click the section title to open / close a particular section.
- Create your recovery media as soon as you can, before disaster strikes.
- A USB thumb drive is the ideal storage for your recovery media.
- When creating the recovery media, include any additional drivers that may be required to boot your new system(s), if necessary.
- Test your Recovery Media.
- The purpose of the test is to ensure that the Recovery Media includes all necessary drivers that are required to boot the system.
- A test of the recovery media should end once the system successfully boots and the recovery assistant appears.
- To perform a test, follow these steps.
- Power off a computer.
- Insert the recovery media device.
- Power on the computer.
- (If necessary) Enter the BIOS and configure the system to boot from the recovery media.
- The test is successful if the system is able to boot and the recovery assistant appears.
- Do not begin the Bare Metal restore process, unless you wish to overwrite the existing system entirely.
- After a successful test, power down the system and remove the recovery media.
- An actual Bare Metal restore will completely erase the current system.
- Do not begin an actual Bare Metal restore unless you are willing to overwrite the current system.
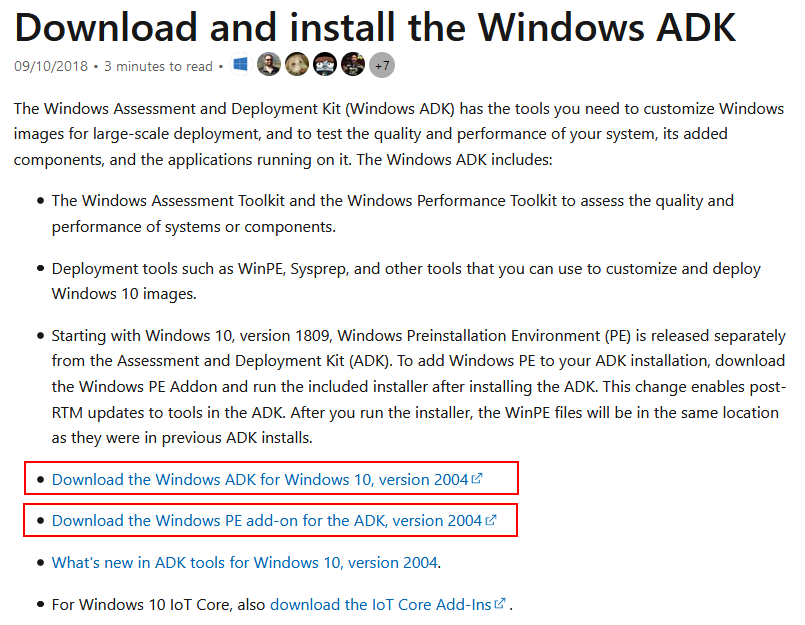
The Microsoft ADK and accompanying PE add-on must be installed on the system in order to create the recovery media. Please download the Microsoft ADK and PE add-on here: https://docs.microsoft.com/en-us/windows-hardware/get-started/adk-install.
On Microsoft's ADK page, please choose the following to download:
- Windows ADK for Windows 10, version 2004
- Windows PE add-on for the ADK, version 2004
These allow for the easiest recovery media creation process. However, the Deployment Tools and the Windows Preinstallation Environment (Windows PE) are the only features that are required on most systems.
A Create Recovery Media button is found within the Notifications panel of the Dashboard. Click this button to begin creation of your recovery media.
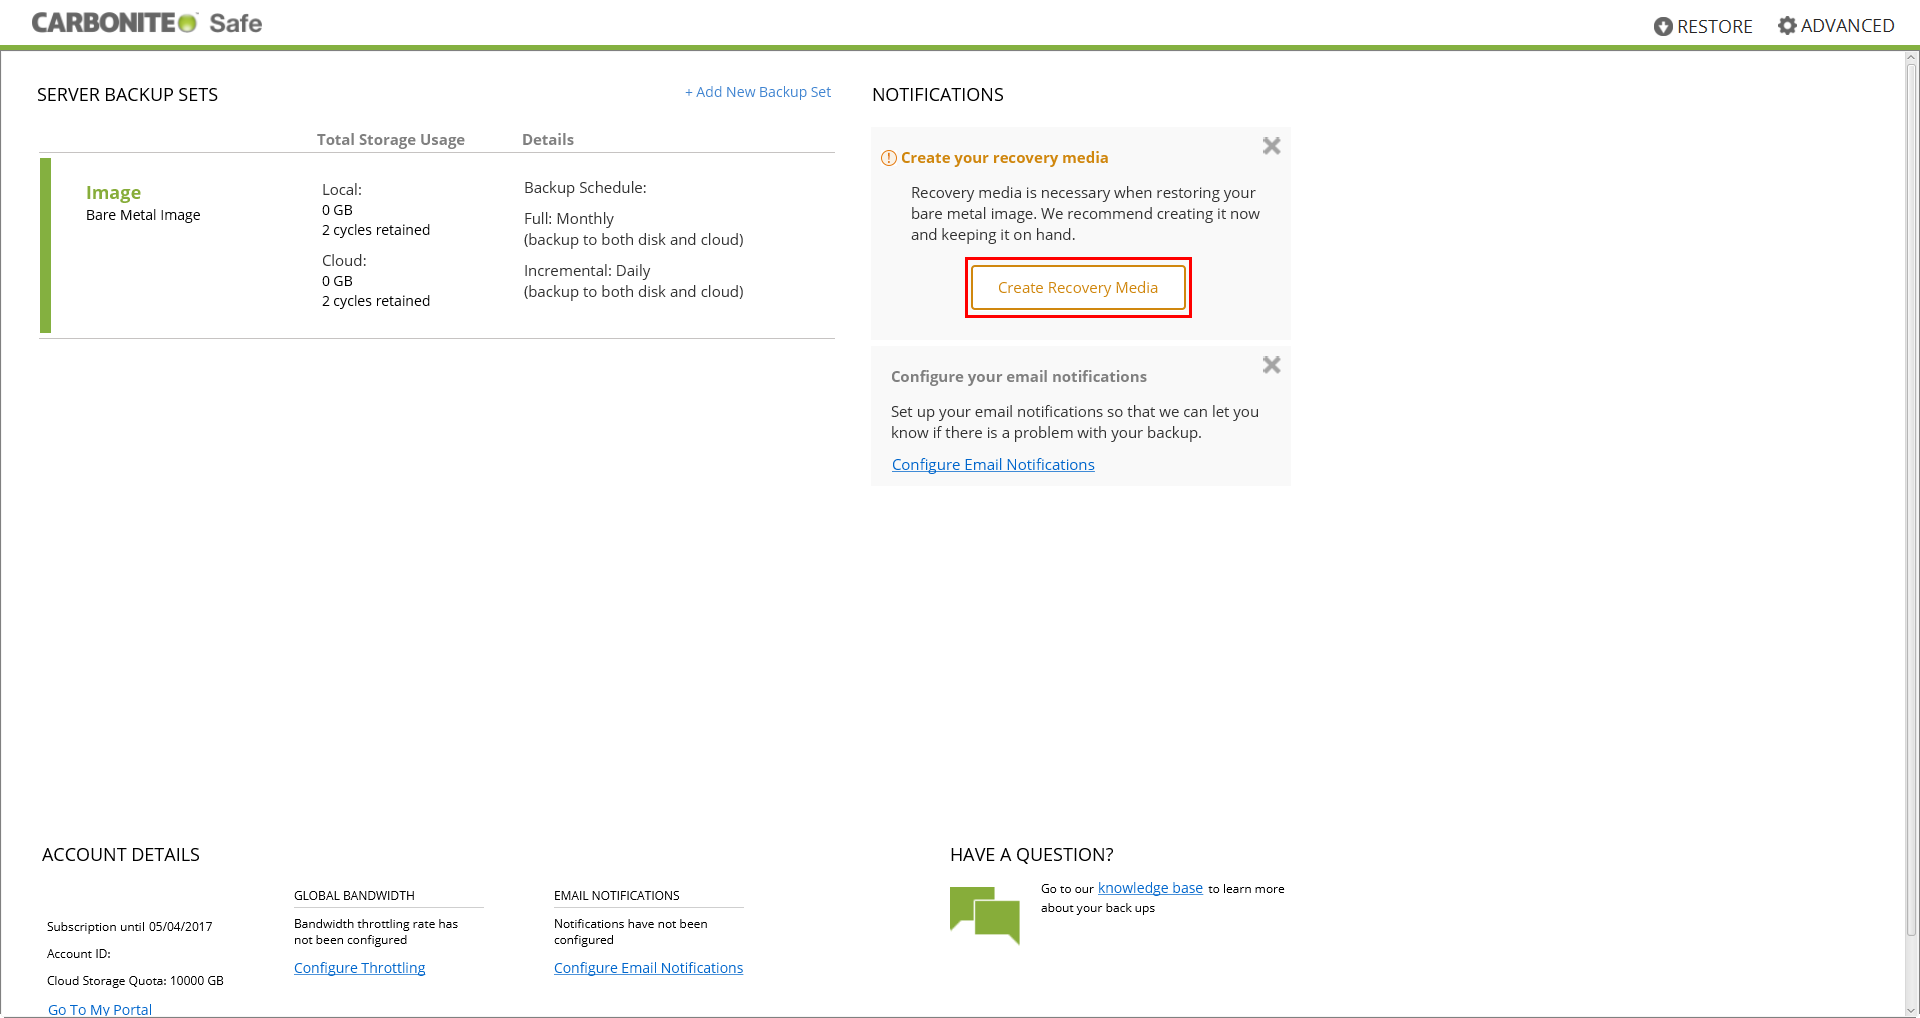
Click image to enlarge
If you have already created recovery media previously, this button may not be in the notifications panel.
The recovery media can also be created from the Restore page.
Alternatively, you can create recovery media by selecting the BMI Backup set within the dashboard, selecting Edit Backup Set, then selecting Create Recovery Media.
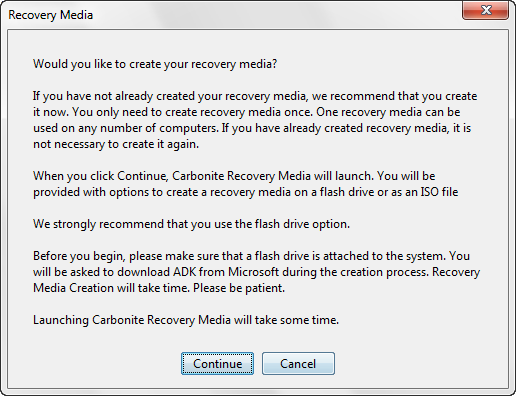
A Recovery Media pop up window will appear with important information about Recovery Media. Click Continue after reading the information.
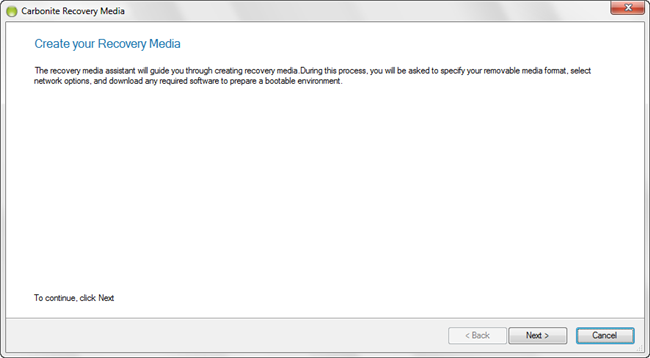
The OpenText Recovery Media builder will launch. Click Next to continue.
Your next step is to select the type of recovery media you wish to build. Your choices are Removable flash media which will look for a USB connected device to use as the boot media, ISO Image which will create an ISO to boot from. We recommend that you use a USB Flash Drive in order to make the Recovery Media. Make your selection and click Next.
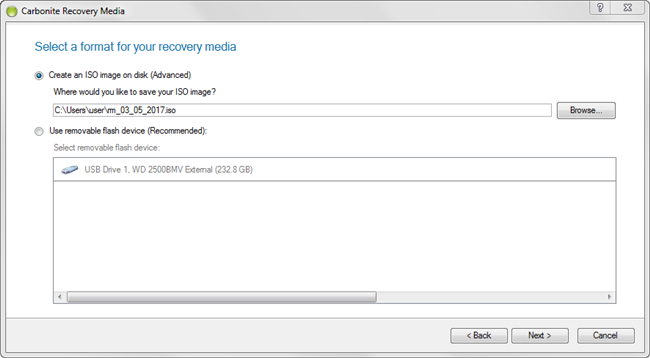
Note: If you select to use a Removable Flash Device as your recovery media, you may be prompted that any data on the selected USB flash drive will be completely erased.
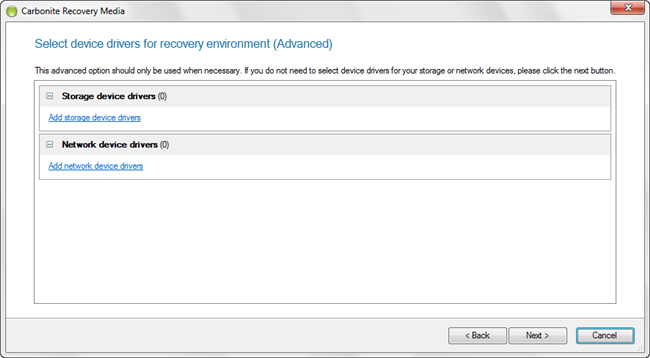
Adding drivers into the recovery media is the next step. Drivers are useful if you have specific hardware installed that needs drivers before they will work. If you require specific drivers to be installed, click Add storage device drivers or Add network device drivers and you will be able to browse to where the drivers are so they can be included in the recovery media. Once you have added all the drivers you need, if necessary, click Next.
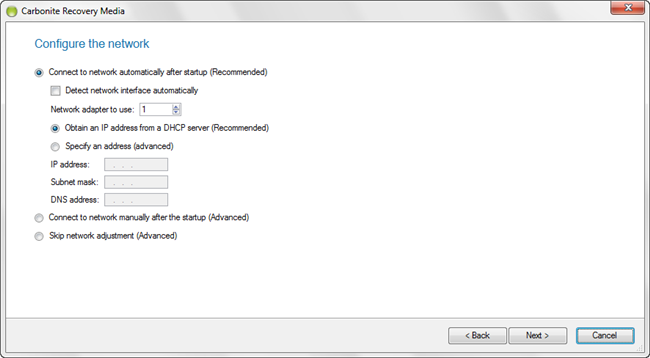
After you have added any drivers to your recovery media, you are prompted to select your network connection. By default this is automatically set up after you have successfully performed a Bare Metal Restore and restarted the machine. However, if your computer requires specific network settings, you can make those selections or manually configure the settings after you first start it up. We recommend, unless a specific IP address is required, that you connect automatically and obtain an IP address from a DHCP server. Once you have completed your selections, click Next.
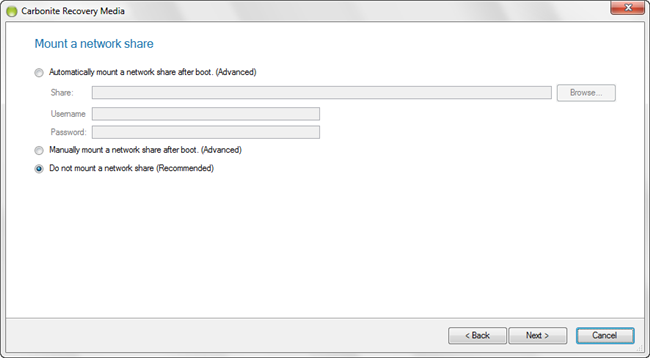
You are next prompted to mount a network share. By default, the recovery media prompts you to not mount a network share. If you need to mount a share automatically after you boot the drive, you can select the appropriate option, browse to the shared location and provide the appropriate credentials. Click Next to continue.
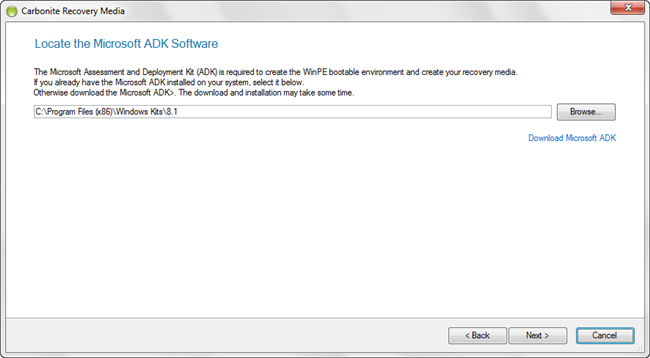
You are then also prompted to list the location of the Windows Assessment and Deployment Kit (ADK). The Windows ADK is what is used to facilitate the bare metal recovery process and needs to be installed on the computer you are building the recovery media on before you can continue.
If you already have the software installed and listed in the field provided, please click Next to proceed to building the recovery media. If you still need to install the software, please click this link https://docs.microsoft.com/en-us/windows-hardware/get-started/adk-install to download it.
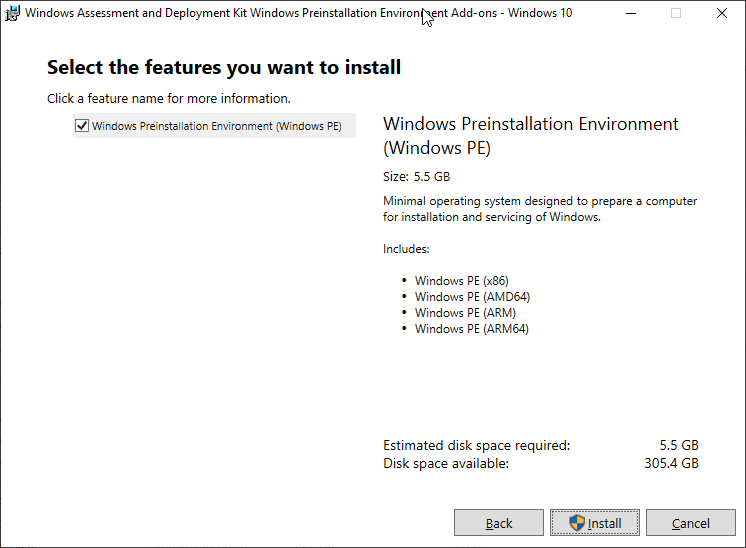
Within the Microsoft page, click both Download options shown below to download and then run the ADK installer and the Windows PE add-on for the ADK.
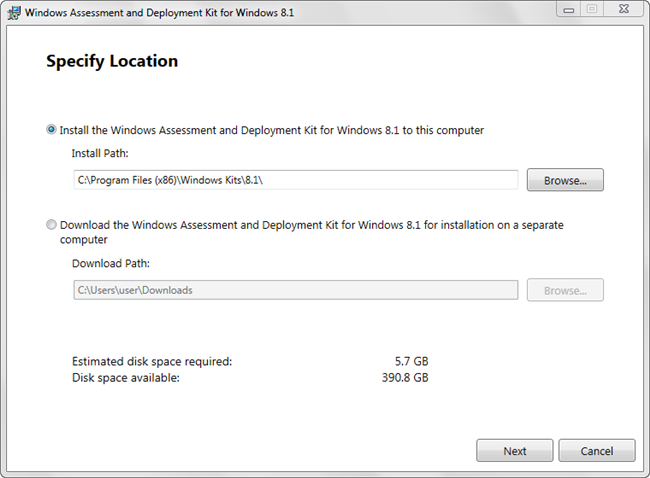
The Assessment and Deployment Kit will run and you will be prompted to select a location to install the ADK. Click Next once you have selected this location.
Note: The ADK webpage, installer and software are all provided by Microsoft. Installing this software is required before you can create recovery media. If you are experiencing issues with the webpage display, we suggest adjusting your internet settings, attempting the download with another browser, or attempting the download from another computer. If none of these methods fix the issue, we then suggest contacting Microsoft.
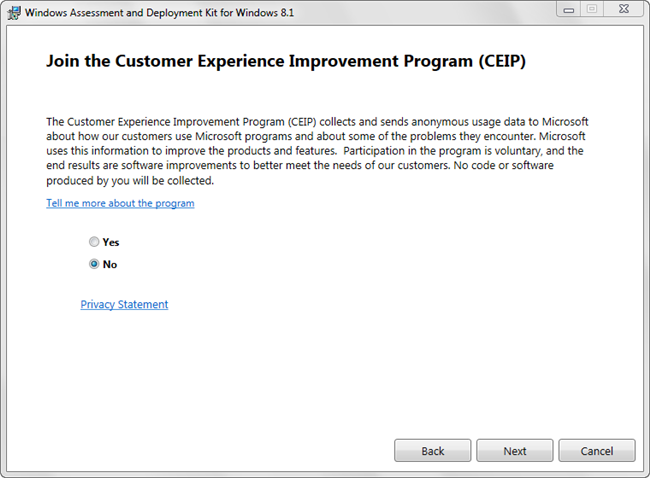
The ADK installer will ask you to choose whether to send anonymous usage data to Microsoft. Please make your selection for Yes or No and click Next.
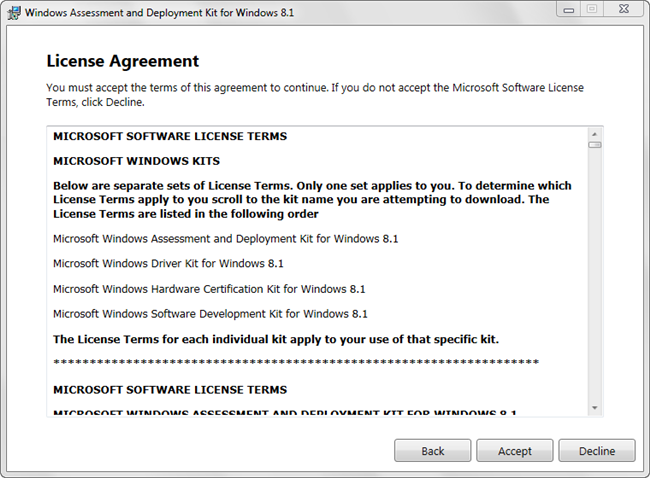
On this screen you will need to review the Microsoft License Agreement and click Accept to continue.
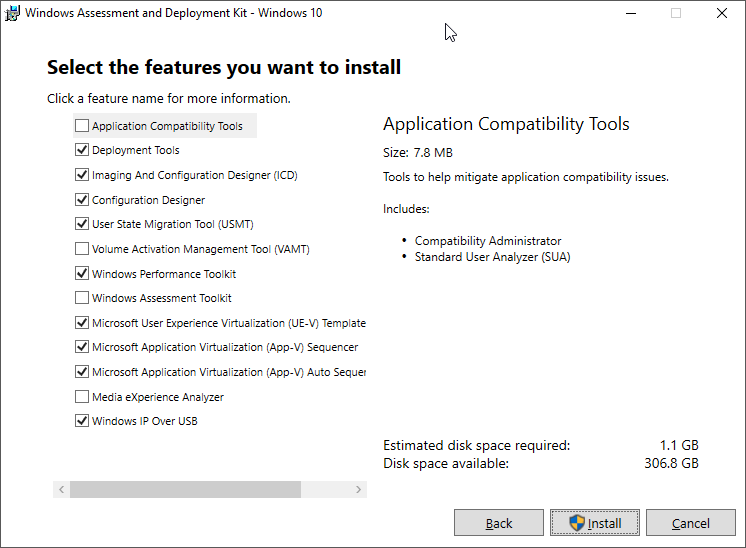
There will then be a list of features for you to install. Please ensure that Deployment Tools is selected. Click Install to continue.
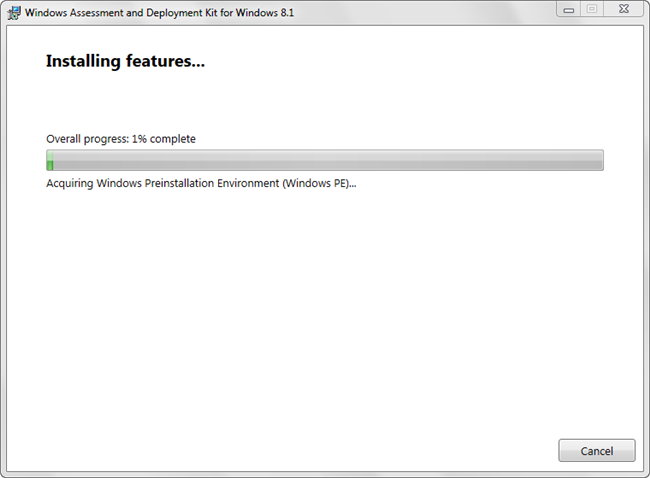
Once you click Install, the Assessment and Deployment Kit will process installing on your computer.
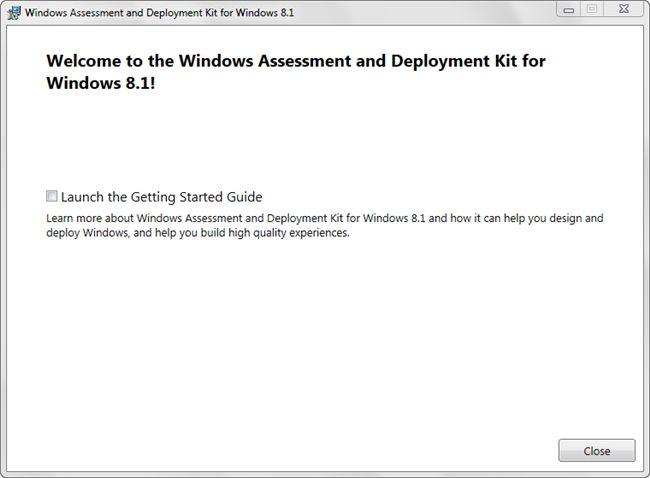
After the install has completed, please click Close and return to the Recovery Media builder.

Now that you have the Assessment and Deployment Kit, and WinPE installed, please make sure that the path is pointing to the correct location. If not, please click Browse and navigate to where you installed the ADK. Otherwise, click Next.
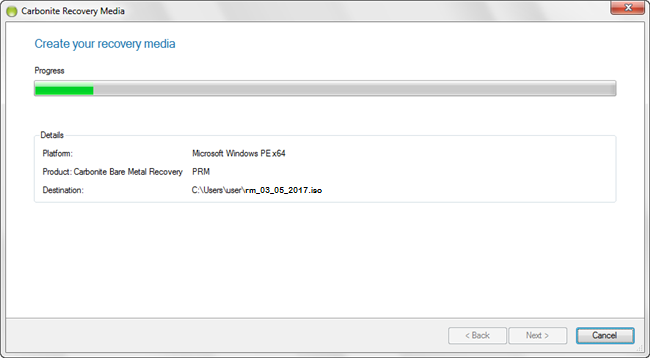
The recovery media will begin being built with the specifications requested when running the Wizard.
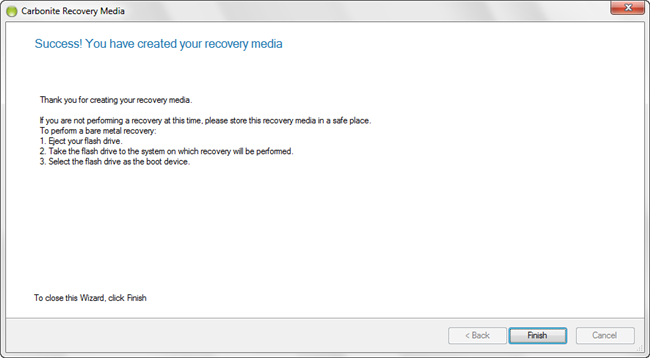
Once completed, you will be prompted with a screen indicating that the recovery media has been built.
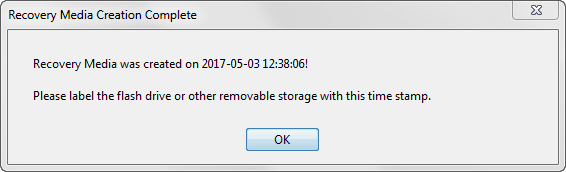
CSSB will display a message once the Recovery Media has been created.
You will now be able to boot your computer in case of a crash from the media. Please ensure that the media is not stored on the computer itself as you would not be able to access it if the computer crashes and you need to perform a bare metal restore.
 Feedback