

Command Line Installation and Configuration of CSSB

Summary:
- This article is for Windows only
It is possible to record the installation of Carbonite Safe Server Backup and export the backup set configuration. Once created, the installation recording and exported backup set configuration can be used to install CSSB via the command line on any number of other machines.
Command-line operations, including CSSB installation, can be automated in many ways. Windows Powershell, batch scripts, Group Policies, and more can all be used for automation purposes. The steps below can be used to build automated, large-scale rollouts of pre-configured CSSB installations to any number of machines. However, the exact automation process is beyond the scope of this article.
Solution:
The following steps are required:
The sections below are collapsed. Please click the section title to open / close a particular section.
Record an Installation
Step 1: Download the installer
Sign in to your account at https://account.carbonite.com.
Example:
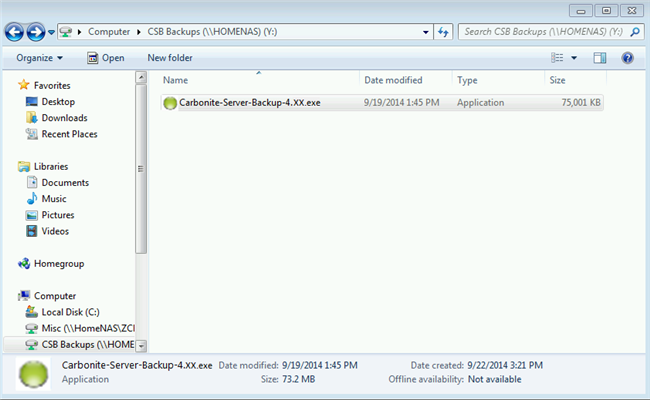
The Carbonite-Server-Backup-4.XX.exe file has been downloaded to Y:\.
Step 2: Extract the setup files
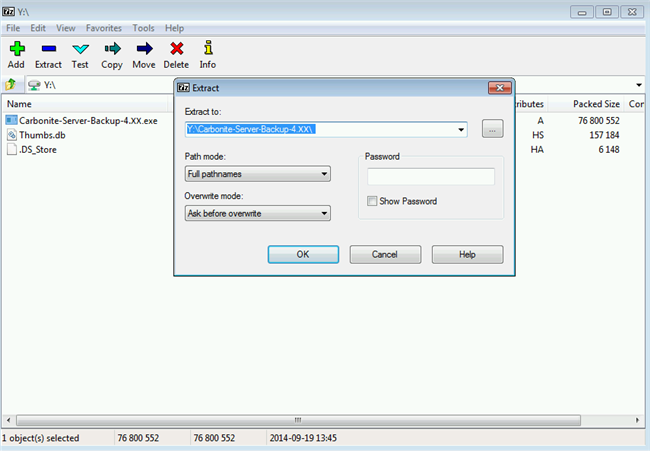
Do not run the installer by double-clicking it. Instead, use a zip program such as 7-zip, to open the installer and extract the contents to a directory of your choosing.
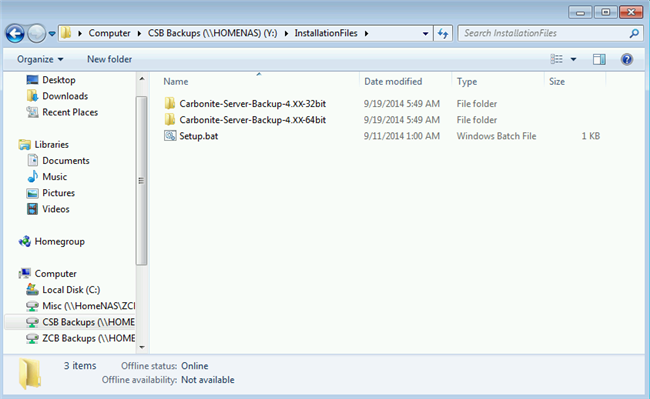
Two folders will be extracted: one for 32-bit CSSB, and another for 64-bit CSSB.
Example:
The contents of Carbonite-Server-Backup-4.XX.exe will be extracted to Y:\InstallationFiles.
Once the extraction is complete, the two CSSB folders will be visible in Y:\InstallationFiles.
Step 3: Ensure that the Java Runtime Environment is installed
CSSB requires that the Java Runtime Environment be installed on the system prior to installation. To ensure a clean recording, please install the Java Runtime Environment before the installation of CSSB begins.
Please see How to Install the Java Runtime Environment for more information.
Step 4: Start installation and create a recording
- Open an elevated command prompt using the Run as Administrator option.
- Change directories to the folder where you extracted the installer. There will be two folders located inside the directory where you extracted the installer, one containing the 32-bit installer and another for the 64-bit installer.
- Change the directory to the folder that matches your system.
- For example, you'll need to change to the 32-bit installation folder if you are on a 32-bit machine.
- Enter the following command
- setup.exe /r /f1"<Path to some folder>\Setup.iss"
- The filename or path inside the parentheses can be changed to suit your needs.
- Make sure that the folder where you choose to create Setup.iss exists before the installation begins.
- The CSSB installation wizard will appear.
- Proceed through the entire installation process.
The choices you make during the installation will be recorded. Take care to make choices that are generic and match the expected configuration of the other machines on which you plan to install CSSB.
For example, you should not record an installation to a folder on the E:\ drive if not all machines will have an E:\ drive.
Note: Disable the Open CSSB after installation completes option during installation. The last step in the command-line installation and configuration, Import the Backup Set Configuration, requires that the user interface be closed. If this option is not disabled, the user interface will open after the installation and must be closed somehow (manually or by stopping the process) before the import can proceed.
Example:
The 64-bit version of CSSB will be installed, and the Setup.iss recording file will be created in Y:\InstallationRecording\.

Once the installation completes, you will be able to access the CSSB user interface and configure backup sets.
Configure Backup Sets and Export the Configuration
Step 1: Configure one or more backup sets
Open CSSB and configure one or more backup sets.
Take care to make choices that make sense for the other machines on which you plan to install CSSB. When in doubt, stick to the defaults, as they represent the settings that work for most users.
Save each backup set after configuring it. When you are done configuring all backup sets, exit the program.
Example:
Two backup sets, a File System backup and a System State backup, were configured and saved.

Click image to enlarge
Step 2: Export backup set configuration
- Close CSSB if it is open.
- Open a command prompt.
- Change directories to the \bin\ folder in the directory where CSSB is installed.
- By default, this is C:\Program Files\Carbonite\Carbonite Server Backup\bin\.
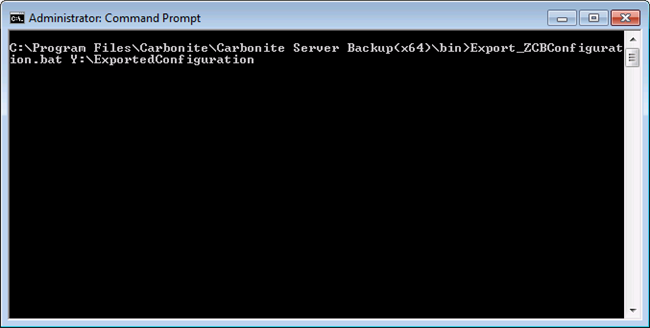
- Run the following command:
- Export_ZCBConfiguration.bat C:\Export_Folder
- You may replace C:\Export_Folder with any directory of your choice. The configuration will be exported as a .zip file to this location.
- A file named ZCB.zip will be placed in the folder you chose after the export process is complete.
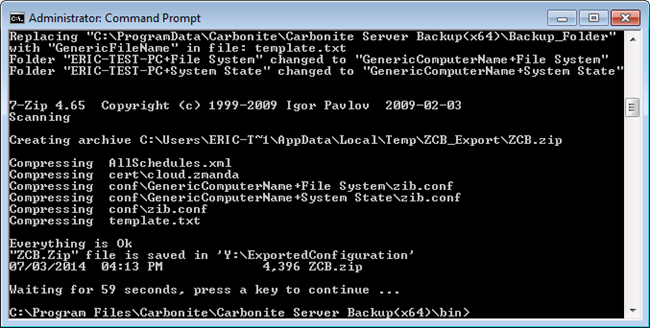
Example:
Start the export process.
Once the export is complete, you will receive a notification that "Everything is Ok" and that the .zip file was successfully created.
Prepare Other Machines for Installation
Ensure that the files necessary for installation and configuration of CSSB are available on all machines on which CSSB will be installed. For example, these files can be placed on a mapped network drive. They may also be copied to each machine using any method of your choice.
Each machine must have access to the following:
- The installation recording. In our example above, this file is named Setup.iss.
- All of the files extracted from the installer, including the setup.exe files for 32-bit or 64-bit CSSB.
- The ZCB.zip file that was created when the configuration was exported.
The Java Runtime Environment must also be installed on each machine prior to the CSSB installation. Please see How to Install the Java Runtime Environment for more information.
Example:
All files are available on a network share. The share has been mapped as the Y: drive for easy access on a machine running Server 2012 R2.

Use the Installation Record to Install CSSB
Start the installation using the following command.
<Path to>\setup.exe /s /f1"<Path to>\Setup.iss"
Replace <Path to> with an actual path to the setup.exe and Setup.iss files. The setup.exe file is found within the extracted setup files. There will be separate setup.exe files for 32-bit and 64-bit installations. You must provide the path to the correct setup.exe file.
For example, if you extracted setup.exe to C:\CSB\Install\Carbonite-Server-Backup-4.XX-64bit\ and Setup.iss to C:\CSB\Install\SetupRecording\, then the command would be:
C:\CSB\Install\Carbonite-Server-Backup-4.XX-64bit\setup.exe /s /f1"C:\CSB\Install\SetupRecording\Setup.iss"
The installation will be silent and mostly invisible. An InstallShield setup window may appear in the task bar. Other than that, there will be little feedback once the installation begins.
The command prompt will immediately be available for other commands. If you wish for the command prompt to wait until setup is complete, use this command instead:
start /WAIT <Path to>\setup.exe /w /s /f1"<Path to>\Setup.iss"
With either command, the setup.exe process will be visible in Task Manager, and an installation sign file will be created in the directory where Setup.iss is located.
If the Open CSSB after installation completes option was selected in the initial recording, CSSB will open automatically once the installation is complete.
Example:
Start the installation via the command line.
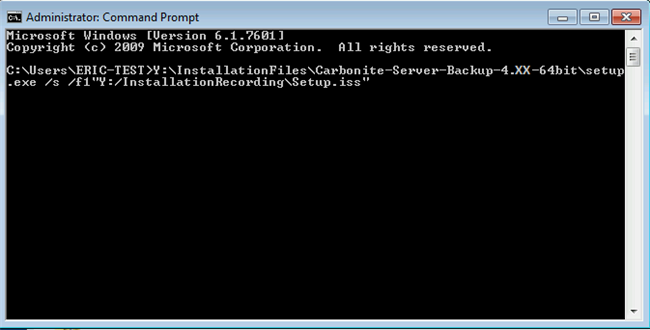
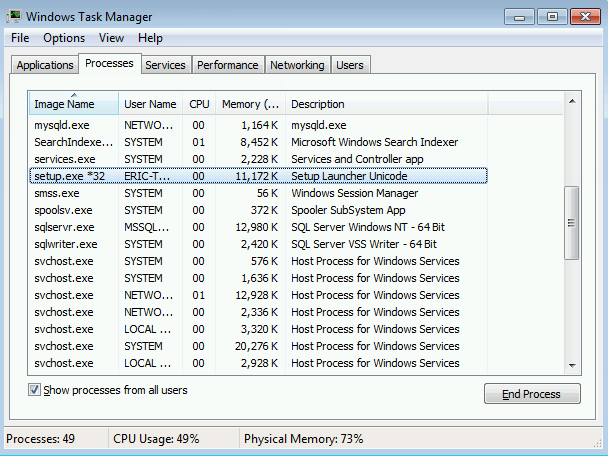
The installation is in progress. The Task Manager has been opened to show the setup.exe process.
Once the installation is complete, you will be able to access the CSSB user interface. However, CSSB must be closed before the next step to Import the Backup Set Configuration.
Import the Backup Set Configuration
- Wait for the installation to complete.
- Make sure the CSSB user interface is closed.
- The CSSB user interface process is named javaw.exe. If necessary for automation purposes, this process can be stopped via the command line.
- Open a command prompt.
- Change the directory to the \bin\ folder within the CSSB installation directory:
- By default, this is C:\Program Files\Carbonite\Carbonite Server Backup\bin\
- Run the following command
- Import_ZCBConfiguration.bat C:\Export_Folder
- Replace C:\Export_Folder with the folder path that contains the ZCB.zip file
After completion of the import process, open the CSSB user interface to make sure that all the backup sets and their respective configurations are complete.
Example:
Start the import process from the command line.
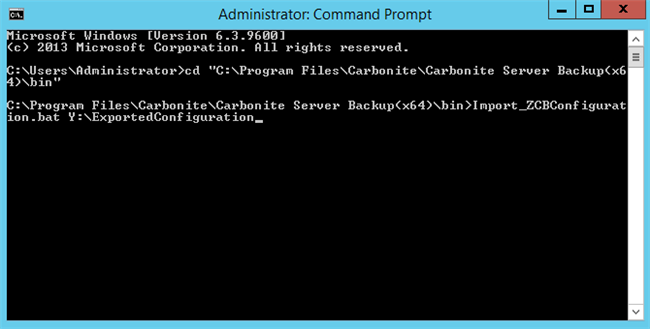
You will receive notification once the import is complete.
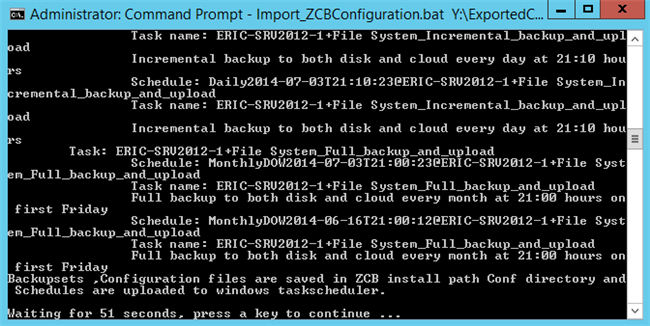
Backup sets will be successfully imported. When CSSB is opened, the backup sets will be available.

Click image to enlarge
 Feedback