

Collecting Log Files for Troubleshooting

Summary:
- This article is for Windows only
If you experience an issue with our product, you can send us your log files from within the Carbonite Safe Server Backup user interface. Sending in your logs will help our customer care team troubleshoot your issue and provide a resolution to your problem.
Solution:
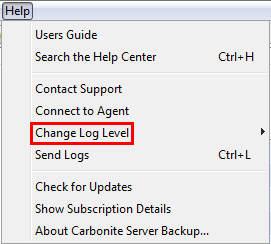
- Within the Carbonite Safe Server Backup (CSSB) user interface, click Help; Change Log Level.
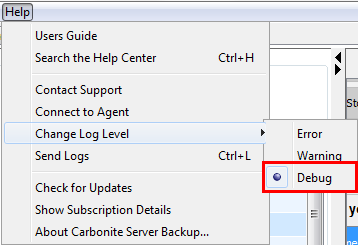
- Change the default log level from Error to Debug.
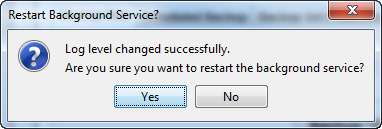
- A Restart Background Service? window will appear, prompting you to click Yes or No to proceed.
- Click Yes to restart the background service.
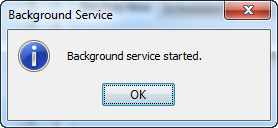
- A Background Service window will appear. Click OK to close the window.
Note: Your default log level should now state Debug.
- Perform whatever action was failing (e.g. If a backup was failing, perform steps 1-5, then perform the backup and finally proceed to step 7.)
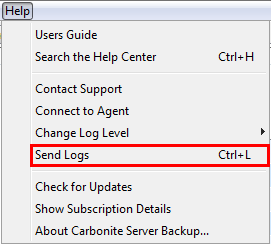
- To collect your log files, click Help; Send Logs within the CSSB user interface.
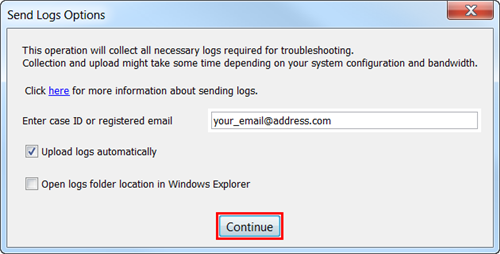
- A Send Logs Options window will appear, prompting you to enter your case ID or registered email address. After entering the required information, place a checkmark in the box next to Upload logs automatically. You will also have the option to check the box next to Open logs folder location in Windows Explorer. Click Continue to proceed.
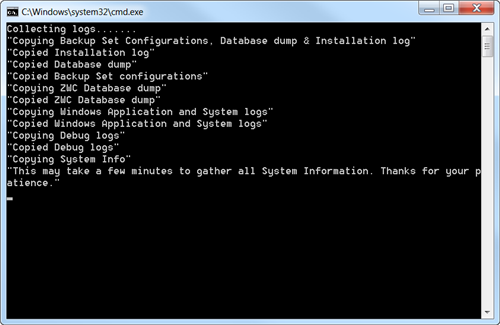
- Carbonite Safe Server Backup will automatically start collecting your log files. This may take a few minutes.
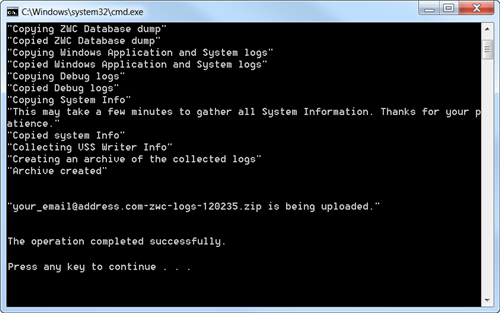
- Once the log collection process is complete and your logs have been successfully uploaded to Carbonite, you will be prompted to press any key on your keyboard to proceed. The log collection tool window will then close.
- Make sure to return the Log Level back to the default of Error after the issue is resolved.
 Feedback