

Windows Firewall

Summary:
Windows Firewall has been known to block the installation and normal running process of Carbonite. For the installation to complete, you should temporarily disable the Real-time protection of Windows Defender. Then, once the installation completes successfully, you should configure the program to allow Carbonite through as an exception.
Please note: This article is provided for self-help purposes only, and is outside of the scope of support for Carbonite customer service. If you need further assistance, please work with a local technician.
Solution:
The sections below are collapsed. Please click a section title to open / close the appropriate section.
Windows 10
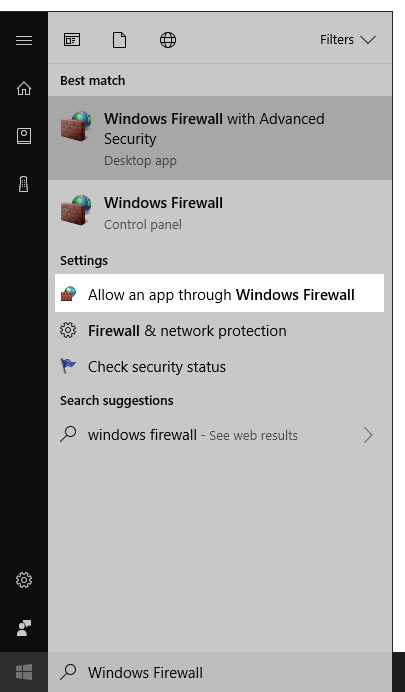
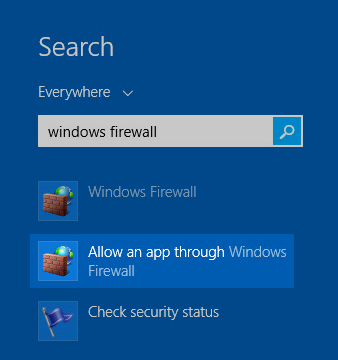
- Click the Windows Start buttonThe Windows icon in the lower left hand corner of your screen that allows access to “All Programs”., then click the Search... box that appears next to the button.
- Type "windows firewall" in the search box and click Allow an app through Windows Firewall in the search results.
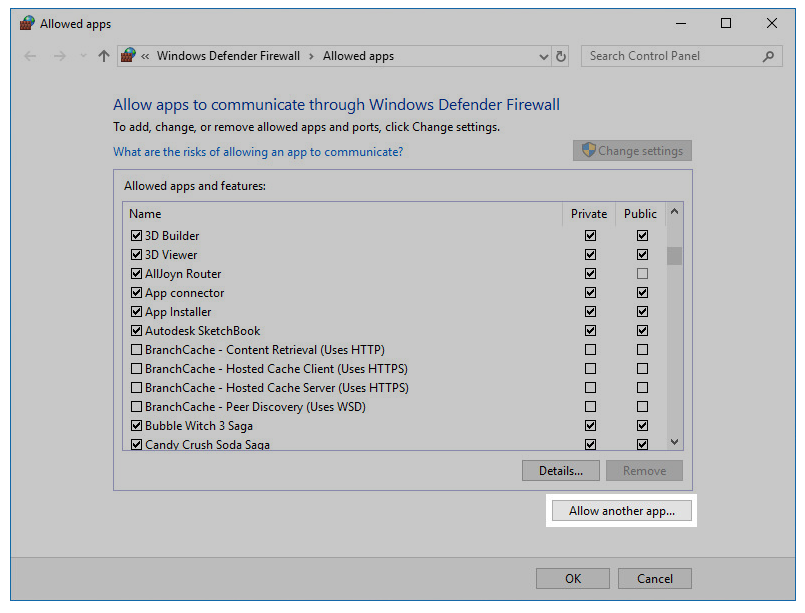
- In the Allow apps to communicate through Windows Firewall window, click Allow another app... towards the bottom of the window.
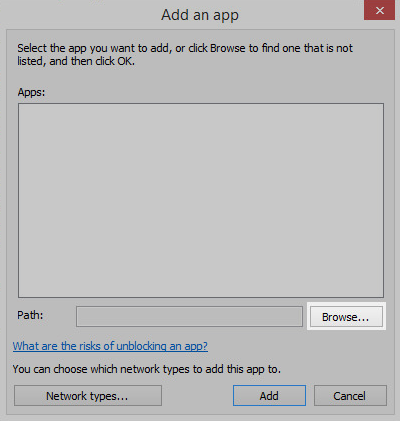
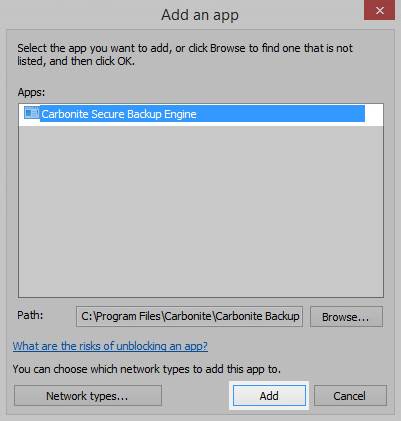
- Within the Add an app window, click Browse... to locate the Carbonite program files.
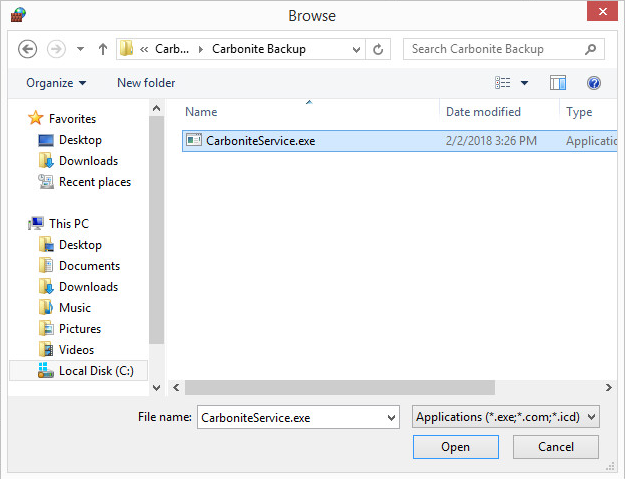
- Navigate to C:\Program Files\Carbonite\Carbonite Backup\ and select CarboniteService within the Browse window.
- Click Open to add the Carbonite file into the Add an app Window.
- Back in the Add an app window, ensure the Carbonite file is selected and click Add.
- Repeat steps 3 - 7 for the following files:
32-bit Operating System
- C:\Program Files\Carbonite\Carbonite Backup\CarboniteUI.exe
- C:\Program Files\Carbonite\Carbonite Backup\CarboniteSetup.exe
64-bit Operating System
- C:\Program Files (x86)\Carbonite\Carbonite Backup\CarboniteUI.exe
- C:\Program Files (x86)\Carbonite\Carbonite Backup\CarboniteSetup.exe
- After all the Carbonite Files have been added, click OK to save the changes.
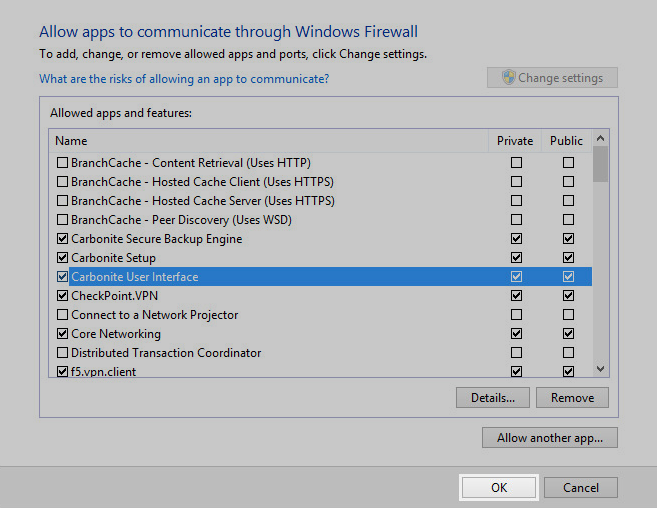
You have now successfully added Carbonite to the Windows Firewall exceptions list, enabling Carbonite to work concurrently with the program.
Windows 8
- Open the Search Charm by hovering your mouse over the bottom or top right of the screen and clicking Search or pressing the Windows Key + W on your keyboard.
- Type Windows Firewall into the search field and click Allow an app through Windows Firewall in the search results.
- Within the Windows Firewall window, click Allow another app... towards the bottom of the window.

- Within the Add an app window, click Browse... to locate the Carbonite program files.
- Navigate to C:\Program Files\Carbonite\Carbonite Backup\ and select CarboniteService within the Browse window.
- Click Open to add the Carbonite file into the Add an app Window.
- Back in the Add an app window, ensure the Carbonite file is selected and click Add.
- Repeat steps 3 - 7 for the following files:
32-bit Operating System
- C:\Program Files\Carbonite\Carbonite Backup\CarboniteUI.exe
- C:\Program Files\Carbonite\Carbonite Backup\CarboniteSetup.exe
64-bit Operating System
- C:\Program Files (x86)\Carbonite\Carbonite Backup\CarboniteUI.exe
- C:\Program Files (x86)\Carbonite\Carbonite Backup\CarboniteSetup.exe
- After all the Carbonite Files have been added, click OK to save the changes.
You have now successfully added Carbonite to the Windows Firewall exceptions list, enabling Carbonite to work concurrently with the program.
Windows 7
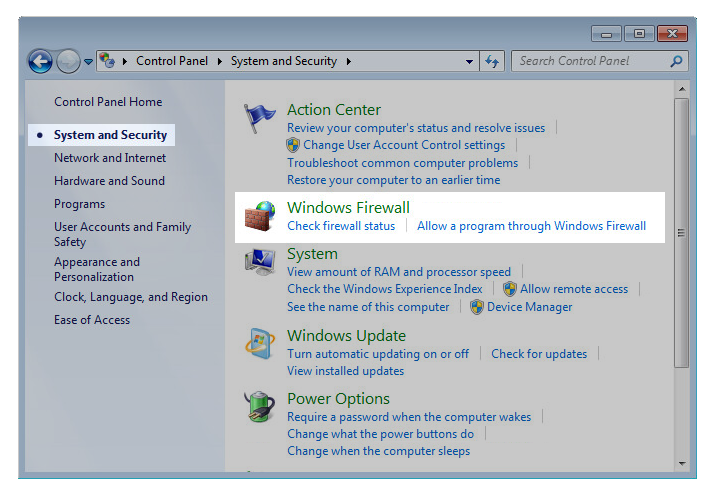
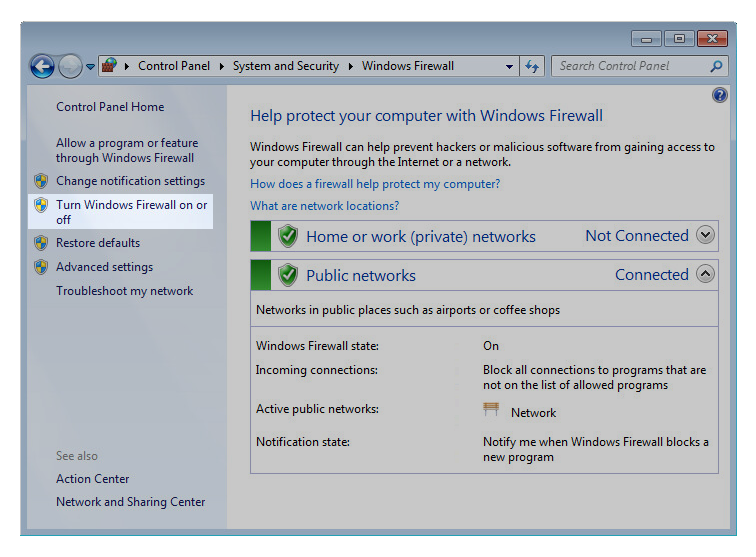
- Click the Windows Start buttonThe Windows icon in the lower left hand corner of your screen that allows access to “All Programs”. and select Control Panel. Within the Control Panel, click System and Security, then select Windows Firewall.
- Within the Windows Firewall window, click the Turn Windows Firewall on or off link.
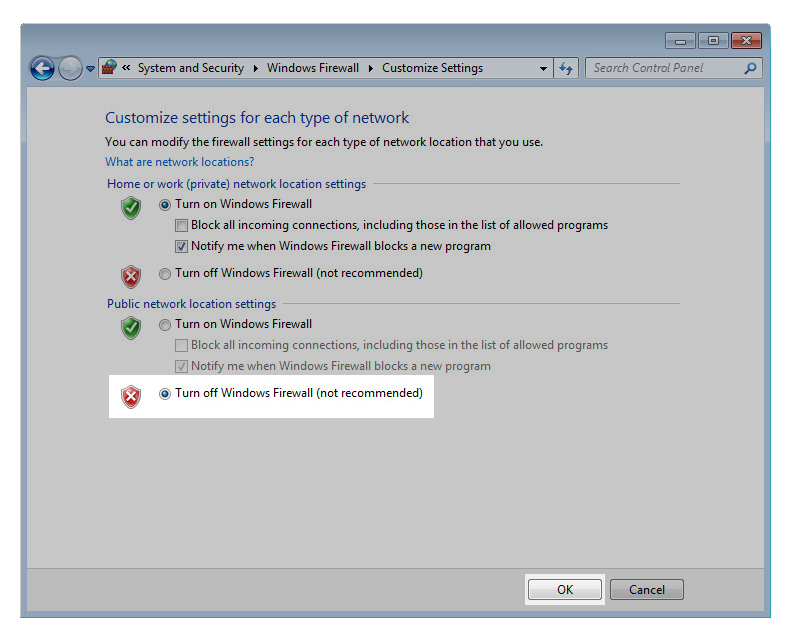
- Within Customize Settings, select Turn off Windows Firewall (not recommended) to temporarily turn off the firewall. Click the OK button to save your changes.
Your Windows Firewall should now be disabled, which means you can now install Carbonite by signing in to your account at https://account.carbonite.com.
- Once Carbonite has been successfully installed, re-enable Windows Firewall for your particular network type (or all network types that you are connected to) by selecting the Turn on Windows Firewall option from the Customize Settings window and clicking OK.
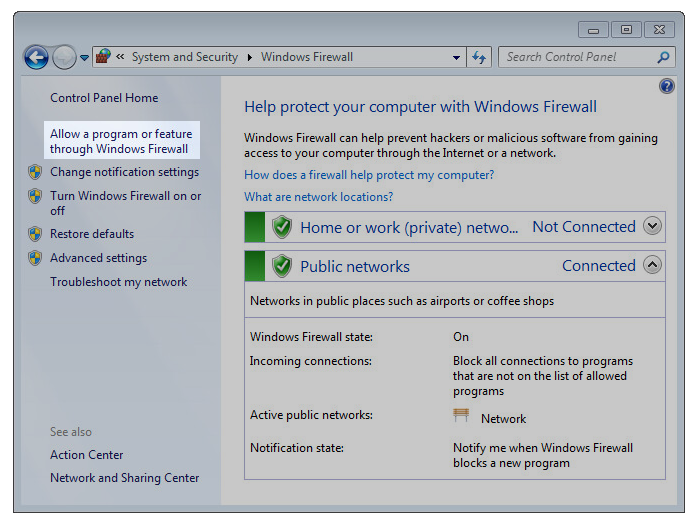
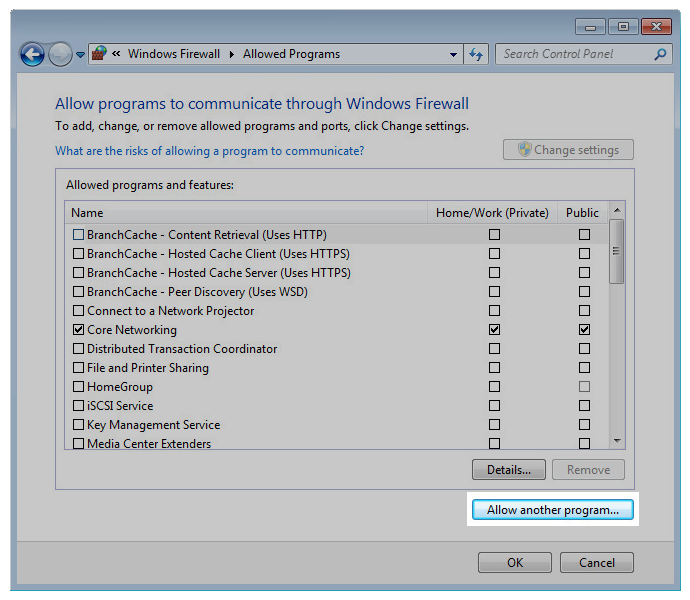
- Go to the Windows Firewall and click the Allow a program or feature through Windows Firewall link to allow programs to communicate through the firewall.
- Click the Change Settings button to enable you to make changes to the Allowed programs and features list.
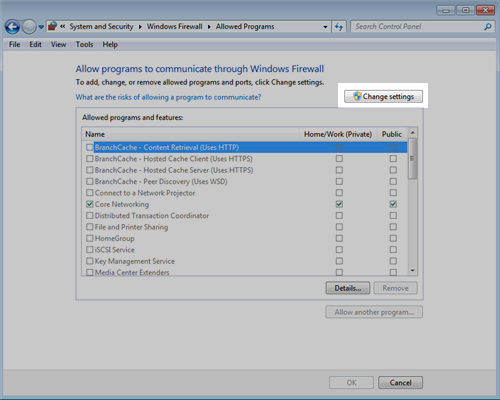
- Click Allow another program... to open the Add a Program window.
- Click the Browse button to search for files to add to the firewall's list of exceptions.
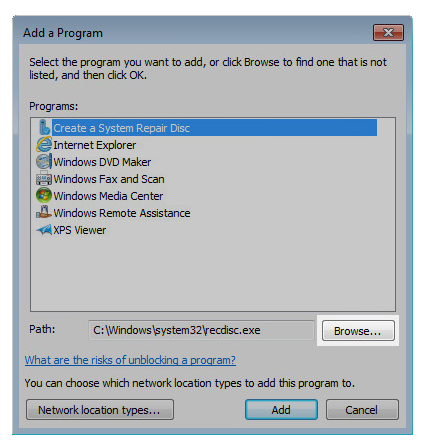
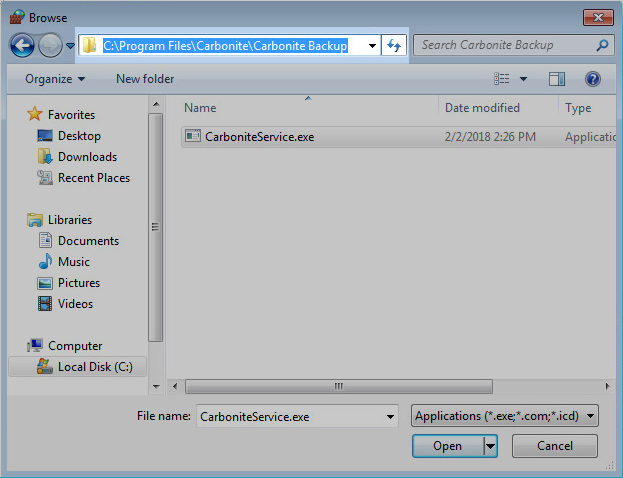
- Navigate to the Carbonite executable files located at C:\Program Files\Carbonite\Carbonite Backup\.
- Click on CarboniteService.exe, click the Open button, and then click Add.
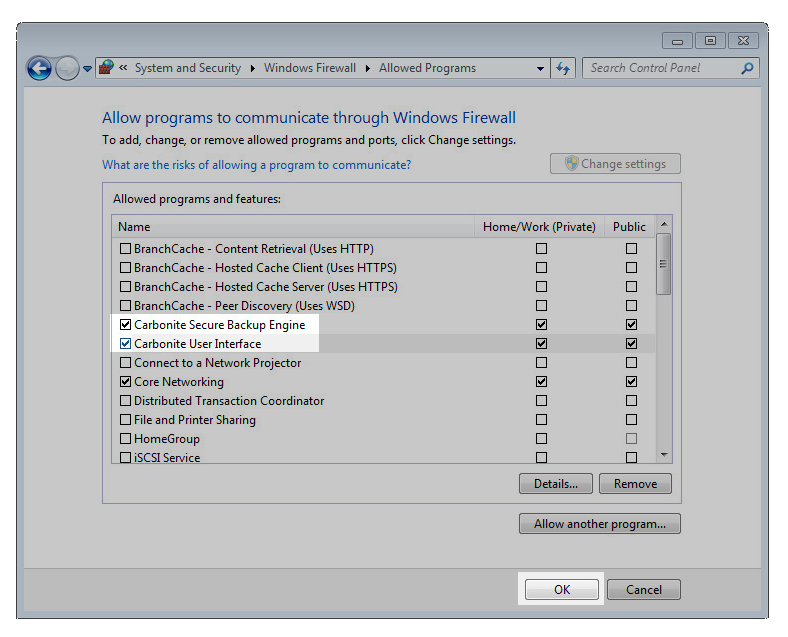
You should now see Carbonite Secure Backup Engine in the Programs and Services listbox with a checkmark next to it, indicating that it has been added as an exception to the firewall.
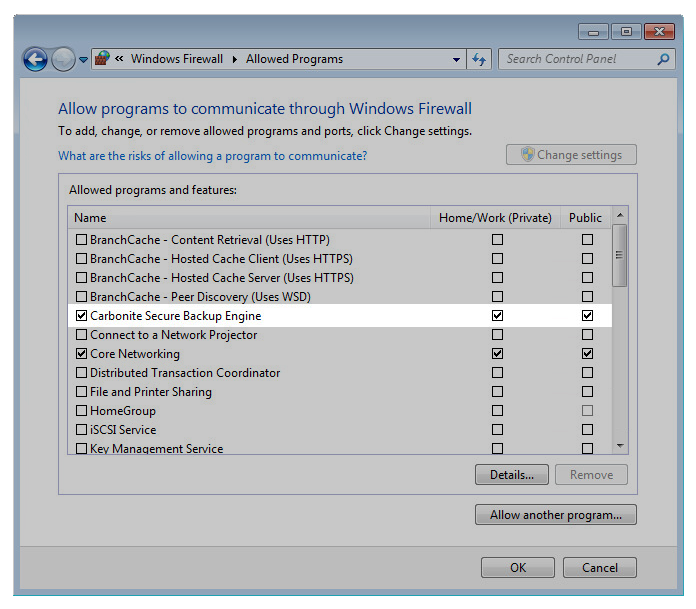
- Repeat steps 6 - 10 for the CarboniteUI.exe and CarboniteSetup.exe files.
- After adding all of the Carbonite executable files to the exception list, click the OK button to save your changes and close the Windows Firewall Settings window.
You have now successfully added Carbonite to the Windows Firewall exceptions list, which will enable Carbonite to work concurrently with the program.
Windows Defender Firewall Advanced Settings
In some instances it may be necessary to create rules within the Windows Defender Firewall to ensure no disruption to the Carbonite services occurs. The section below outlines the process needed to establish these permissions.
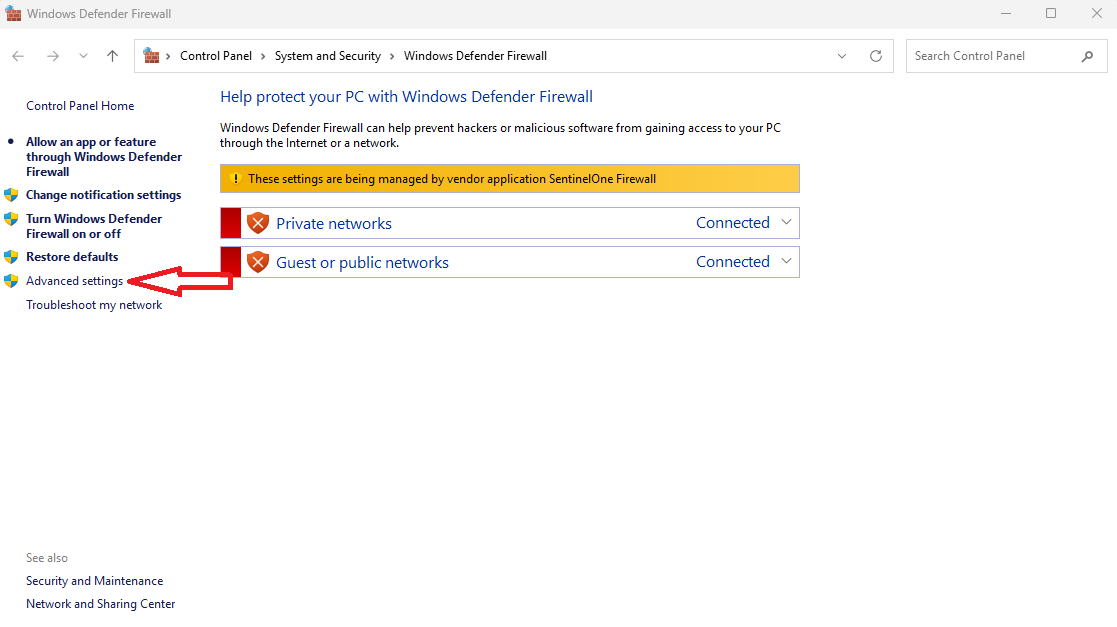
To get to the Windows Defender Firewall Advanced Settings, start by typing "Windows Defender Firewall" into the Search field within the Taskbar of the system. This may present as a full field or simply a magnifying glass.

After searching for Windows Defender Firewall, you will see the application populate on the list of options. Click on the application to open it. Once opened click the "Advanced settings" link on the left side list.
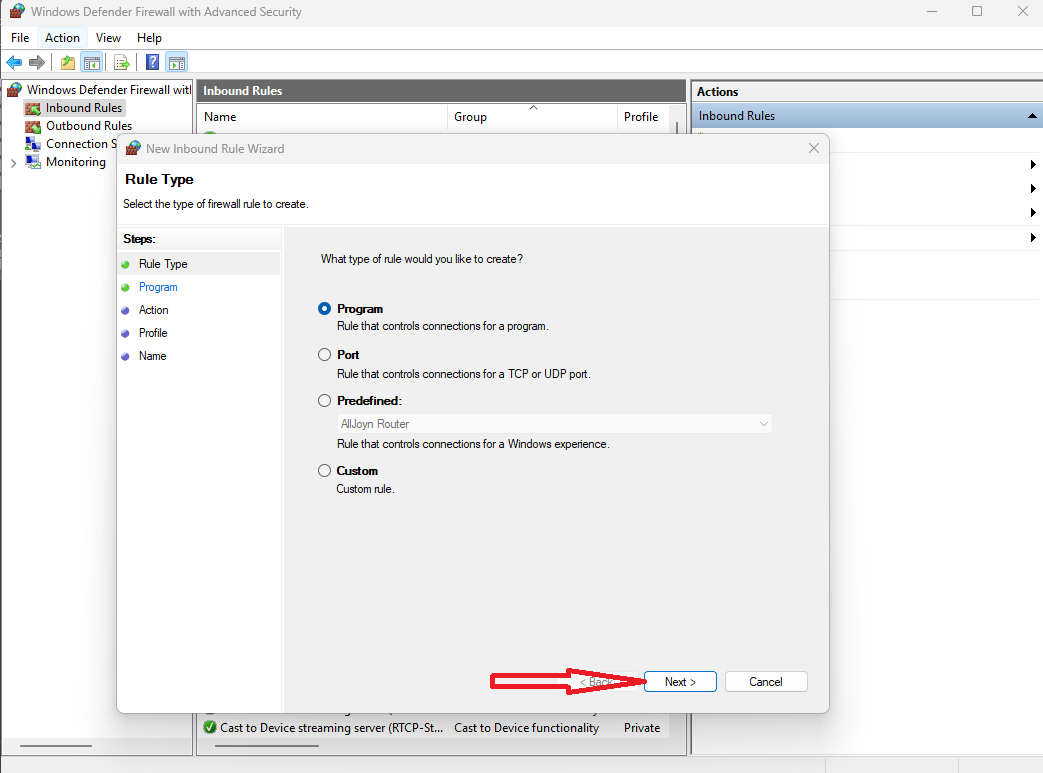
When you open the Advanced Security you will want to click on "Inbound Rules" from the left side list of options.
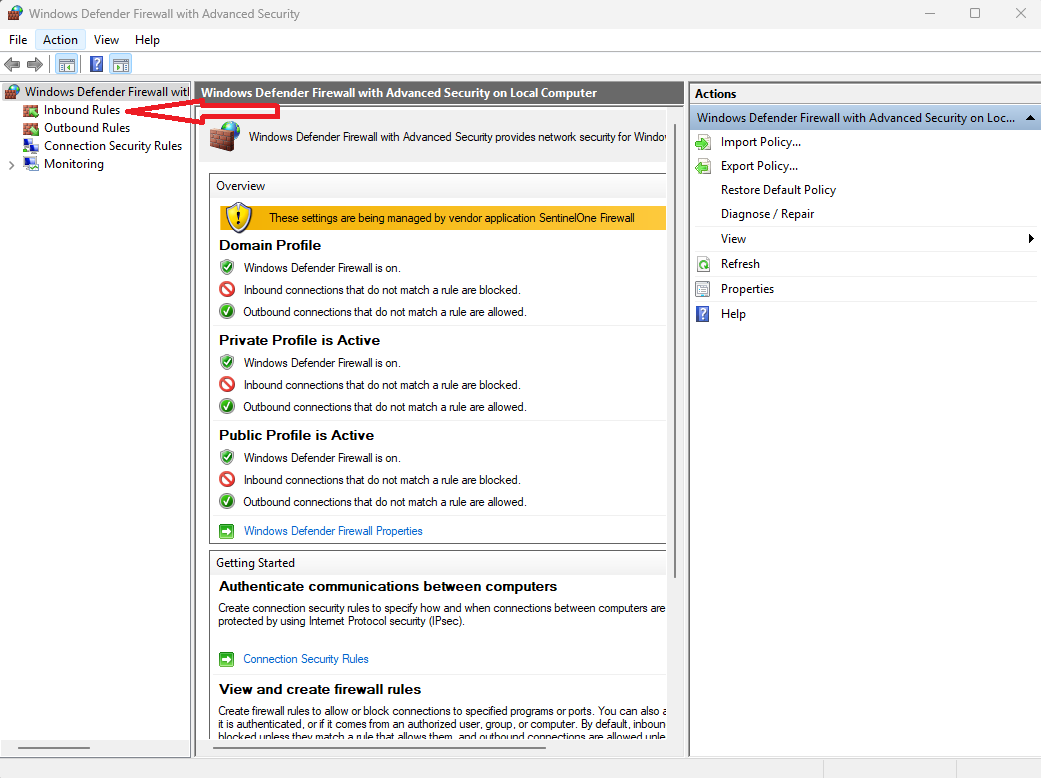
On the right side set of options, please click New Rule.
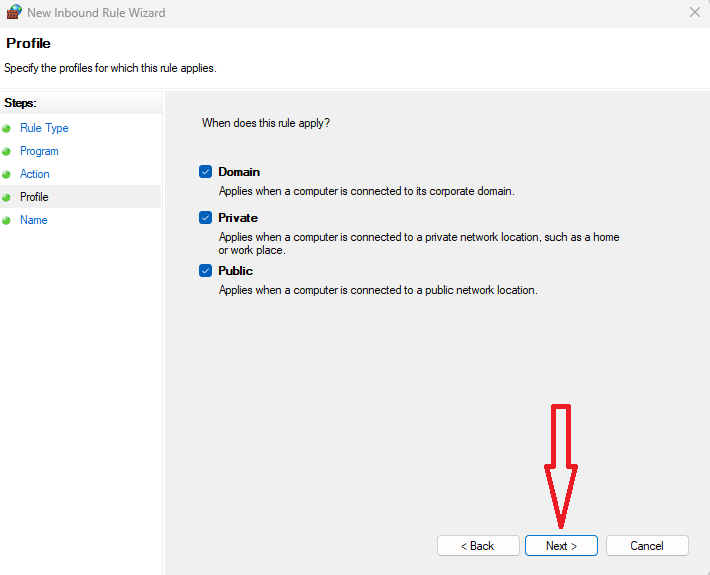
A new Windows box will appear. All needed settings for this process are automatically populated. No autogenerated settings have to be altered. You will input the New Inbound Rule Wizard to the Carbonite locations being added, and a name provided for each. In the Rule Wizard, please click Next.
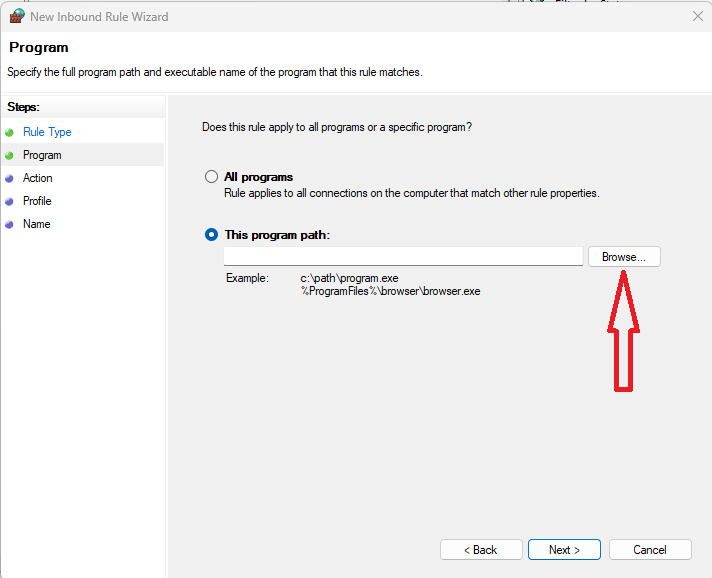
On the next page you will be prompted to Browse to the folder locations you need to add.
For a PC running a 32-bit operating system, firewall/security software exceptions need to be created for these files located at:
- C:\Program Files\Carbonite\Carbonite Backup\CarboniteService
- C:\Program Files\Carbonite\Carbonite Backup\CarboniteUI
- C:\Program Files\Carbonite\Carbonite Backup\CarboniteSetup
For a PC running a 64-bit operating system, firewall/security software exceptions need to be created for these files located at:
- C:\Program Files\Carbonite\Carbonite Backup\CarboniteService
- C:\Program Files(x86)\Carbonite\Carbonite Backup\CarboniteUI
- C:\Program Files(x86)\Carbonite\Carbonite Backup\CarboniteSetup
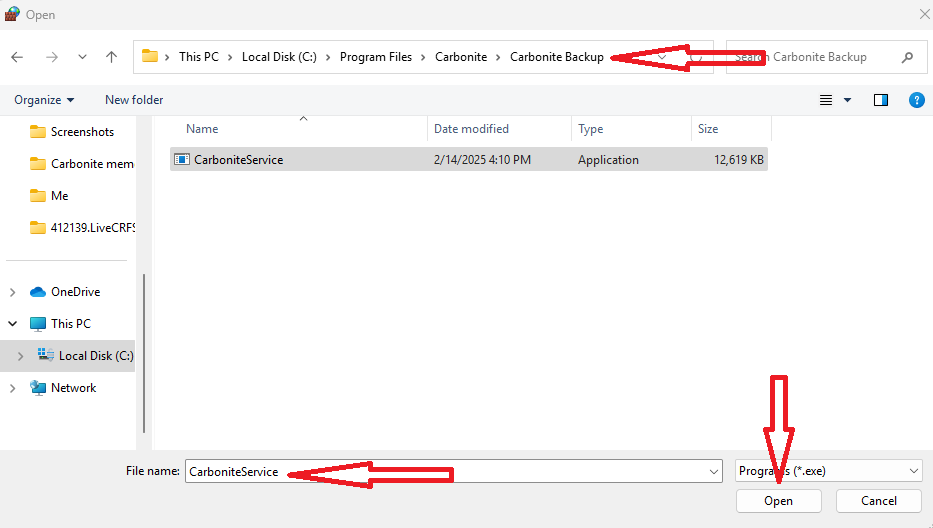
Use the Browse Wizard to navigate to each of the noted locations. You will double click into each folder location until you get to the file itself. In the "File name:" field you should see the name of the file listed. Once it's in that field, click "Open".
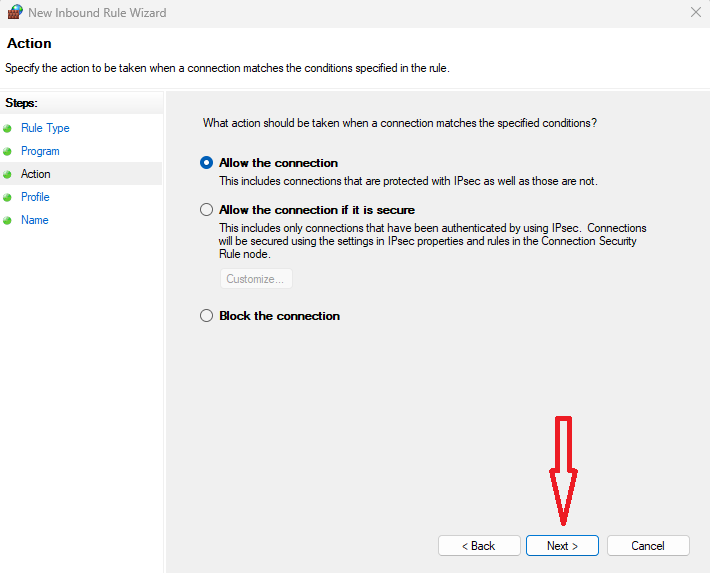
On the following two pages click "Next".
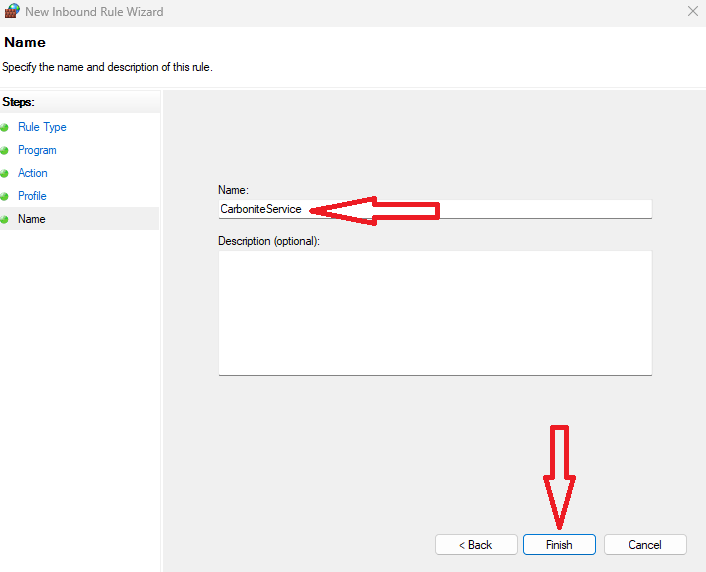
On the last page of the process you will be asked to name the exclusion. It would be recommended, to lessen any confusion, to name these "CarboniteService", "CarboniteUI", and "CarboniteSetup" as you are creating each of those rules, and then click Finish.
You will have to create a separate rule following this process for each of the three files listed above.
 Feedback