Policy settings
This section provides a list of policy settings and their descriptions. Consider the key questions and situations in Create and manage policies when determining the policy settings.
Each of the settings below, except for those under General, have an eye icon to the right of the setting. An eye icon indicates that the setting is visible within the company-level policy and can be modified by a company administrator. An eye icon with a slash through it indicates that the setting is not visible within the company-level policy and cannot be modified by a company administrator.
If a company administrator modifies a setting at the company-level policy, changes that you make to the partner-level policy for that setting will not be pushed down and override the company administrator's change. If you want to prevent the company administrator from overriding the partner policy settings, you must hide those settings from the company administrator by making sure the eye icon has a slash through it.
- General
-
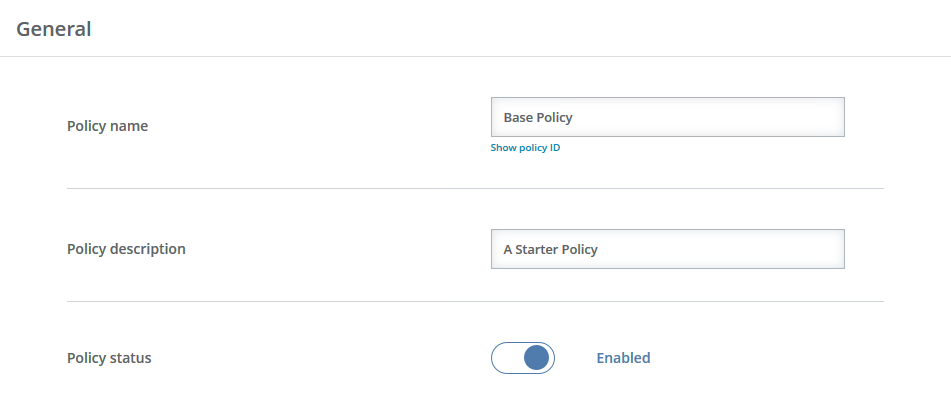
Policy name—Provide a name for the policy. If the name already exists and you select Save as, OpenText Core Endpoint Backup will append a number to the policy name. The name cannot contain any of the following reserved characters.
- less than <
- greater than >
- colon :
- quotation marks or double quote "
- forward slash /
- backslash \
- vertical bar or pipe |
- question mark ?
- asterisk *
- Policy description—Provide a description of the policy. The description cannot contain any of the reserved characters identified under policy name.
- Policy status—Specify whether you want to enable or disable this policy.
-
- Protected Files
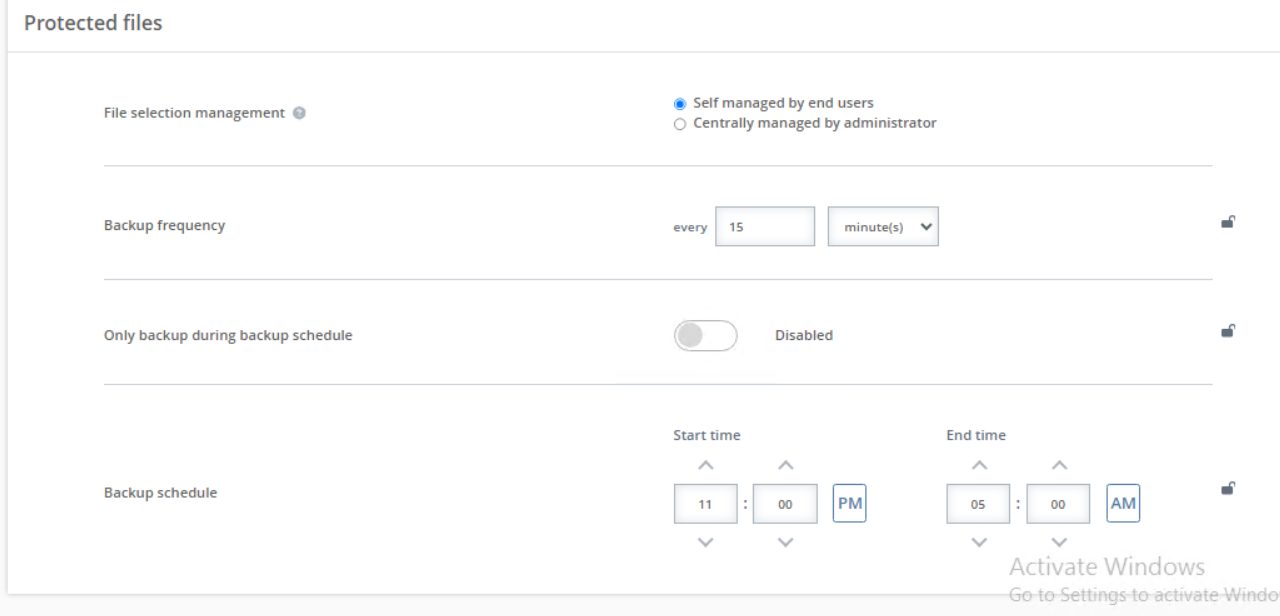
- File Selection Management—This setting identifies who defines the files that will be backed up.
- Self managed by end users—Users define the backup rules.
- Centrally managed by administrator—Administrators define the backup rules. When this option is selected, you must define the rules the policy will use to identify which files to include or exclude in the backup. See Manage backup rules for centrally managed policies for details.
- End user can also add file selection rules—Select this option if you want to give users the ability to add their own personal rules, in addition to the centrally-managed administrator defined rules.
Regardless of whether a policy is self-managed or centrally-managed, some files and folders (including files without an extension) are excluded, by default, from backups. See Default exclusions for details.
If you are using a centrally-managed policy with or without allowing users to add file selection rules, you should have at least one rule defined.
-
Backup frequency—Specify the amount of time between backups. OpenText Core Endpoint Backup will scan for changes on this interval and back up any changes, additions, or deletions.
The lock icon is a toggle you can turn on and off. The icon indicates whether end users can modify the policy setting in the client interface. When the icon displays as locked, end users cannot modify the setting. When the icon displays as unlocked, end users can modify the setting.
-
Only back up during Backup Schedule—When enabled, a defined backup schedule controls when files are backed up, and files are backed up only within the defined schedule. When disabled, files are backed up at any time.
The lock icon is a toggle you can turn on and off. The icon indicates whether end users can modify the policy setting in the client interface. When the icon displays as locked, end users cannot modify the setting. When the icon displays as unlocked, end users can modify the setting.
- Backup schedule—When Only back up during Backup Schedule is enabled, you can configure the schedule when you want files to be backed up. This option is not used when Only back up during Backup Schedule is disabled. The toggle circle will be on the right and blue when enabled and on the left and gray when disabled.
- Start time—Specify when you want the backup schedule to start. Files will be backed up between this time and the End time.
- End time—Specify when you want the backup schedule to end. Files will be backed up between the Start time and this time.
The time is configured using your local machine time.
The lock icon is a toggle you can turn on and off. The icon indicates whether end users can modify the policy setting in the client interface. When the icon displays as locked, end users cannot modify the setting. When the icon displays as unlocked, end users can modify the setting.
- File Selection Management—This setting identifies who defines the files that will be backed up.
- Device Settings
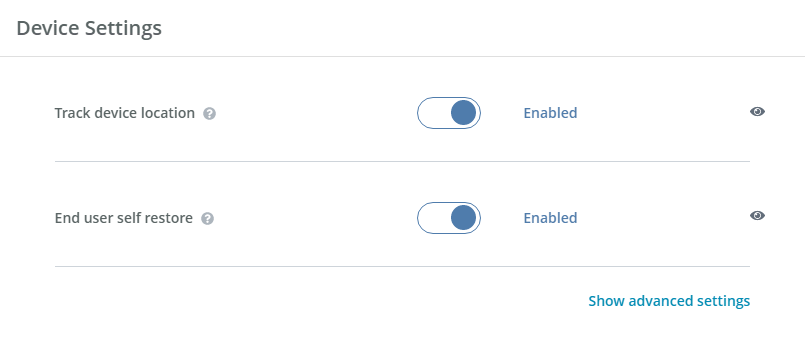
- Track device location—When enabled, OpenText Core Endpoint Backup tracks the physical location of a device, and the location can be viewed on a map. When disabled, the location of the device is not tracked. This setting can be useful for locating lost or stolen devices. The toggle circle will be on the right and blue when enabled and on the left and gray when disabled.
- End user self restore—When enabled, users can perform file restores from the vault or QuickCache. When disabled, only administrators can restore files. The toggle circle will be on the right and blue when enabled and on the left and gray when disabled.
- Advanced settings—Click the link to show or hide advanced settings.
- Advanced File Deletion
- End users can erase their data from vault—When enabled, users can erase (delete) their backed up files from the vault and QuickCache. When disabled, users cannot erase their backed up files and the backed up files are maintained until a retention or storage policy overwrites the file or the device is deleted from the vault. The toggle circle will be on the right and blue when enabled and on the left and gray when disabled.
- User State Migration Tool—OpenText Core Endpoint Backup uses Microsoft User State Migration Tool (USMT) to provide a process for replacing or refreshing Windows computers. The utility captures operating system settings, application settings, user accounts, and user files and migrates them to a new Windows installation. You must be familiar with using and configuring USMT. See https://docs.microsoft.com/en-us/windows/deployment/usmt/usmt-topics for details on this utility.
Scheduled user scan backup—When enabled, OpenText Core Endpoint Backup scans a Windows device for the latest settings, accounts, and files. The frequency of the scan is defined by the number of days specified. When disabled, scans must be run manually. The toggle circle will be on the right and blue when enabled and on the left and gray when disabled.
You can also perform manual scans as needed.
- Location of the 32-bit USMT executable—Specify where the 32-bit version of the utility is located. This file will be used on 32-bit Windows computers. The location must be accessible by the Windows devices. You do not need to specify the file name, just the location.
- Location of the 64-bit USMT executable—Specify where the 64-bit version of the utility is located. This file will be used on 64-bit Windows computers. The location must be accessible by the Windows devices. You do not need to specify the file name, just the location.
- Parameters for ScanState executable—Specify the options you want to use with ScanState. Generally, this is /config:filename.xml, however you should review https://docs.microsoft.com/en-us/windows/deployment/usmt/usmt-scanstate-syntax for details on the command syntax.
- Abort ScanState execution—Specify the length of time you want ScanState to run before it is automatically terminated. The minimum duration is one minute.
- Location for custom configuration files—Specify the location of your XML files for custom configurations. See https://docs.microsoft.com/en-us/windows/deployment/usmt/usmt-include-files-and-settings and https://docs.microsoft.com/en-us/windows/deployment/usmt/usmt-exclude-files-and-settings for details on custom files to include and how to exclude files and settings. You do not need to specify the file names, just the location.
- After a restart, start USMT ScanState—Specify the length of time to wait after a Windows computer has been restarted to initiate a scan. The minimum duration is one minute.
- Parameters for LoadState executable—Specify the options you want to use with LoadState. See https://docs.microsoft.com/en-us/windows/deployment/usmt/usmt-loadstate-syntax for details on the command syntax.
- Abort LoadState execution—Specify the length of time LoadState should run before it is automatically terminated. The minimum duration is one minute.
- Advanced File Deletion
- Retention & Storage
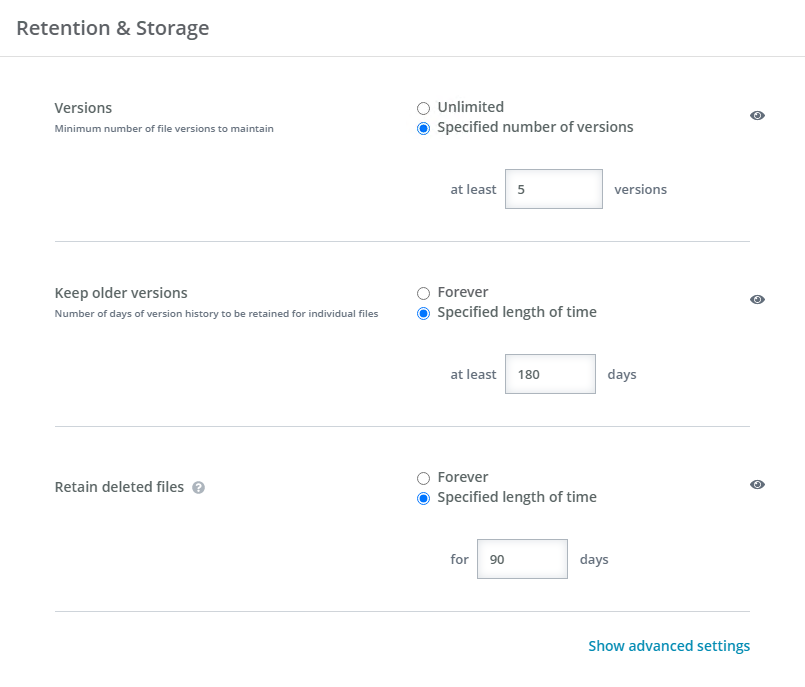
- Versions—Select the number of versions of an individual file to keep. Different file versions do not count against your total billable storage.
- Unlimited—Select this option to keep all file versions. If you have specified a length of time for Keep older versions, that time will be disregarded because all versions are being kept.
- Specified number of versions—Select this option to keep at least the number of versions specified. Versions outside of this minimum number will be deleted at the specified length of time for Keep older versions.
- Keep older versions—Select the number of days of version history to keep.
- Forever—Select this option to keep all days of version history. If you have specified a number of versions for Versions, that number will be disregarded because all days of version history are being kept.
- Specified length of time—Select this option to keep at least the number of days of version history specified. Versions outside of this minimum date will be removed at the specified number of versions for Versions.
- Retain deleted files—Select the number of days to keep files that have been deleted from a device or files that were once backed up but are no longer being backed up because of a change to file selection rules. Deleted files that are retained count against your total billable storage.
Forever—Select this option to keep all deleted files within the backup even if they are deleted from the device or no longer included in the backup policy.
Keep in mind your consumed capacity will always grow and will not be subject to any retain policy, even if you delete users and their devices.
- Specified length of time—Specify the number of days to keep all deleted (or no longer backed up) files. After the specified number of days, the files will be deleted. The maximum number of days is 180. If you need more than that, you must select Forever.
The default value for retaining deleted files changed in OpenText Core Endpoint Backup version 10.6. If you were using the default value previously (forever or 180 days depending on your version), your new default value will be 90 days. Files beyond the 90 day value will be deleted from the backup. If you customized the value, your setting will be retained.
- Advanced settings—Click the link to show or hide advanced settings.
- Unlimited storage quota—When enabled, there is no size limit to how much data can be backed up. When disabled, the size specified will be used as a quota. The toggle circle will be on the right and blue when enabled and on the left and gray when disabled. The minimum storage quota is 5 GB. You can use the quota for reporting and to monitor usage to avoid overage fees.
- Prevent backups when storage quota is reached—When enabled, backups will stop when the specified quota limit has been reached. When disabled, devices can exceed the specified quota limit.
- Largest file size to include in backups—Specify the maximum file size, up to 70 GB, that will be backed up. Files larger than the size you specify will not be backed up.
- Unlimited storage quota—When enabled, there is no size limit to how much data can be backed up. When disabled, the size specified will be used as a quota. The toggle circle will be on the right and blue when enabled and on the left and gray when disabled. The minimum storage quota is 5 GB. You can use the quota for reporting and to monitor usage to avoid overage fees.
- Versions—Select the number of versions of an individual file to keep. Different file versions do not count against your total billable storage.
- Bandwidth Management

-
Device bandwidth configuration—Select the amount of bandwidth a device will use to back up files.
- Reduced Bandwidth—Select this option to limit the amount of bandwidth used for backing up files to the amount specified in Maximum upload rate when reduced.
- Use all available bandwidth—Select this option to use unlimited bandwidth for backing up files.
The lock icon is a toggle you can turn on and off. The icon indicates whether end users can modify the policy setting in the client interface. When the icon displays as locked, end users cannot modify the setting. When the icon displays as unlocked, end users can modify the setting.
- Maximum upload rate when reduced—Specify the amount of bandwidth a device will use to back up file when Device bandwidth configuration is set to Reduced Bandwidth.
- Maximum download rate—Specify the bandwidth limit a device will use when downloading during restores and when using the User State Migration Tool.
- Proxy settings—Select this option to specify proxy server settings.
- No Proxy—Select this option if you want remove an existing proxy server or prevent users from using a proxy server.
- Automatically detect settings—Select this option to have the system automatically detect the proxy server.
- Specify the server and port—Select this option to specify the proxy server to use. You need to specify credentials, the server, and the port number.
- Use automatic configuration script—Select this option to use a configuration script on your proxy server to automatically configure the device. You need to specify credentials and the IP address of the proxy server.
- Advanced settings—Click the link to show or hide advanced settings.
- Do not upload when device is attached to a mobile broadband network—When enabled, Windows devices attached to a mobile network will not back up files. When disabled, Windows devices attached to a mobile network will back up files. The toggle circle will be on the right and blue when enabled and on the left and gray when disabled.
- Mobile Network Names—This setting allows you to identify specific WiFi networks as a mobile network, which can be used to identify tethering or hotspot scenarios. WiFi networks identified as mobile networks will be limited by the Do not upload when device is attached to a mobile broadband network setting. Enter each network name on a separate line.
-