

Transferring Carbonite Safe Between Windows and Mac

Summary:
You can transfer your existing Carbonite Safe subscription from Windows to a Mac computer.
The instructions also apply when moving Carbonite Safe from a Mac to a Windows Computer, but the installation process is slightly different on Windows.
This article applies to:
| Carbonite Plans | Products | Platforms |
| Basic, Plus, and Prime (Not sure?) | Safe (Not sure?) | Windows, Mac, and Portal |
Solution:
Step 1: Restore Files to the New Computer
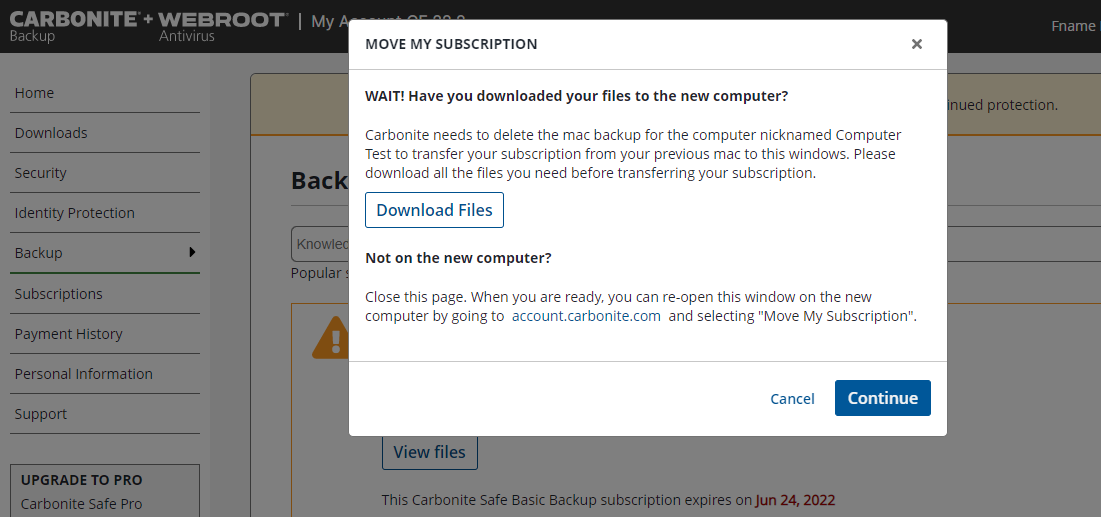
Before you transfer your subscription, you should restore files to the new computer with Anytime Anywhere Access.
Files that are not restored to the new computer will be removed from Carbonite after 30 days. However, you will have the option to Renew now to keep the backup of the previous computer.
After you have all of your files, you can follow the instructions in the next section.
Step 2: Start a new backup on the new computer
After you restore all the files to the new computer, you can transfer your subscription time from the old computer to the new computer and start a new backup.
- On the new computer, sign into your account at https://account.carbonite.com.
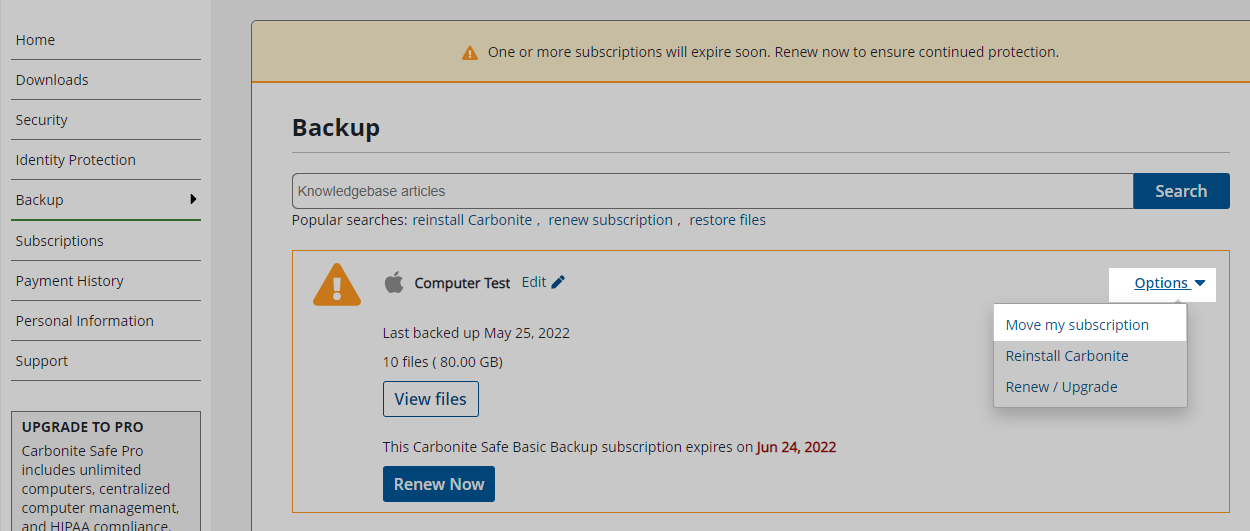
- Select the Backup tab.
- From the backup you want to reinstall, click Options > Move my subscription.
- After restoring all the files you need, click Continue.
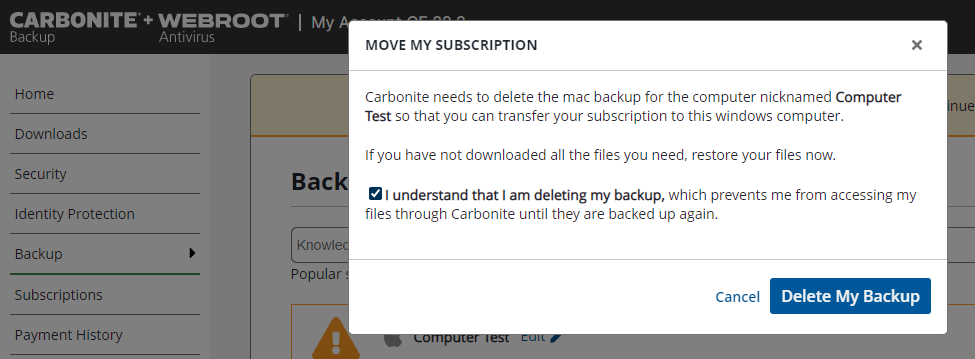
- Check I understand that I am deleting my backup and click Delete My Backup.
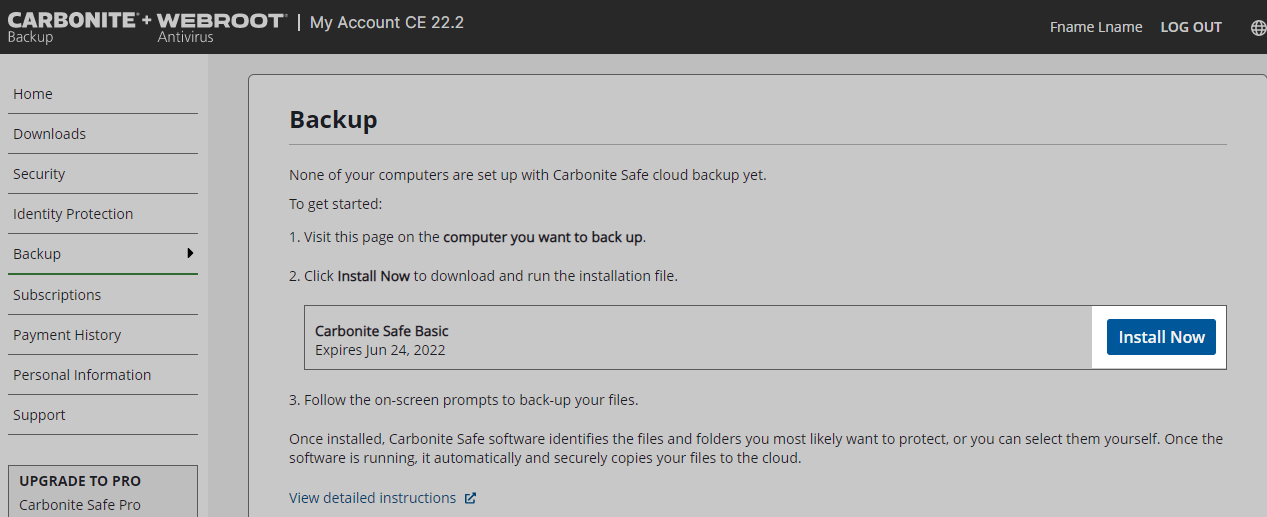
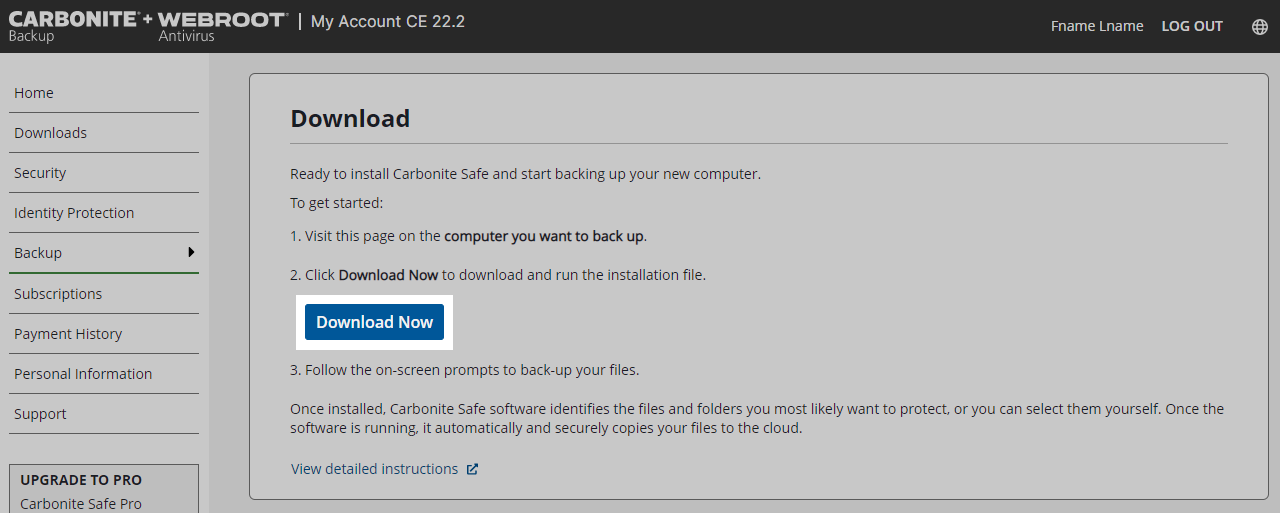
- On the next page, click Install Now.
- Download the Carbonite setup file by clicking Download Now.
- Depending on your web browser, use the instructions below to open Carbonite.
- Google Chrome: The downloaded file appears at the bottom left of the browser. Double-click the Carbonite file to open it.
- Mozilla Firefox: Click Save in the pop-up message that appears to start the download. When the download completes, click the arrow in the top right corner of your browser to view your downloads. Double-click the Carbonite file to open it.
- Safari: When the download completes, click the arrow in the top right corner of your browser to view your downloads. Double-click the Carbonite file to open it.
- Choose what gets backed up:
- Automatic Settings: Carbonite selects the Macintosh HD/Users/ folder for backup which is the default location for documents, pictures, music, and other important files.
- Advanced Settings: Carbonite does not select anything for backup. You will need to manually select the files and folders you wish to back up.
- During a trial, Carbonite does not back up Music or Videos automatically. However, you can select them manually.
- After you configure your backup settings, click Install to finish installing Carbonite and begin backing up your computer.
- From here, configure Full Disk Access to ensure Carbonite can access and backup your files.
Regardless of whether you choose automatic or advanced settings, you can select files for backup at any time.
 Feedback